


15
En
4 Getting Started
English
Switching on for
the first time
The next few pages take you through
switching on the PDR–609, playing discs,
and doing some basic recording. Before
proceeding with this section you should
have at least connected your recorder to an
amplifier. (If you haven't, turn to pages
10–11 for more on connecting the PDR–
609 to other components in your system.)
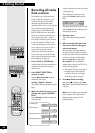
1 Switch the POWER to _ON.
The record indicator flashes, and the main
display panel lights up.
• Also make sure that your amplifier is
switched on and the input function set
to the PDR–609.
2 Press OPEN/CLOSE 0 to open
the disc tray.
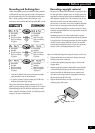
3 Load a pre-recorded audio CD.
Place the disc in the disc tray label-side up.
• The disc tray has guides for both CD
singles (8cm) and regular CDs (12cm).
Do not use an adaptor when playing
CD singles: it could damage the
recorder.
• Never load more than one disc at a
time.
4 Press OPEN/CLOSE 0 to close
the disc tray.
Once the recorder has found out what is on
the disc, the display will show track and
disc information or, depending on the disc,
CD text.
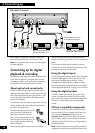
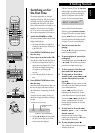
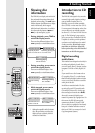
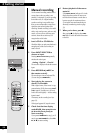
If the disc does not contain CD text, you
should see a display that looks something
like this:
• Pressing 3 (6 on the front panel)
will also close the disc tray (but you
won’t see the above display).
If the disc contains CD text, the CD TEXT
indicator lights up and the entire disc title
automatically scrolls across the display.
The first 12 characters of the disc title
remain, as seen in the display below:
BEST CLASSIC
CD
CD TEXT
You can switch CD text information
displays by pressing DISPLAY/CHARA.
See page 16 for more on CD text displays.
Pressing TIME allows you to switch to the
disc and track time information displays.
See page 17 for more on time displays.
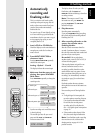
5 Press 3 to start the disc
playing.
Pressing 6 or the jog dial on the front
panel also starts playback.
6 To pause playback, press 8 (or
6 again).
To resume playback, press either 8 again,
or 3 (6). The recorder only remains
paused for 10 minutes, then it stops.
7 To fast-reverse or fast-forward,
press and hold 1 or ¡.
8 To skip back or forward to
another track, press 4 or ¢
(on the front panel, turn the
jog dial).
Pressing ¢ once skips to the start of the
next track on the disc. Further presses take
you to subsequent tracks.
Pressing 4 once takes you to the
beginning of the current track. Further
presses skip to the start of previous tracks.
You can use 4 or ¢ while the disc is
paused or stopped as well. The track
number changes while the disc remains
paused/stopped.
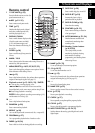
9 To skip back or forward index
markers, press ø or Ø on the
remote control.
Because most CDs don’t have index
markers, you will generally see 01 in the
index display for each track.
10 To stop playback, press 7.
Take out the CD from the disc tray before
switching off the unit.
Total playing time
of disc
Number of tracks on disc
O3 45:37
CD
Indicates a pre-recorded disc
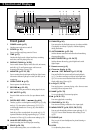
8
7
9
6
ENTER
CURSOR
MENU/
DELETE
NAMEMARK
SET
CLEAR
DISPLAY
/CHARA
7
1
¡
8
3
4
¢
ABC DEF
GHI MNOJKL
PQRS TUV WXYZ
REC SYNCHRO
REPEAT RANDOMNAME CLIP
I
NPUT
SELECTER
FADER
SKIP PLAY
SKIP ID
PROGRAM CHECK CLEAR
AUTO /
MANUAL
123
4
56
78
9
10/0 >10
SCROLL
TIME
Î
•
10
8
7
5,6
9
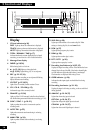
◊ÛB
-
>?/
MONITOR
INPUT
SELECTOR
AUTO
MANUAL
AUTO
MANUAL
TRACK NO.
WRITE
TIME
FINALIZEERASE
SCROLL
1
DIGITAL
REC LEVEL
PUSH ENTER
5
8
DIGITAL
REC LEVEL
ANALOG
REC LEVEL
MENU/
DELETE
TEXT
SYNCHRO
PUSH ENTER
RL
ANALOG
REC BALANCE
Legato Link Conversion
CD TEXT
8
7105,6
2