


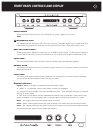
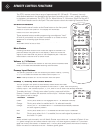


REMOTE CONTROL FUNCTIONS
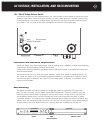
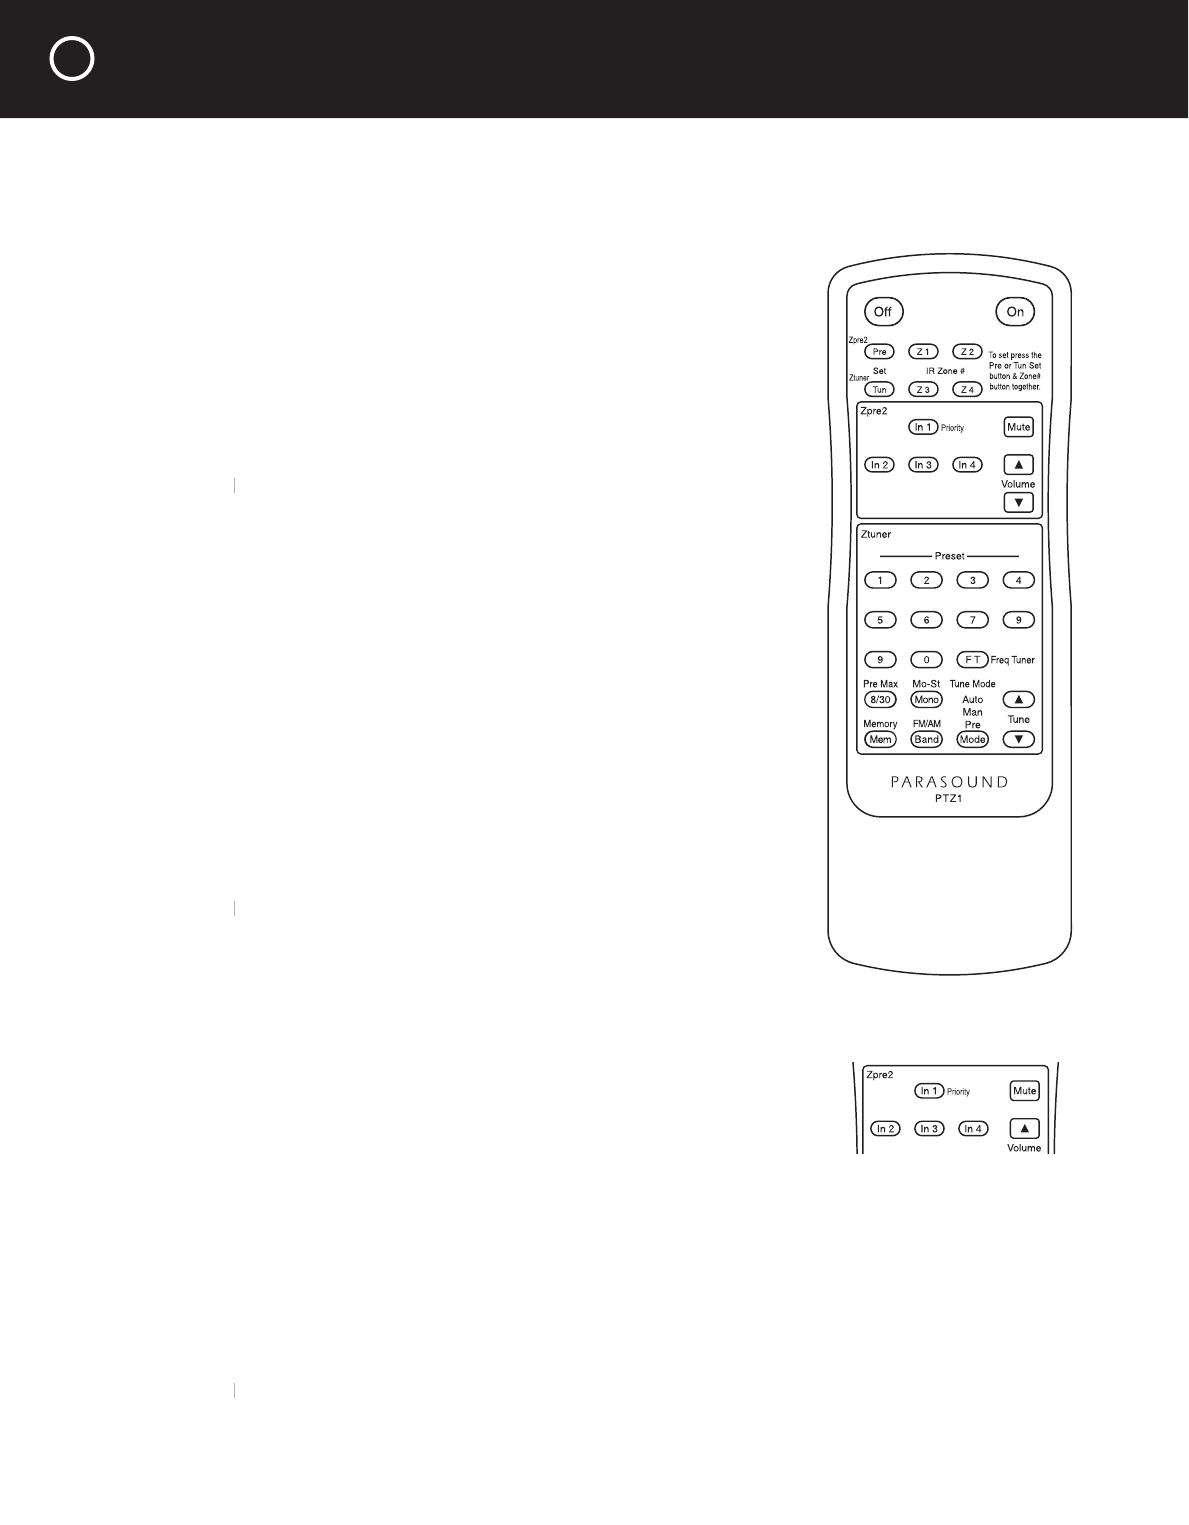
The PTZ-1 remote control has a range of approximately 20 - 25 feet (6 - 7.5 meters). Use only
AAA alkaline batteries in the handset and insert them according to the + and – polarity markings
in the battery compartment. The PTZ-1 Off, On, Mute Volume, In 1-4 buttons, Zpre2 Pre Set and Z
1-4 IR Zone # buttons are for the Zpre2. The tuner buttons control the matching Parasound Ztuner.
On and Off Buttons
These have the same function as the Power button on the front panel.
Press On to turn the Zpre2 on. The display will illuminate.
Press Off to turn the Zpre2 off.
These separate buttons enable programming unambiguous “hard”
off and on commands into a system controller or to create a macro
sequence for a learning-type remote control.
Note:
These buttons will not function when the rear panel
Note: These buttons will not function when the rear panel Note:
Auto-Man switch is set to Auto.
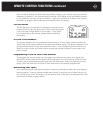
Mute Button
Pressing the Mute button once mutes the signal at the Main Out
jacks and Mute will glow red in the display. It does not mute the
signal at the Fixed level out jacks or the headphone jack. Press the
Mute button a second time to cancel mute.
Volume
^
/
v
Buttons
These buttons control the rotation of the front panel motorized Level
knob, to increase and decrease listening volume levels.
Preamp Input Buttons
The primary purpose of the four buttons just below Preamp, 1/Priority,
2, 3, 4, is to select the Audio and Video source inputs 1-4.
Note:
Preamp buttons 5-7 do not function with the Zpre2.
Note: Preamp buttons 5-7 do not function with the Zpre2. Note:
Preamp 1 / Priority Auto Select Button
You can program the Zpre2 to automatically select Audio and Video
Inputs 1 when an audio signal is present at the Audio In 1 jacks. With this priority,
Preamp Input 1 will override inputs 2, 3, or 4, even if one of them was already selected.
To enable the Input 1 / Priority auto select function, press and hold the
Preamp 1 button for about 3-4 seconds until the Input 1 indicator changes
from green to red or orange.
1 Indicator Function
Green Priority auto select is not engaged and In 1 is selected manually.
Orange Priority auto select is enabled and In I is selected manually.
Orange Priority for In 1 is enabled and In 1 is selected automatically because
an audio signal is present.
Red Priority auto select for In 1 is enabled and another input is selected.
Red Priority auto select for In 1 is enabled, but no audio signal is present at
the Audio 1 In jacks.
Note:
After the Audio In 1 source stops playing the In 1 indicator will remain orange until you
Note: After the Audio In 1 source stops playing the In 1 indicator will remain orange until you Note:
select another input manually. You can select another input when the 1 indicator is green or red.
If 1 glows orange you can select another input only if no audio signal is present or if you disen-
gage the Priority auto select. To disable Input 1 Priority auto select press and hold the Preamp 1
button for about 3-4 seconds until the 1 indicator glows green.
8