


27
RQTX0221
Getting StartedPlaying DiscsOther OperationsReference
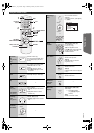
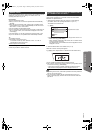
While an iPod is connected
≥Do not push the Dock for iPod.
≥Do not push or pull your iPod back and forth with great force.
About recharging the battery
≥iPod will start recharging regardless of whether this unit is on or off.
≥“IPOD ¢” will be shown on the main unit’s display during iPod charging
in main unit standby mode.
≥Check iPod to see if the battery is fully recharged.
≥If you are not using iPod for an extended period of time after recharging
has completed, disconnect it from main unit, as the battery will be
depleted naturally. (Once fully recharged, additional recharging will not
occur.)
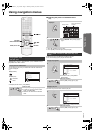
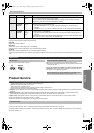
Compatible iPod
≥iPod touch 2nd generation (8GB, 16GB, 32GB)
≥iPod nano 4th generation (video) (8GB, 16GB)
≥iPod classic (120GB)
≥iPod touch 1st generation (8GB, 16GB, 32GB)
≥iPod nano 3rd generation (video) (4GB, 8GB)
≥iPod classic (80GB, 160GB)
≥iPod nano 2nd generation (aluminum) (2GB, 4GB, 8GB)
≥iPod 5th generation (video) (60GB, 80GB)
≥iPod 5th generation (video) (30GB)
≥iPod nano 1st generation (1GB, 2GB, 4GB)
≥iPod 4th generation (color display) (40GB, 60GB)
≥iPod 4th generation (color display) (20GB, 30GB)
≥iPod 4th generation (40GB)
≥iPod 4th generation (20GB)
≥iPod mini (4GB, 6GB)
Compatibility depends on the software version of your iPod.
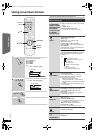
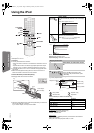
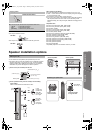
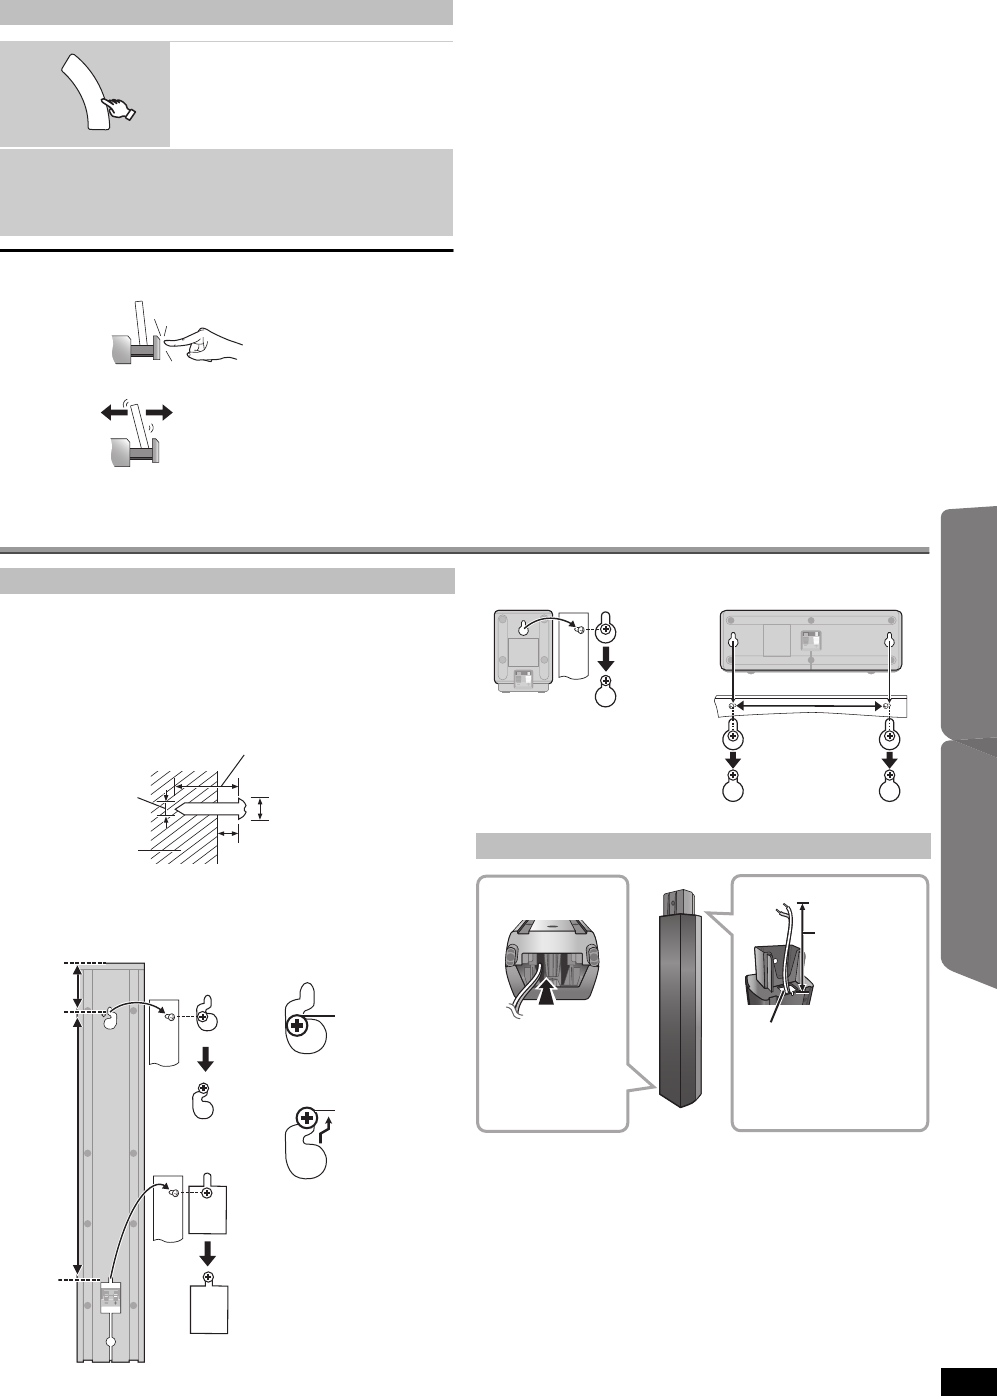
Speaker installation options
You can attach all of the speakers (except subwoofer) to a wall.
≥The wall or pillar on which the speakers are to be attached should be
capable of supporting 10 kg (22 Ibs) per screw. Consult a qualified
building contractor when attaching the speakers to a wall. Improper
attachment may result in damage to the wall and speakers.
1 Drive a screw (not included) into the wall.
2 Fit the speaker securely onto the screw(s) with the hole(s).
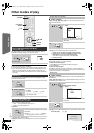
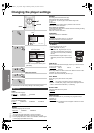
Enjoying photos
1
Select the iPod menu.
2
Play a slideshow on your iPod.
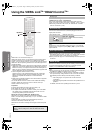
You can use the remote control to operate the iPod menu.
[3, 4]: To navigate menu items.
[OK]: To go to the next menu.
[RETURN]: To return to the previous menu.
F
U
N
C
T
I
O
N
S
DO NOT
DO NOT
Attaching to a wall
At least 30 mm (1
3
/
16
)
3 mm to 5 mm (
1
/
8
to
3
/
16
)
Wall or pillar
4.0 mm (
5
/
32
)
7.0 mm to 9.0 mm
(
9
/
32
to
11
/
32
)
Front speaker
Attach to a wall without the base and the stand
e.g.
In this
position, the
speaker will
likely fall if
moved to the
left or right.
Move the
speaker so
that the
screw is in
this position.
DO
DO
NOT
348.5 mm
(13
23
/32q)
72 mm
(2
27
/32q)
Reattaching the speaker cable
190 mm
(7
15
/32q)
Surround speaker Center speaker
Insert the cable
from the bottom.
Pull out the cable
through the hole.
Leave about
120 mm (4
23
/32z)
RQTX0221-P_770_en.book Page 27 Monday, January 12, 2009 5:56 PM