6
Simple Setup
[PT465]
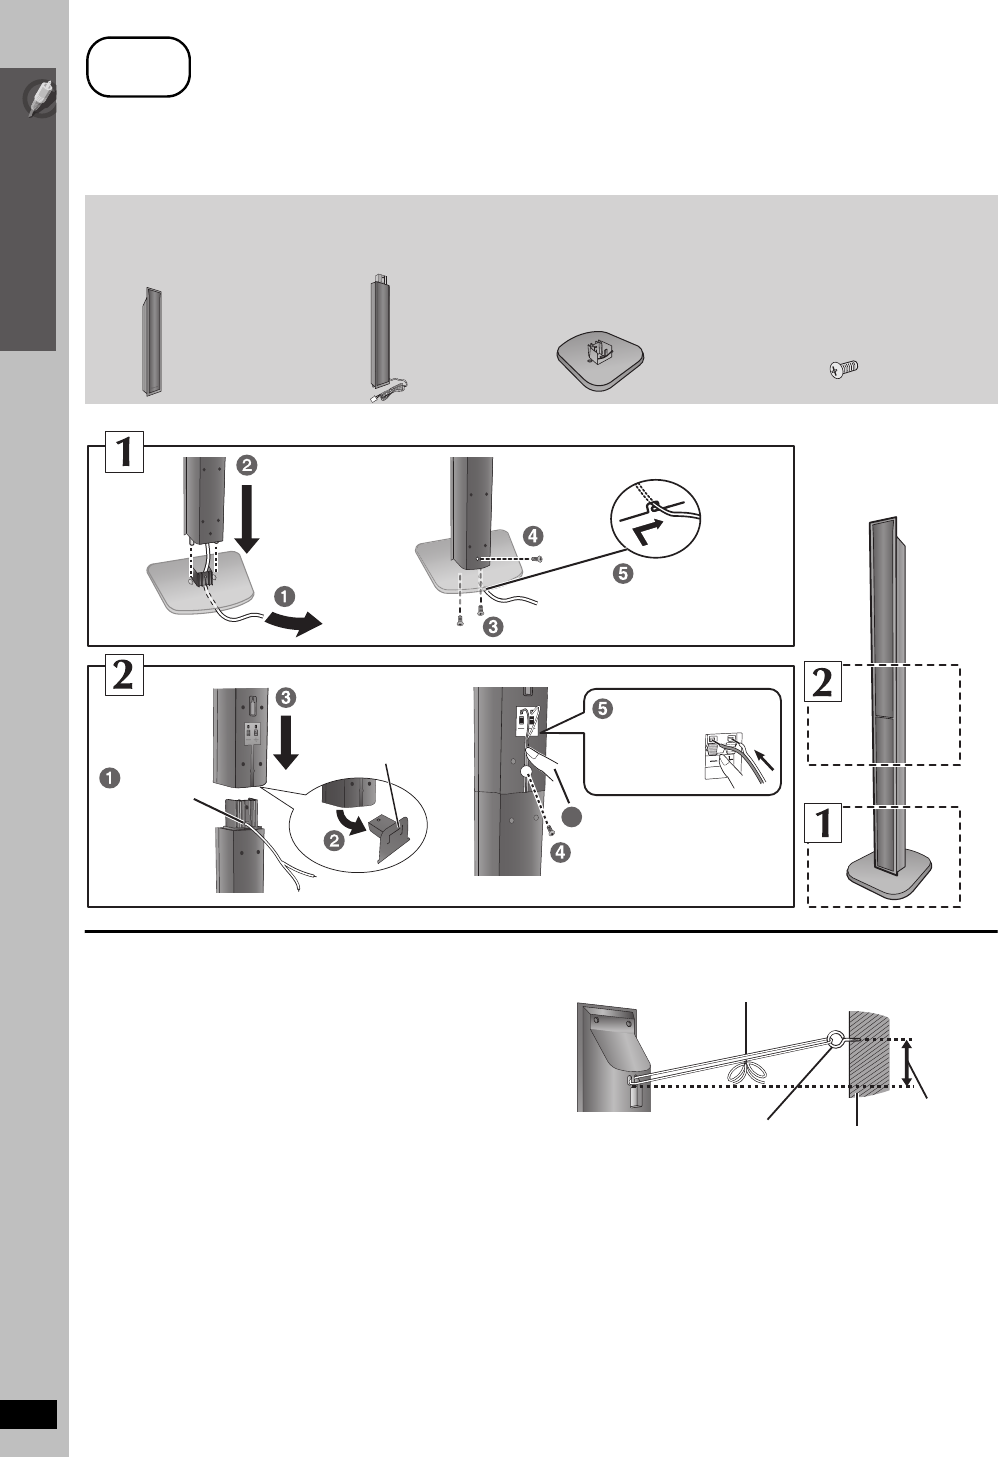
Assembling the front speakers
RQTX0088
Preparation
≥To prevent damage or scratches, lay down a soft cloth and perform assembly on it.
≥For assembly, use a Phillips-head screwdriver.
≥For optional wall mount, refer to page 8.
∫ Preventing the speakers from falling
≥You will need to obtain the appropriate screw eyes to match the
walls or pillars to which they are going to be fastened.
≥Consult a qualified housing contractor concerning the
appropriate procedure when attaching to a concrete wall or a
surface that may not have strong enough support. Improper
attachment may result in damage to the wall or speakers.
step
1
[PT465] Assembling the front speakers
Make sure you have all the indicated components before starting assembly, setup, and connection.
2 Front speakers
(with cover plate)
2 Stands
(with cable)
2 Bases
8 Screws
6
Tighten securely.
Slide into the groove.
Position the
cable between
the ridges.
Tighten securely.
Press into the groove.
Insert the wire fully.
i: White
j: Blue
Push!
Cover plate
Remove using a flat
object.
≥Keep for wall-mount
use (➜ 8).
String (not included)
Thread from the wall to the speaker and tie tightly.
Rear of the speaker
Wall
Approx.
150 mm
Screw eye
(not included)
PT465GC-GS-GCS-GCT-PT460GN_RQTX0088-B_eng.book Page 6 Thursday, December 13, 2007 9:04 AM


