


13
RQT8043
RQTV0199
LANG - 5 LANG - 4 FRANÇAIS DANSK ENGLISH
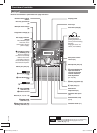
The buttons described for “Microphone mixing” are
mainly for the main unit unless indicated otherwise.
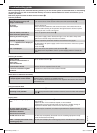
Enjoying the microphone mixingEnjoying the microphone mixing
You can enjoy microphone mixing from various
music sources (cassette, disc, radio or other external
equipments).
1
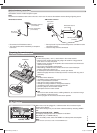
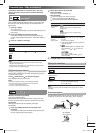
Firstly, lower the volume with [MIC VOL], connect
the microphone.
Plug type : Ø 3.5 mm monaural
2
Start playing the music source.
3
Adjust the volume with [VOLUME +
] or [VOLUME −
]
and [MIC VOL] and sing along.
Note:
• If a strange noise (howling) is emitted during use, move
the microphone away from the speakers, or turn down
the microphone volume.
• When you are not using the microphone, disconnect it
from the microphone jack, and turn down the microphone
volume level to “MIN”.
• Sound adjustments can be made using microphone
mixing but recording will not be affected.
Record microphone mixingRecord microphone mixing
1
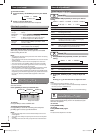
Press [0, OPEN] and insert the cassette to be
recorded.
Insert with the side to be recorded facing towards you
and the exposed tape facing down.
2
Lower the volume with [MIC VOL], then connect the
microphone.
3
Select the music source:
When singing
along with
discs
Insert the desired disc (
\ page 8).
When singing
along with
radio
Select your desired station (
\ page 12).
When singing
along from
other external
equipments
Connect and prepare the external
equipment (
\ page 15)
4
Press [¶, REC] and start microphone mixing.
To record your voiceTo record your voice
1
Press [0, OPEN] and insert the cassette to be
recorded.
2
Lower the volume with [MIC VOL], then connect the
microphone.
3
Press [¶, REC] to start recording.
4
Speak through the microphone and adjust the
volume with [VOLUME
+
]
or [VOLUME
−
]
and
[MIC VOL].
Microphone mixing
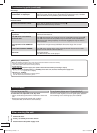
Setting the clockSetting the clock
This is a 24-hour clock.
1
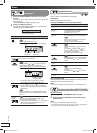
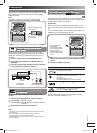
Press [CLOCK / TIMER] to select “CLOCK”.
Each time you press the button:
CLOCK
˚ PLAY
Original display
˚ REC
2
(
Within 8 seconds or so
)
Press [4,
/ REW] or [¢, / FF] to set the time.
3
Press [CLOCK / TIMER] to finish setting the time.
Displaying the clock
Press [CLOCK
/
TIMER] once when the unit is on or in standby
mode.
The time is displayed for a few seconds.
Note:
Reset the clock regularly to maintain accuracy.
Using the play or record timerUsing the play or record timer
You can set the timer to come on at a certain time to wake
you up (play timer) or to record from the radio or the external
equipment (record timer).
Play timer and record timer cannot be used together.
Turn the unit on and set the clock.
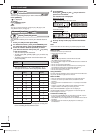
Timer Action
Play timer Prepare the music source you want to listen to;
cassette, disc number (1~5), radio or other external
equipments, and set the volume.
Record
timer
Check the cassette’s erasure prevention tabs
(
\ page 11), insert the cassette and tune to the
radio station (
\ page 12) or select the external
equipment (
\ page 15).
1
Press [CLOCK/TIMER] to select the timer function.
Each time you press the button:
➞
CLOCK
˚ PLAY
Original display
˚ REC
➞
˚PLAY : to set the play timer
˚REC : to set the record timer
(Proceed to the next step
within 8 seconds
)
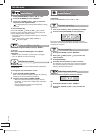
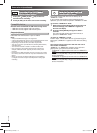
2
Press [4, / REW ] or [¢, / FF] to set the
starting time.
Play timer indicator
Start time
Record timer indicator
1
3
Press [CLOCK / TIMER] to confirm.
4
Repeat steps 2 to 3 to set the finishing time.
1
Finish time
Timer
RQTV0199-M_1EN.indd 13RQTV0199-M_1EN.indd 13 2/9/07 2:22:57 PM2/9/07 2:22:57 PM