


43
En
■ Picture Mode
*1*2
`Thru:
The following settings are set to the default values:
“Film Mode”, “Edge Enhancement”, “Noise
Reduction”, “Brightness”, “Contrast”, “Hue” and
“Saturation”
`Custom:
You can set the following settings as you like: “Film
Mode”, “Edge Enhancement”, “Noise Reduction”,
“Brightness”, “Contrast”, “Hue” and “Saturation”
`Cinema:
Selected when the picture source is movie film, etc.
`Game:
Select to use in connecting a game console.
With Picture Mode, you can change the following settings
to be suitable for the movie or game screen by one opera-
tion; “Film Mode”, “Edge Enhancement”, “Noise
Reduction”, “Brightness”, “Contrast”, “Hue” or “Satu-
ration”.
■ Film Mode
*2
`Video:
Does not process in either “3:2” or “2:2”.
`Auto:
Adjusts to the picture source, automatically selecting
“Picture Mode”.
`3:2:
Selected when the picture source is movie film, etc.
`2:2:
Selected when the picture source is computer graph-
ics, animation, etc.
The AV receiver will adjust to the picture source, process-
ing in either “3:2” or “2:2” (Film Mode). It automati-
cally converts the source to the appropriate progressive
signal and reproduces the natural quality of the original
picture.
When the “Film Mode” setting is set to “Auto”, the AV
receiver automatically detects the picture source and in
either “3:2” or “2:2”. However, there may be times
when you will get a better picture by setting “Film Mode”
yourself.
Note
•If the “Game Mode” setting is set to “On” (➔ 42), this setting
is fixed at “Video”.
■ Edge Enhancement
*2
`0 to +10
With this setting you can adjust the sharpness of edges in
the picture. “0” is the softest. “+10” is the sharpest.
■ Noise Reduction
*2
`Off:
Noise reduction off.
`Low:
Low noise reduction.
`Mid:
Medium noise reduction.
`High:
High noise reduction.
With this setting, you can reduce noise appearing on the
screen.
Note
• If the “Game Mode” setting is set to “On” (➔ 42), this setting
is fixed at “Off”.
■ Brightness
*1*2
`–50 to 0 to +50
With this setting you can adjust the picture bright-
ness. “–50” is the darkest. “+50” is the brightest.
■ Contrast
*1*2
`–50 to 0 to +50
With this setting you can adjust contrast. “–50” is the
least. “+50” is the greatest.
■ Hue
*1*2
`–20 to 0 to +20
With this setting you can adjust the red/green bal-
ance. “–20” is the strongest green. “+20” is the
strongest red.
■ Saturation
*1*2
`–50 to 0 to +50
With this setting you can adjust saturation. “–50” is
the weakest color. “+50” is the strongest color.
Tip
*1
This procedure can also be performed on the remote controller
by using the Video menu (➔ 21).
*2
Press CLR if you want to reset to the default value.
You can assign a default listening mode to each input
source that will be selected automatically when you select
each input source. For example, you can set the default lis-
tening mode to be used with Dolby Digital input signals.
You can select other listening modes during playback, but
the mode specified here will be resumed once the AV
receiver has been set to Standby.
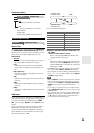
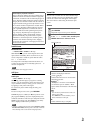
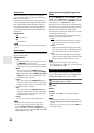
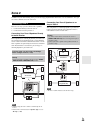
Main menu Listening Mode Preset
Listening Mode Preset
1
Use / to select the input source that you want to
set, and then press ENTER.
The following menu appears.
For TUNER input selector only “Analog” will be
available.
Note
• If you connect an input component (such as UP-A1 series
Dock that seated iPod) to the UNIVERSAL PORT jack,
you can assign only listening modes for the analog sound
to PORT selector.
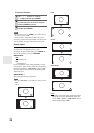
2
Use / to select the signal format that you want
to set, and then use / to select a listening mode.
Only listening modes that can be used with each
input signal format can be selected (➔ 30 to 33).
The “Last Valid” option means that the listening
mode selected last will be used.
1. BD/DVD
2. VCR/DVR
3. CBL/SAT
4. GAME
5. AUX
6. TUNER
7. TV/CD
8. PORT
5. Listening Mode Preset