17
3, 4
2, 5
1
You may wish to set the clock manually if the ACCUCLOCK cannot
receive RDS signals, if the displayed time is obviously wrong, or if
you wish to set your own time (you may intentionally advance the
clock) by doing the following:
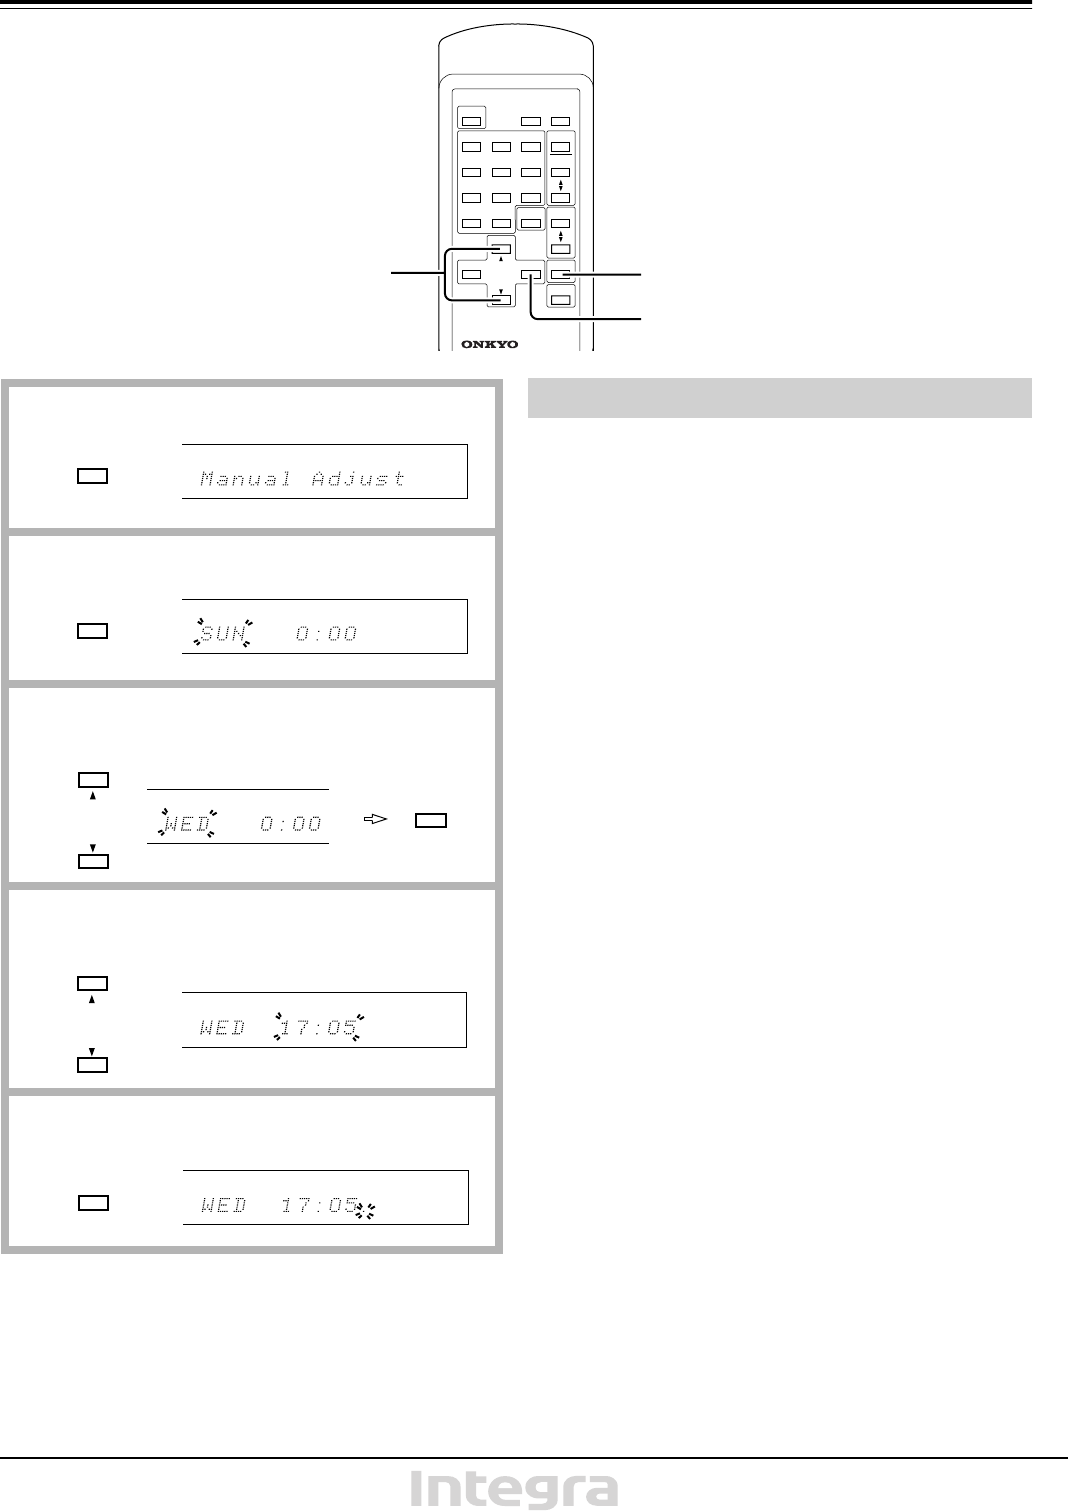
1. Press the ADJUST button until “Manual Adjust” is displayed.
2. Press the ENTER button to display the day and time.
● If an RDS broadcast was tuned in and the CT information was
already received, the day and time will be displayed. To use the
currently set day and time, skip to step 5.
3. Press A or B button until the desired day of the week is
selected, and then press the ENTER button.
● The days can also be entered using the number buttons. If the
number buttons are used:
1: Sunday 2: Monday 3: Tuesday 4: Wednesday
5: Thursday 6: Friday 7: Saturday
4. Set the desired time by using the A or B button.
● The time can also be entered using the number buttons. For
example to enter “17:05”, press 1, then 7, then 0/10, and then 5.
5. Press the ENTER button.
The clock will start operating.
NOTE:
If ACCUCLOCK mode is turned on, even if the clock is set manually,
ACCUCLOCK will continue adjusting the clock automatically. Refer
to “If ACCUCLOCK cannot be used:” on the previous page to turn
off ACCUCLOCK.
Using the main unit to set the clock:
1. In stand-by mode, press the MEMORY button.
2. When the day flashes, use the PRESET/TUNING dial to set
the day.
3. Press the MEMORY button.
4. When “0:00” flashes, use the PRESET/TUNING dial to set the
time.
5. Press the MEMORY button.
Setting the clock manually
TIMER
TIMER
PRESET
ENTER
Remote control
Remote control
ENTER
Remote control
ADJUST
Remote control
1
2
3
5
ENTER
Remote control
4
TIMER
TIMER
PRESET
Remote control


