


34
Connecting Your Components
—Continued
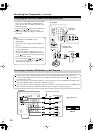
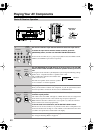
1.
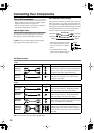
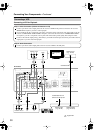
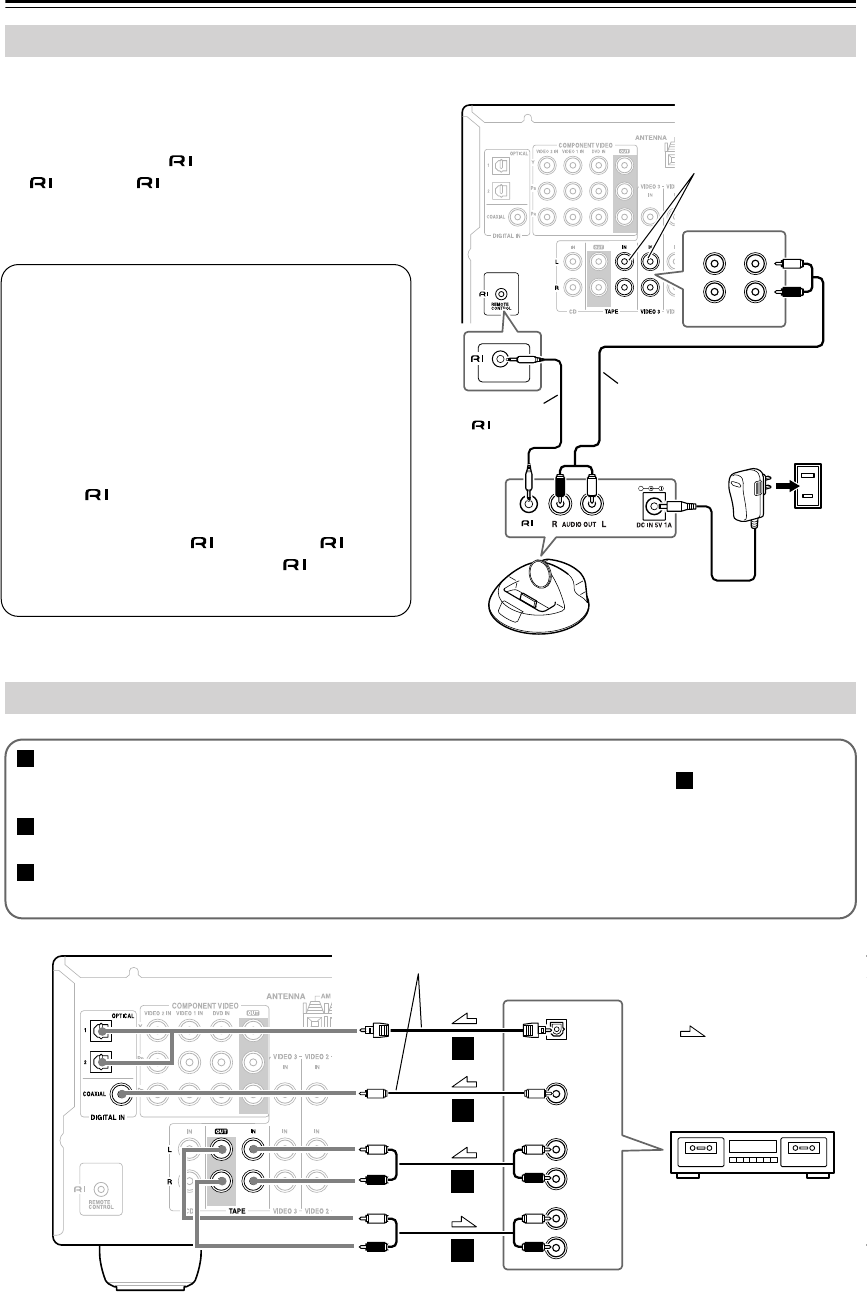
Using the AV cable supplied with the DS-A1XP RI
Dock, connect the RI Dock’s AUDIO OUT L/R
jacks to the AV receiver’s VIDEO 3 IN L/R jack or
TAPE IN L/R jacks.
2.
Using the supplied cable, connect the RI Dock’s
jack to an jack on the AV receiver.
3.
Connect the supplied AC adapter to the RI Dock’s
DC IN jack.
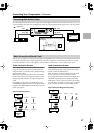
Connecting the DS-A1XP RI Dock for the iPod (Audio Only)
Notes:
• Set the RI Dock’s RI MODE switch to
HDD/DOCK.
• Set the AV receiver’s Input Display to HDD (see
page 37).
• See “DS-A1XP RI Dock for the iPod” on page 44
for more information.
• When the AC adapter is unplugged or not con-
nected to the RI Dock, the RI Dock will output no
sound, functions will not work, and your iPod’s
battery will not be charged.
• Connect the supplied cable to only jacks.
Do not connect headphones to the jack, as it
will damage your equipment.
IN
VIDEO 3
L
R
IN
TAPE
REMOTE
CONTROL
Connect one
or the other
AV receiver
AC adapter
Wall outlet
Supplied audio
connection cable
Supplied
cable
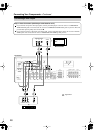
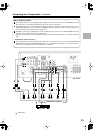
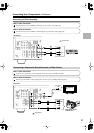
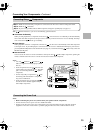
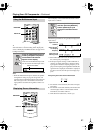
Connecting a Cassette, CDR, MiniDisc, or DAT Recorder
COAXIAL
OUT
OPTICAL
OUT
OUT
PLAY
L
R
IN
RED
L
R
a
a
b
c
Cassette recorder,
CDR, etc.
Connect one or the other
Connect your recorder’s audio input jacks to the AV receiver’s TAPE OUT L/R jacks, and connect your
recorder’s audio output jacks to the AV receiver’s TAPE IN L/R jacks. With connection , you can play and
record with the recorder.
If your recorder has a coaxial digital output jack, connect it to the AV receiver’s DIGITAL IN COAXIAL jack,
and set the DIGITAL INPUT assignment to COAX (see page 37).
If your recorder has an optical output jack instead of a coaxial one, connect it to the AV receiver’s DIGITAL IN
OPT 1 or OPT 2 jack and set the DIGITAL INPUT assignment to OPT1 or OPT2 (see page 37).
a
a
b
c
AV receiver
: Signal Flow