7
Step 2:
Setting Up
1
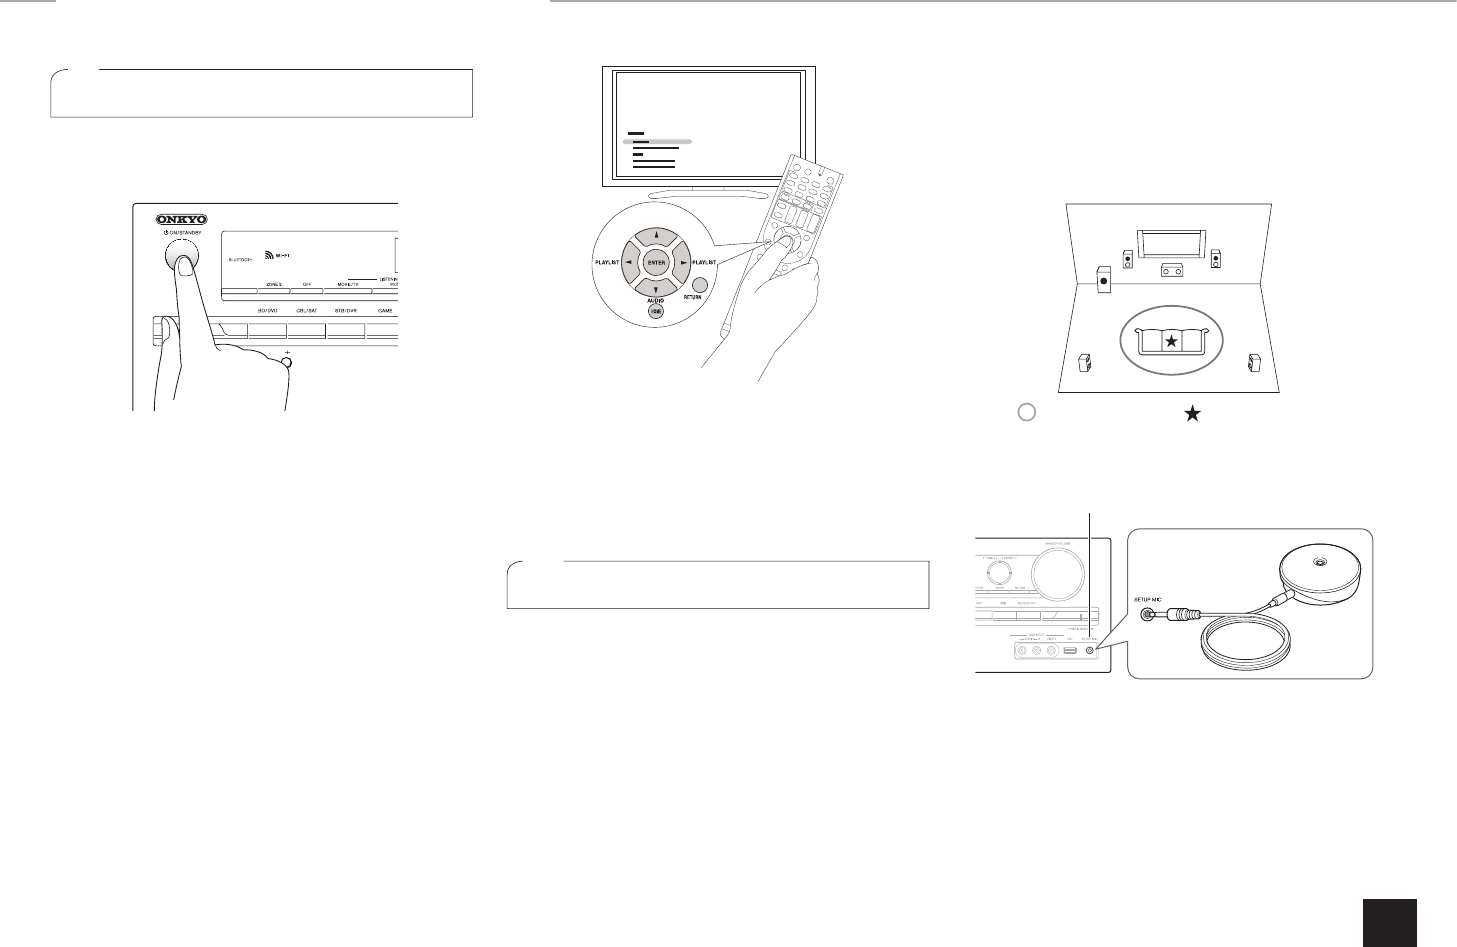
Turning the power on
Connect the power cord to the outlet. Press
z
ON/
STANDBY on the main unit or
z
RECEIVER on the remote
controller to turn the unit on or to standby mode.
r When the unit is turned on, a large instantaneous current
may flow affecting functionality of the computer and other
devices. It is recommended to use a separate outlet from
that for the computer or such other sensitive devices.
Firmware update notification: If the unit is connected via
LAN and there is firmware update available, the "Update
New F/W" message will appear. Press the
S
/
T
buttons on
the remote controller to select whether to update or not
and press ENTER to confirm your selection. For details on
firmware update, see the Advanced Manual.
z
Operation: You can set up by viewing the guidance
displayed on the TV screen. To display the guidance, you
need to make HDMI connection between the unit and
TV. Select the item with the cursor buttons of the remote
controller and press ENTER to confirm your selection. To
return to the previous screen, press RETURN. To return to
the Home menu, press HOME.
2
Making automatic speaker setting
The AccuEQ Room Calibration function, our proprietary
technology, collects the test tones coming from each
speaker with the supplied speaker setup microphone and
performs automatic setting of the number of speakers,
volume level, each speaker's optimum crossover
frequencies, and distance from the primary listening
position. Distortion caused by difference of room acoustic
environment will also be corrected to produce clear, well-
balanced sound.
1.
Place the speaker setup microphone at the
measurement position
.
r Correct measurement will not be possible if the
microphone is held by hand. It is desirable that the
microphone be placed on a stand at the height
of listener's ears. Measurement is not possible if
headphones are being used.
TV
:Listening area :Measurement position
with microphone
2.
Connect the speaker setup microphone to the
SETUP MIC jack on the unit.
SETUP MIC jack
Speaker setup
microphone


