5
Step 1:
Connections
2
Connecting speakers
Important: The power cord must be connected only after all
other connections are completed.
45
12
3
6
12
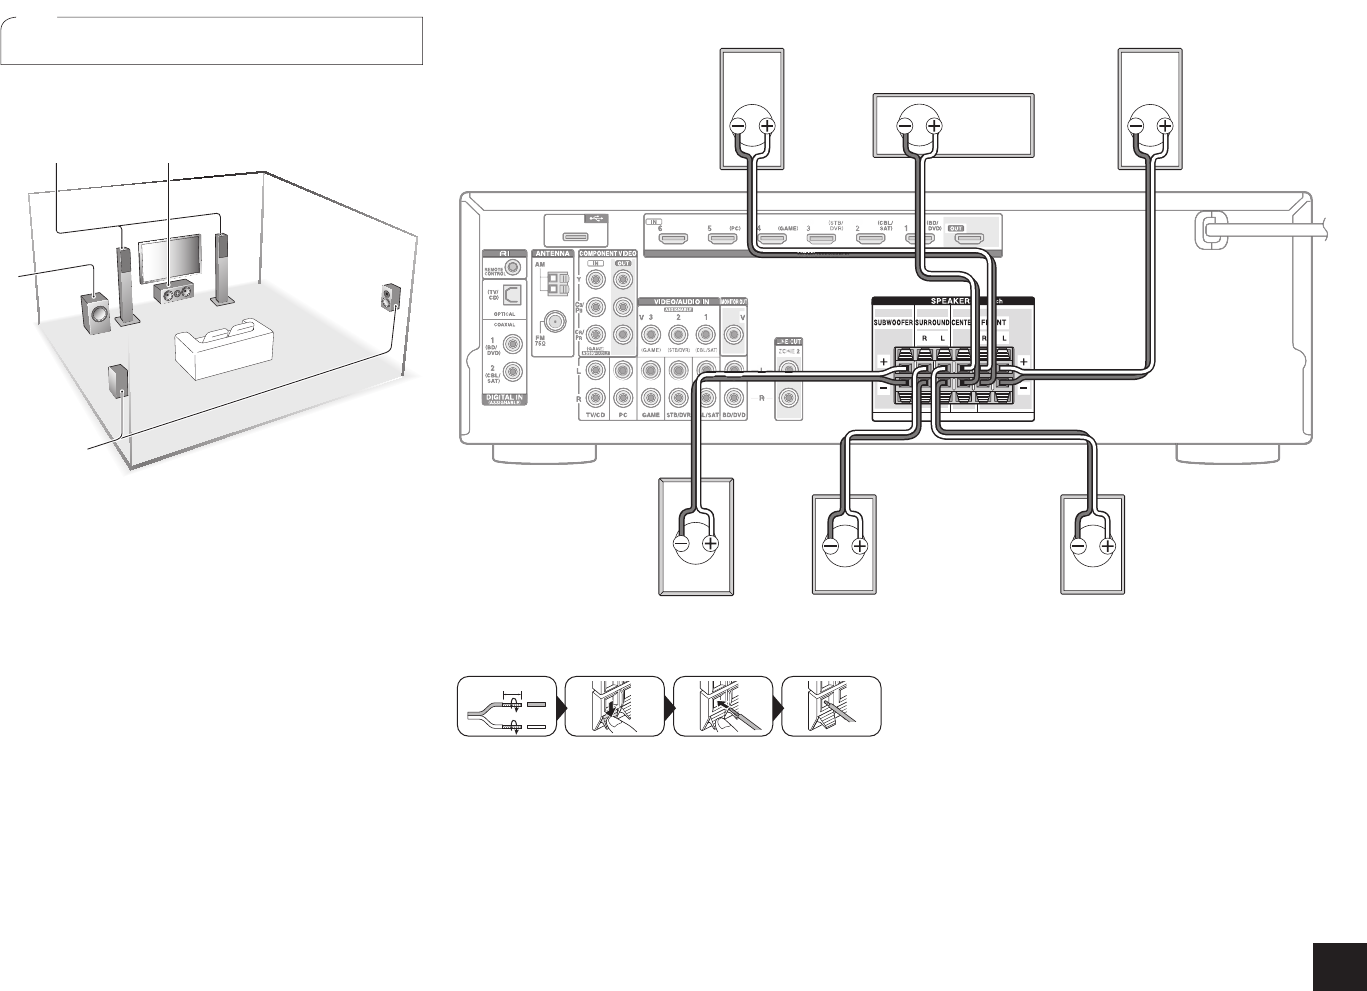
Front speakers
3
Center speaker
45
Surround speakers
6
Subwoofer
r The position and size of the speakers is an image.
r Only one subwoofer can be connected.
r To use the ZONE function, refer to the section 6 "Using
the multi-zone function" of "Step 3: Playing Back".
It is ideal to install the front speakers and center speaker
at the height not too far from that of the screen. As for the
surround speakers, it is recommended to install at the
position slightly backward of the listening position and
higher than the listener's ears, since it is preferable to
obtain a diffused sound rather than a direct sound. As a
bass sound reproduced by subwoofer is less directional,
it is possible to place it at any position. Consider the best
installation position where a bass sound can be clearly
heard by listening to actual playback.
2
Front R
3
Center
1
Front L
5
Surround R
6
Passive type
subwoofer
4
Surround L
3/8"-1/2" (10-12 mm)
Important%QPPGEVURGCMGTUYKVJŝVQŝKORGFCPEG
Using a speaker with less impedance than the supported
value may result in failure.
Cut and remove the plastic coating from the end of the
speaker cable, twist the core and connect it to the terminal.
Make correct connection between the unit's jacks and
speaker's jacks (+ to + and - to -) for each channel. If
connection is wrong, a bass sound may become poor due to
reverse phase. The levers of positive (+) speaker terminals
are color-coded. Also, the supplied speaker cables are color-
coated to help correct connection. The colored cables are
positive (+) cables. Connect a cable to a terminal in the
same color as the cable. Do not connect a subwoofer with
built-in power amplifier to the subwoofer terminals of this
unit.
r The speaker setting is 5.1 ch at the time of purchase.
Change the setting when you use a configuration other
than 5.1 ch.
r Short-circuiting the + cable and - cable or contacting the


