


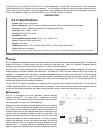
Installation: Existing Construction (retrofitting finished walls)
Warning: Exercise caution when drilling into existing walls. Do not drill through
existing wires, pipes, conduits, heating or air conditioning ducts. If you feel resis-
tance while drilling, stop immediately.
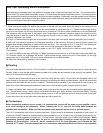
1. Using a studfinder or the "knocking" method, locate the wall studs in the wall area
where you wish to mount the speaker. The speaker will be mounted between adjacent
studs, no closer than two inches from either stud (fig.8).
2. Determine that there are no obstructions behind the desired cutout area. This may
be accomplished by drilling a hole in the center of the cutout area and using an
"L"-shaped piece of metal (like a coat hanger) to "feel around" behind the wall. If you
discover an obstruction, fill the hole with patching compound and try another location.
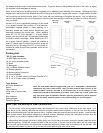
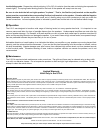
3. If there are no obstructions found behind the wall, use the supplied cutout template
and a pencil to draw a 19-3/4"H x 8-7/8"W outline of the area to be cut out. Use a level
to ensure that the cutout is precisely positioned. Begin by drilling the four corners with
a ¼" bit (fig.8). Then cut out the wall section with a utility knife or keyhole saw,
following the lines traced around the mounting template. If the wall is painted or
wallpapered, use the keyhole saw.
4. If the wall is constructed of lath and plaster, outline the penciled marks with
masking tape, drill the four corners with a 1/4" drill bit, and use a utility knife to cut
through the plaster down to the lath. Use a saber saw with a metal cutting blade or a
pair of tin snips to gently cut through the lath, being careful not to vibrate plaster off the
wall.
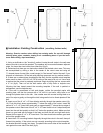
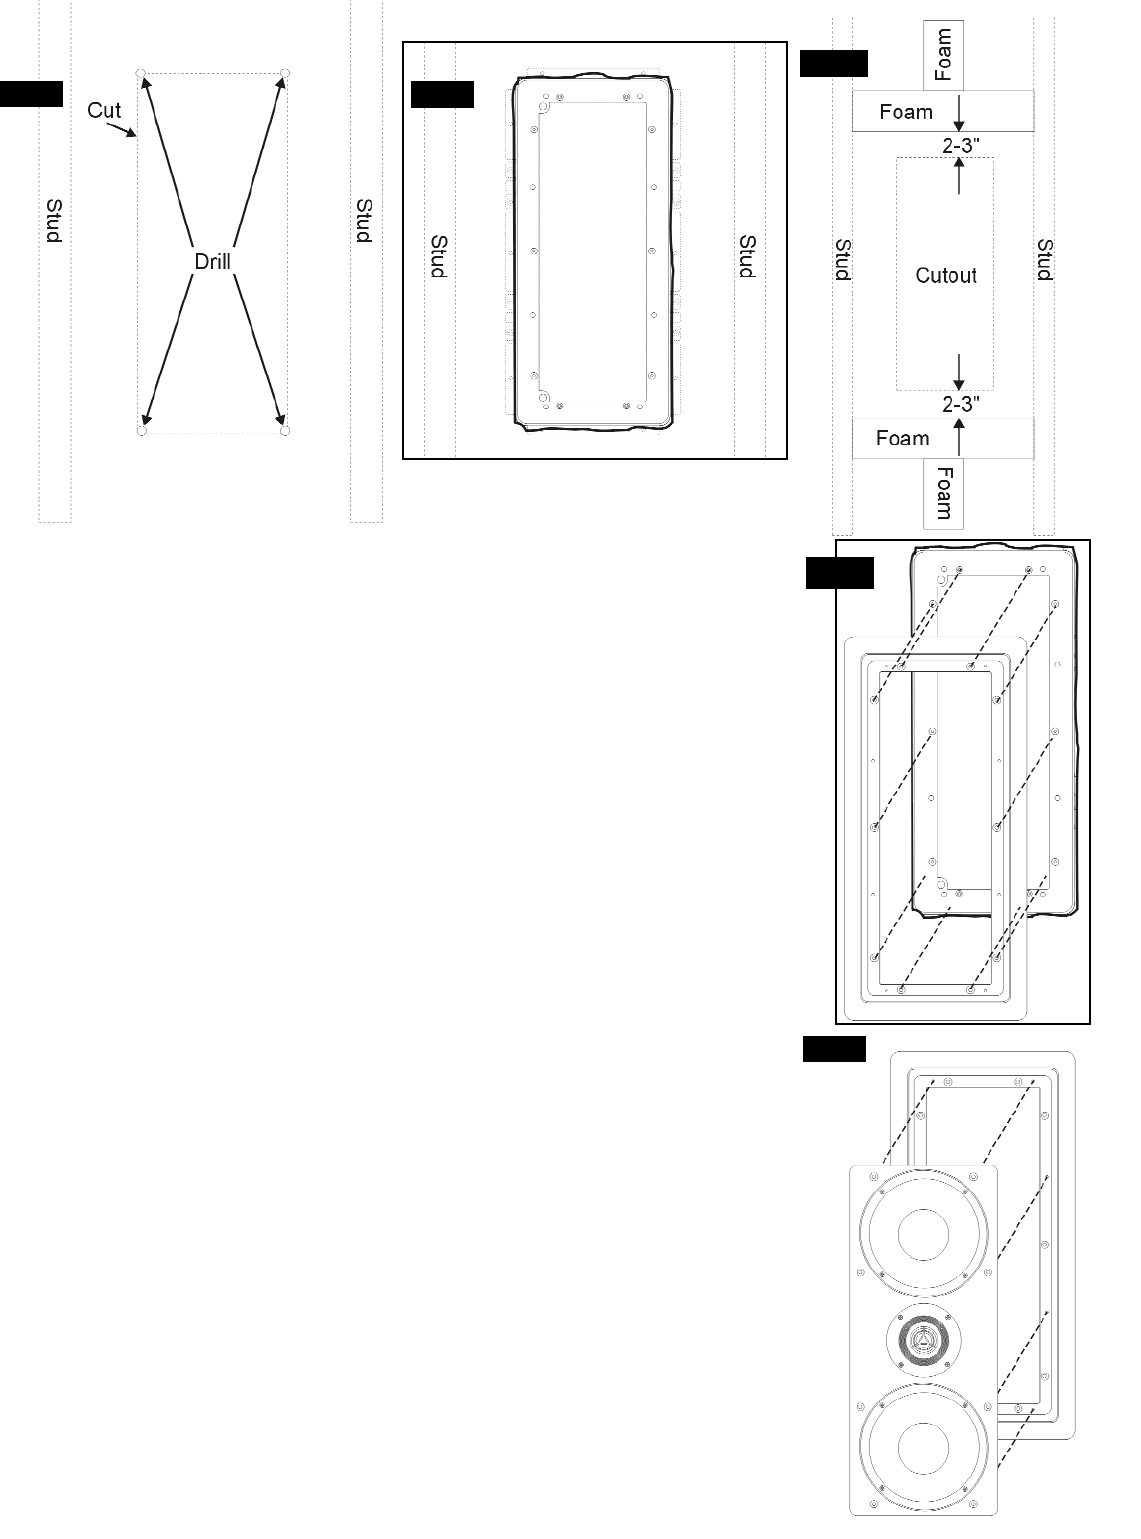
5. Insert one of the 4" x 4" x 8" foam blocks vertically through the speaker cutout (fig.
10). Push this block down approximately 7" below the edge of the cutout. Insert the
second 4" x 4" x 8" foam block and push up approximately 7" above the top edge of
the speaker cutout. Bend one of the 4" x 4" x 16" foam blocks into a U shape and push
down into the wall horizontally so that it is 3" below the speaker cutout. Make sure that
there is a good seal with the edge of the foam and both the left and right wall studs.
Repeat for the upper 4" x 4" x 16" foam block. The foam should also make a good seal
around the speaker wires.
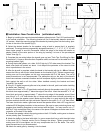
6. Insert the 6.2 Ci mounting bracket diagonally through the cutout in the wall, then pull
forward into position. If the cutout was cut correctly according to the cutout template,
the bracket should fit snugly into place. The plastic tabs on all sides of the bracket will
rest against the rear side of the wall (fig.9).
fig.8
fig.9
fig.10
fig.12
fig.11