95-7801 DASH DISASSEMBLY
ACURA TL 1996-1998
3
1
Disconnect the negative battery terminal to pre-
vent an accidental short circuit.
Disconnect the negative battery terminal to pre-
vent an accidental short circuit.
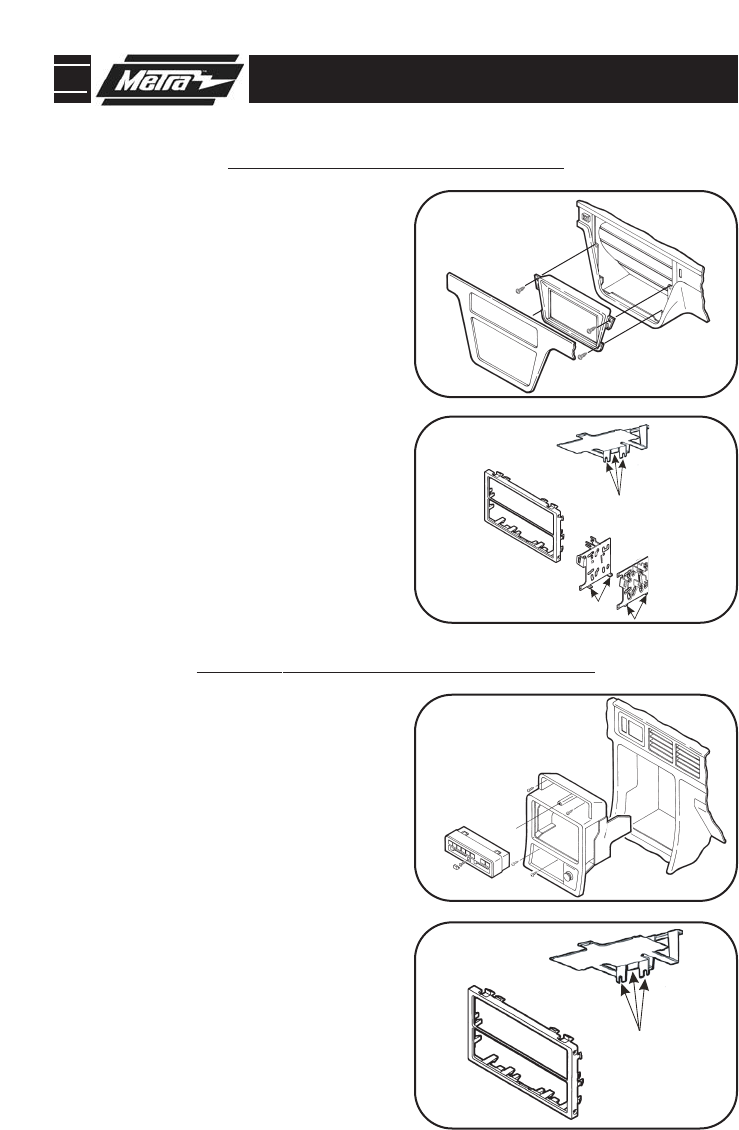
Using a small screwdriver, unclip the perimeter
of the radio trim bezel. Disconnect the climate
control and rear defroster wiring and remove
the bezel. Remove (4) Phillips screws securing
the factory head unit/trim bezel assembly.
Loosen (2) Phillips screws securing the back of
the head unit to the metal housing and slide the
unit out. (It is NOT necessary to remove the
screws securing the metal housing to the
bezel). Disconnect the wiring. (Fig. A)
3
2
ACURA VIGOR 1992-1994
1
Remove the access cap from the climate control
cluster and (1) screw exposed. Unclip the clus-
ter and remove (2) screws exposed. Remove the
ashtray and (2) Phillips screws exposed.
Remove the cover caps from each front corner of
the center console and the screws exposed.
Open the storage compartment, lift up the carpet
and remove (2) screws exposed. Lift up on the
center console and remove. Unclip the radio trim
bezel and disconnect the wiring. Remove (2)
bolts from the back of the factory head unit and
disconnect the wiring. (Fig. A)
2
Cut and r
emove the mounting tabs from the bot-
tom of the Rear Support Tray (Fig. A). Cut and
r
emo
ve all mounting clips on the
Radio Housing
EXCEPT clips "A" and "H" (Fig
. B).
Skip to step #3b on Page 10.
3
A
"B"
"B"
Fig. B
Fig. C
F
ig. A
"K"
"K"
B
A
"A"
"H"
"H"
Fig. B
"A"
B
Cut and remove the mounting tabs (Fig. B) from
the bottom of the Rear Support Tray (Fig. A).
Cut and remove all mounting clips on the
Radio
Housing EXCEPT clips "B" and "K" (Fig. B). Cut
and remove the slots on the bottom of the ISO
Brackets (Fig. C).
Skip to step #3b on Page 10.


