


16
Installation, con’t
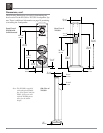
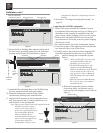
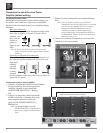
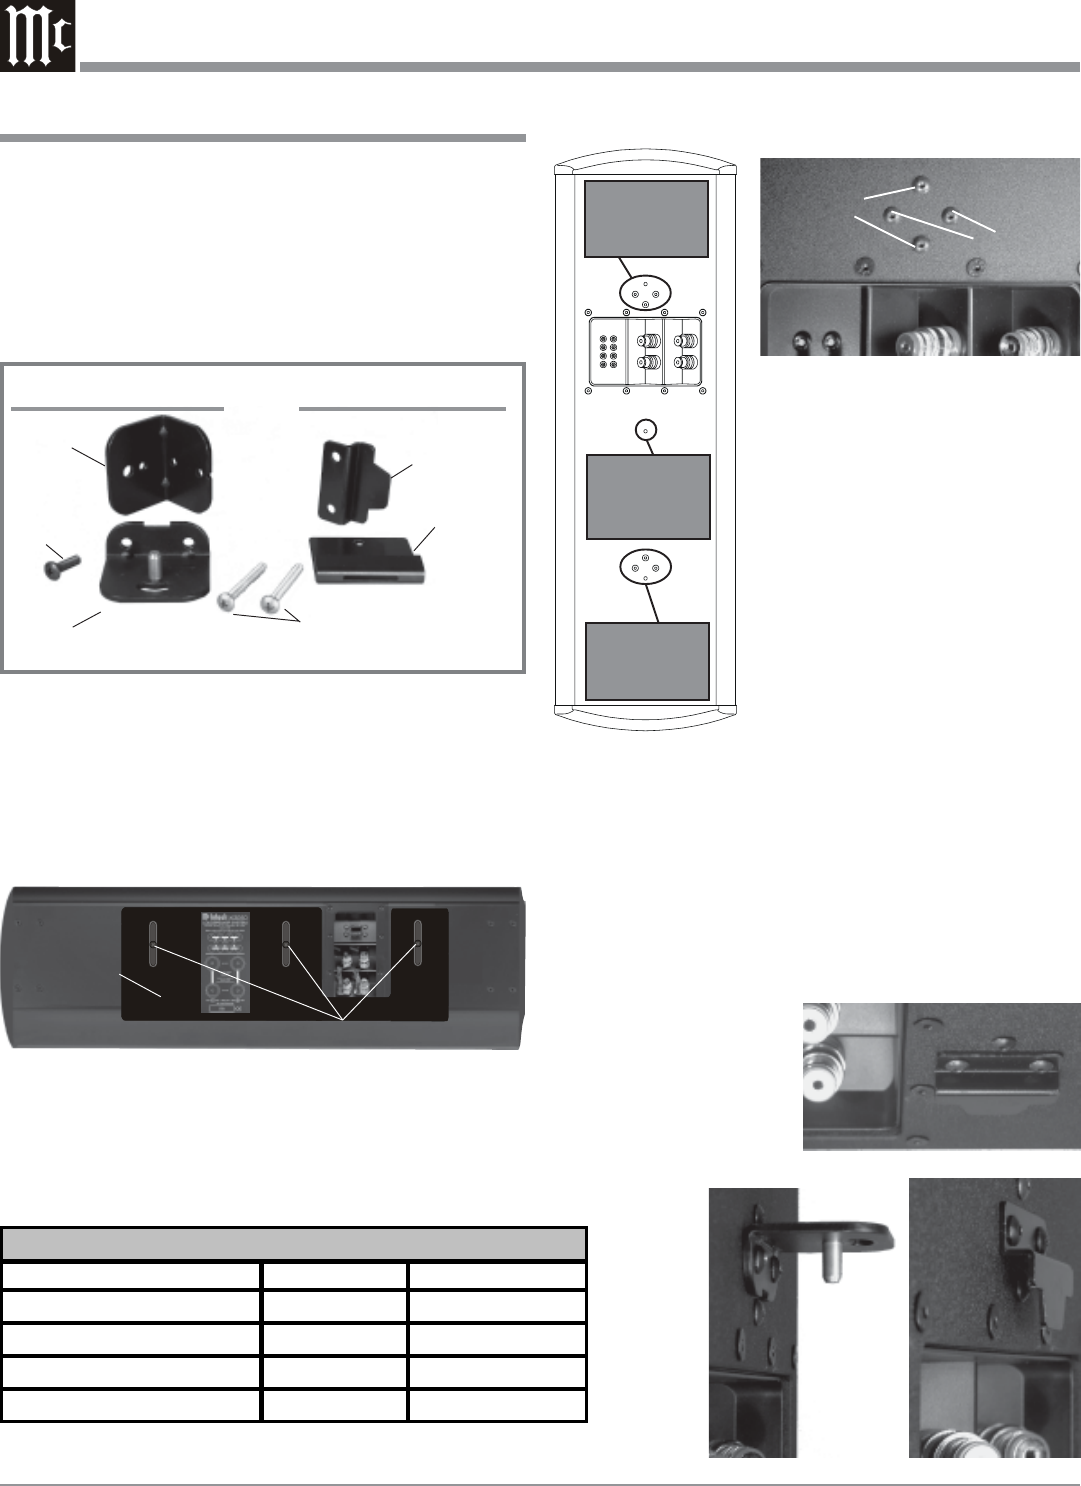
How to Mount the XCS350 Loudspeaker On the Wall
The supplied On Wall Mounting Brackets allow for four
different mounting positions of the XCS350 Loudspeaker
relative to the wall, both vertical and horizontial. Two posi-
tions are flush mount, with the Loudspeaker close to and
parallel with the wall. The other positions are angle mount,
which places the Loudspeaker further away from the wall
and allows for rotation of ± 30 Degrees. Refer to figure 25.
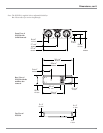
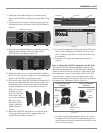
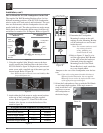
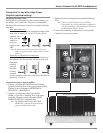
1. Using the supplied Allen Wrench, remove the three
screws securing the Stabilizer Bar to the back of the
XCS350. Refer to figure 26. Replace the just removed
center screw with a supplied one of the same type, but
shorter length. Refer to figure 28.
Note: Retain the three removed screws and Stabilizer Bar
for possible future use.
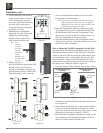
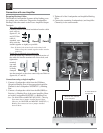
2. Attach either the flush mount or angle mount brackets
to the rear of the Loudspeaker using the supplied
screws. Refer to figures 27, 28 and 29 for the screw
location. Also, be sure to orient the bracket as illus-
trated in figure 30.
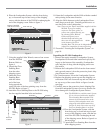
3. Determine the Loudspeaker
Mounting Location on the wall,
making sure the Mounting Bracket
will be anchored to a stud located
inside the wall.
Note: Use extreme caution to avoid
any existing electrical
wiring, plumbing, etc.,
located inside the wall.
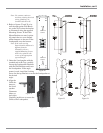
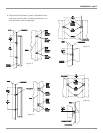
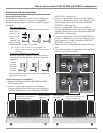
4. Refer to figures 31 thru 34 to in-
stall the appropriate Wall Bracket
on the wall (orient the bracket as
illustrated) using the supplied
Mounting Screws. If the Flush
Mount Bracket is used, attach the
two cone shaped rubber
bumpers to the rear of the Loudspeaker, near the bot-
tom.
Note: If the wall covering material and/or thickness is
different from the illustration, the two supplied
Mounting Screws need to be replaced with screws
of the appropriate type and length.
5. Orient the Loudspeaker to line up with the Wall Brack-
ets and attach them together. If the angle mount is
used, install the Lock-
ing Screw to secure
the Loudspeaker at
the desired angle.
Screws - B
Screws - A
Figure 29
Figure 27
Mounting Type Screws - A Screws - B
Vertical Flush Mount ---- Remove
Vertical Angle Mount ---- Remove
Horizontal Flush Mount Remove ----
Horizontal Angle Mount ---- Remove
XCS350 Screw Removal for Mounting
Figure 28
Location of
Mounting
Screws
Location of
Mounting
Screws
Replace with
supplied
shorter screw
Figure 26
Stabilizer Bar Screws
Stabilizer Bar
Wall
Bracket
Loudspeaker
Bracket
Locking
Screw
Wall Mounting Screws
Wall
Bracket
Loudspeaker
Bracket
Angled Wall Mounting
Hardware
Flush Wall Mounting
Hardware
Figure 25
Figure 30