


11
Installation
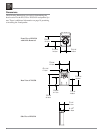
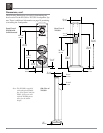
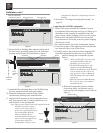
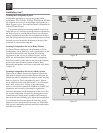
6. Place the Loudspeaker System, with the front facing
up, on foam end caps located on top of the shipping
carton, with the bottom of the XLS340 overhanging the
end of the shipping carton. Refer to figure 3.
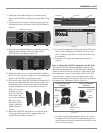
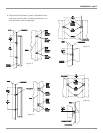
7. Using the supplied Allen Wrench, remove four screws
from the XLS340
Bottom. Refer to
figure 4.
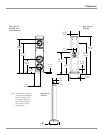
8. Unpack the Floor
Standing Base
from the other
shipping carton.
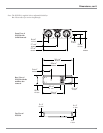
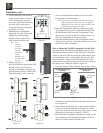
9. Orient the Floor
Standing Base
with the widest
end of the base
facing up and the
totally flat side of the base pointing away from the
XLS340. Refer to figure 5.
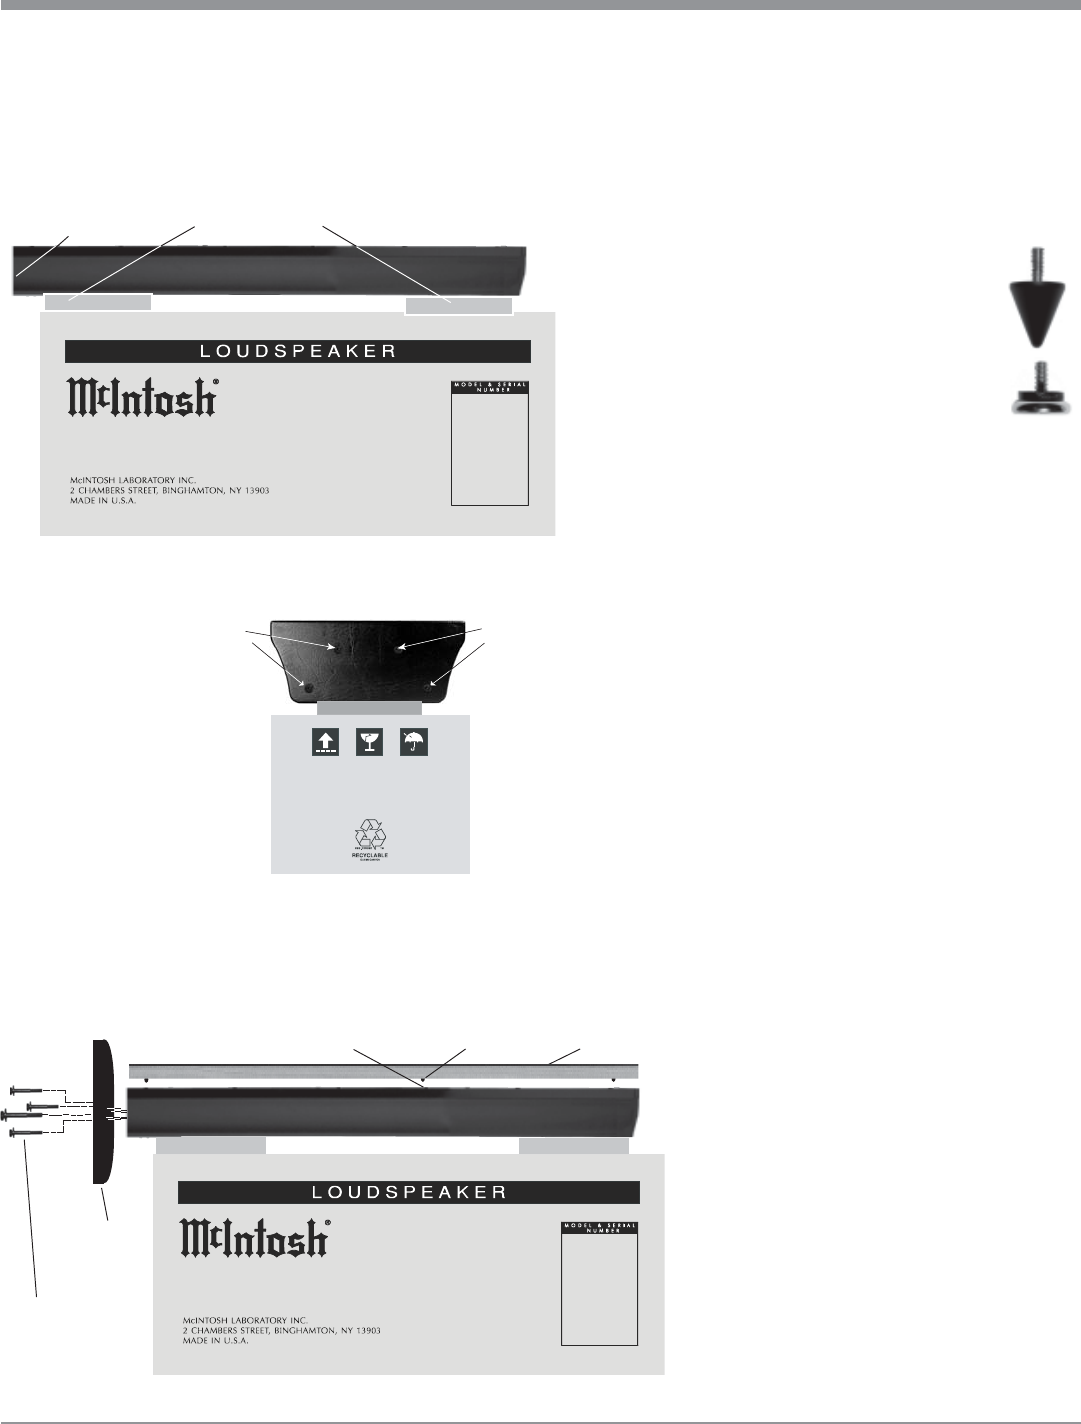
10. Attach the Floor Standing Base to the XLS340 using
the four supplied machine bolts and washers.
Figure 4
Remove
Two Screws
Remove
Two Screws
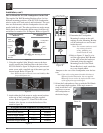
Glides
Tiptoes
Figure 3
Foam end caps
Bottom of XLS340
with the flat surface
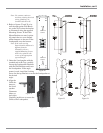
11. Orient the Loudspeaker and the Grille with the rounded
ends pointing in the same direction.
12. Align the Grille fasteners to the Loudspeaker Grom-
mets (three on each side). Carefully push down to se-
cure the Grille to the Loudspeaker.
Note: There are four Tiptoes and Glides supplied with the
XLS340. To prevent crushing
carpet use the Tiptoe spikes; to
protect non-carpeted flooring use
the chrome Glides. Both the
Glides and Tiptoes have a
threaded shaft and locking nut
that screw into the tapped holes
in the bottom of the Floor
Standing Base. The feet can be independently
adjusted to compensate for uneven flooring.
13. Proceed to “Locating the Loudspeaker System” on
page 18.
Unpacking the XLS360 Loudspeaker
1. Remove the entire assembly (Loudspeaker System,
Loudspeaker Grille and foam center/end caps) by lift-
ing up on the bottom of the assembly (Loudspeaker
rear) and place it along side the shipping carton on a
flat surface.
2. Release the Loudspeaker Grille from the foam center/
end caps and remove it from the protective plastic ship-
ping film and set it aside.
3. In a similar manner, lift out the Loudspeaker System.
4. Replace the shipping carton top onto the shipping car-
ton bottom. Place one foam end cap and one foam cen-
ter cap on top of the carton. Refer to figure 6 on the
next page.
5. Carefully remove the protective plastic shipping film
from the Loudspeaker System so as not to mar the fin-
ish or damage the Loudspeaker System Drivers.
Note: The XLS360 is a sealed Acoustic System.
If it is to be used without the supplied
Floor Standing Base attached to the
bottom, the four unused holes on the
bottom of the loudspeaker need to be
plugged up with suitable material to
prevent air leaks. Proceed to step 10 if
the Floor Standing Base is not used.
6. Place the Loudspeaker System, with the
front facing up, on foam end caps located
on top of the shipping carton, with the bot-
tom of the XLS360 overhanging the end
of the shipping carton. Refer to figure 6 on
the next page.
7. Unpack the Floor Standing Base from the
other shipping carton.
Figure 5
FastenersGrommets
Bolts and
washers
Floor
standing
base
Grille