


12
Installation, con’t
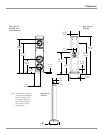
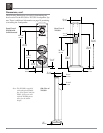
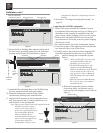
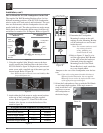
8. Orient the Floor Standing Base with the widest end of
the base facing up and the totally flat side of the base
pointing away from the XLS360. Refer to figure 7.
9. Attach the Floor Standing Base to the XLS360 using
the four supplied machine bolts and washers.
10. Orient the Loudspeaker and the Grille with the
rounded ends pointing in the same direction.
11. Align the Grille fasteners to the Loudspeaker Grom-
mets (four on each side). Carefully push down to se-
cure the Grille to the Loudspeaker.
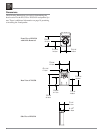
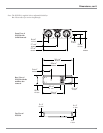
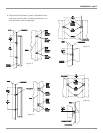
Note: There are four Tiptoes and Glides supplied with the
XLS360. To prevent crushing
carpet use the Tiptoe spikes; to
protect non-carpeted flooring use
the chrome Glides. Both the
Glides and Tiptoes have a
threaded shaft and locking nut
that screw into the tapped holes
in the bottom of the Floor
Standing Base. The feet can be
Glides
Tiptoes
Figure 6
Foam center cap
Bottom of XLS360
with the flat surface
Foam end cap
Figure 7
FastenersGrommets
Bolts and
washers
Floor
standing
base
Grille
independently adjusted to compensate for uneven
flooring.
12. Proceed to “Locating the Loudspeaker System” on
page 18.
Unpacking the XCS350 Loudspeaker
1. Remove the entire assembly (Loudspeaker System,
Loudspeaker Grille and foam end caps) by lifting up on
the bottom of the assembly (Loudspeaker rear) and
place it along side the shipping carton on a flat surface.
2. Release the Loudspeaker Grille from the foam end
caps and remove it from the protective plastic shipping
film and set it aside.
3. In a similar manner, lift out the Loudspeaker System.
4. Close the top flaps of the shipping carton and place the
two foam end caps on top of the carton.
5. Carefully remove the protective plastic shipping film
from the Loudspeaker System so as not to mar the
finish or damage the Loudspeaker System
Drivers.
Notes: 1. When the XCS350 is to be used with
the supplied Stabilizer Bar and
Hardware, proceed to step 6.
2. The XCS350 Loudspeaker is also
supplied with On Wall Mounting
Brackets and Hardware. If the XCS350
is to be mounted on the wall at this
time, proceed to “How to Mount the
XCS350 Loudspeakers On the Wall”
on page 16.
3. When the optional In Wall Mounting
Kit is chosen, refer to the supplied
installation guide.
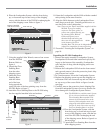
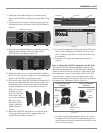
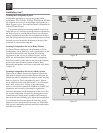
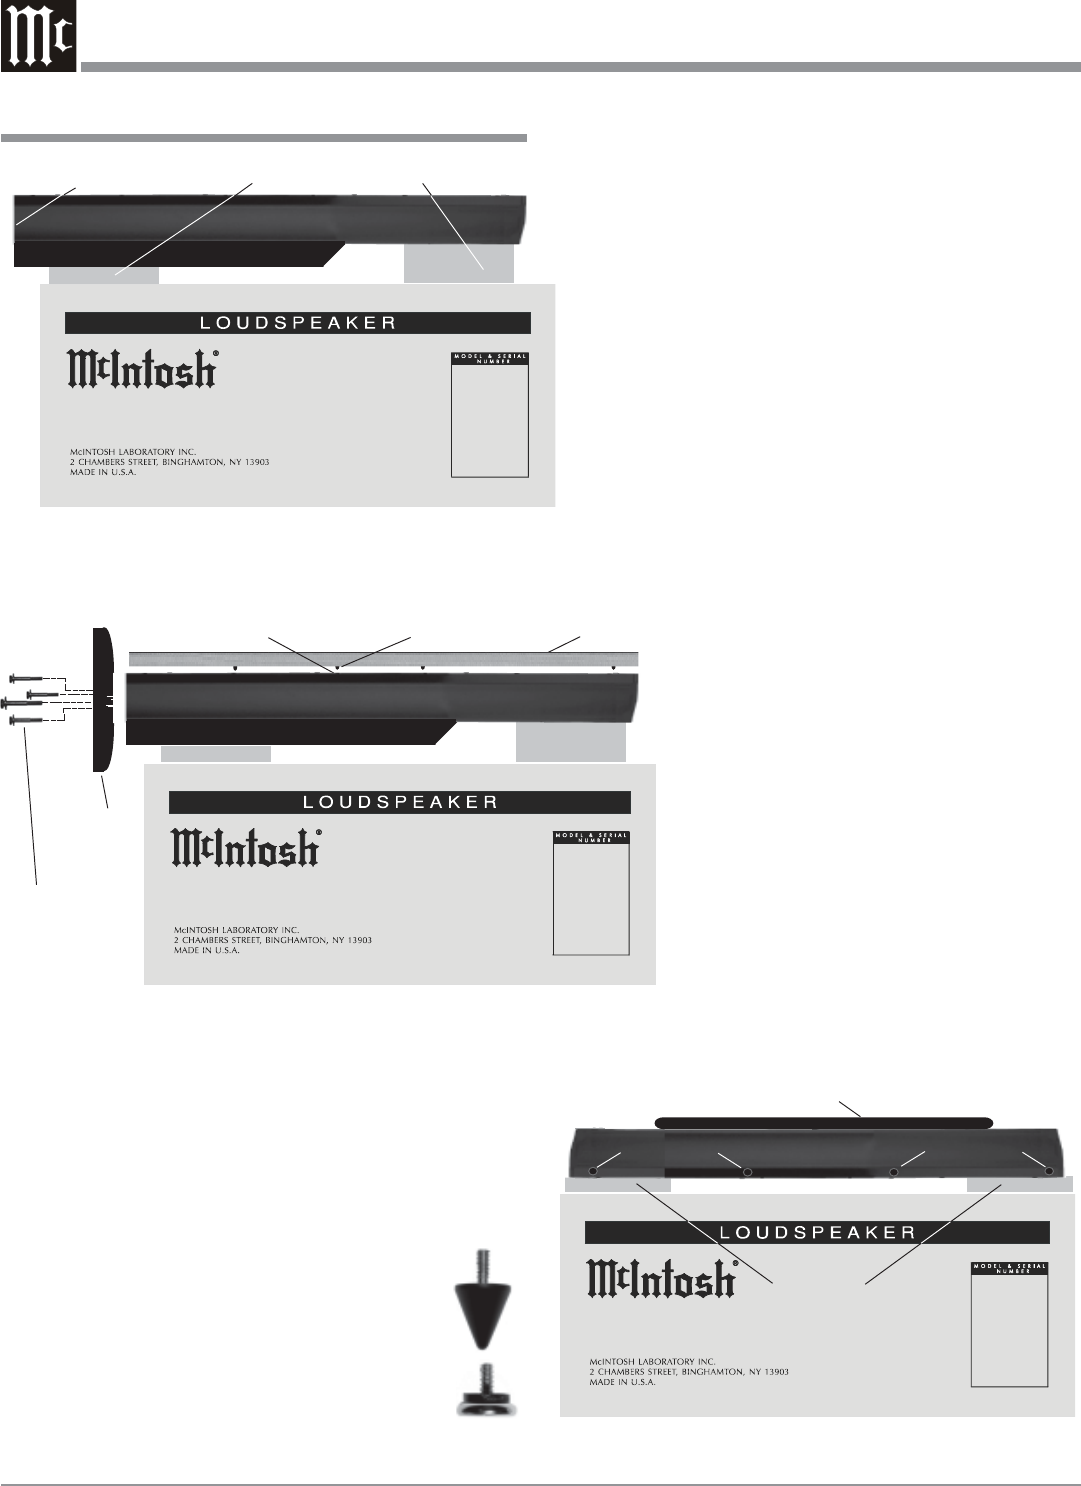
6. Place the Loudspeaker System, with the
front facing down, on foam end caps lo-
cated on top of the shipping carton. Refer to
figure 8.
Figure 8
Foam end caps
Stabilizer Bar
Rubber Bumpers
Rubber Bumpers