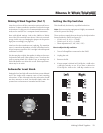
Toe in the ESL/Transition towers so the listener is looking at
the inner
1
/3 of the ESL panels. Sitting at the listening posi-
tion, hold a flashlight under your chin and point it at each
speaker. The reflection of the flashlight should be
1
/3 of the
way out from the inner edge of the panel (see figure 68).
Viewed from the listening position, the 2-inch space between
the transition tower and ESL frame should appear the same
on both channels (see figure 66). When you are happy with
the final placement of the ESL/Transition towers, carefully
remove the glider feet and install the ETC spikes.
Hard Sound
If the speaker sounds hard, there are two options:
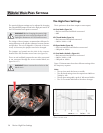
1 Change the jumpers on the passive high-pass to turn
up the lower midrange (see page 26).
2 Try tilting the speaker back (raise the front feet of the
unit). The listener should be straight on with the bot-
tom
1
/3 of the panel when listening.
When you are finished setting up the Statement e2, you
should turn the unit up very loud and check the room for
rattles. If any are found they should be eliminated.
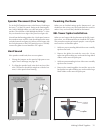
ESL Tower Spike Installation
When you are happy with the placement of the ESL/ transi-
tion towers, we recommend that you install the ETC spikes.
This procedure requires at least two people—one to tip the
tower and one to install the spikes.
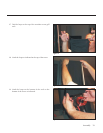
1 With one person standing behind the tower carefully
tip the tower back.
2 Remove the glider feet and the screw the 2 front
spikes into place making sure to thread the large black
rubber washer onto the spike post.
3 With one person standing in front of the tower carefully
tip the tower forward.
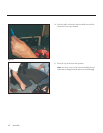
4 Remove the remaining glider foot and the screw the
back spikes into place making sure to thread the large
black rubber washer onto the spike post.
Figure 68. Ideal placement of the ESL/Transition towers.
Speaker Placement (Fine Tuning)
Making It Work Together 31
Tweaking the Room
Figure 69. Statement spikes.


