35
ENGLISH
Getting Started Connections
Basic Operations Advanced OperationsAdvanced Operations TroubleshootingExplanation termsInformation Specifi cations Index
Other functions
Inputting characters
You can change the names as desired using the “Preset Name”
(vpage16), “Napster Account” (vpage21), “Pandora account”
(vpage22), “Rhapsody account” (vpage23), and character input for
the network functions.
For inputting characters, there are two methods, as shown below.
Method Operations
Using the number
buttons
• Operating with the remote control unit.
• Multiple characters are assigned to
a button, and each time the button is
pressed, a character is switched.
Using the cursor
buttons
• Operating with the remote control unit
or the main unit.
• Use uio p and [ENTER/MEMO] or
<ENTER> to input characters.
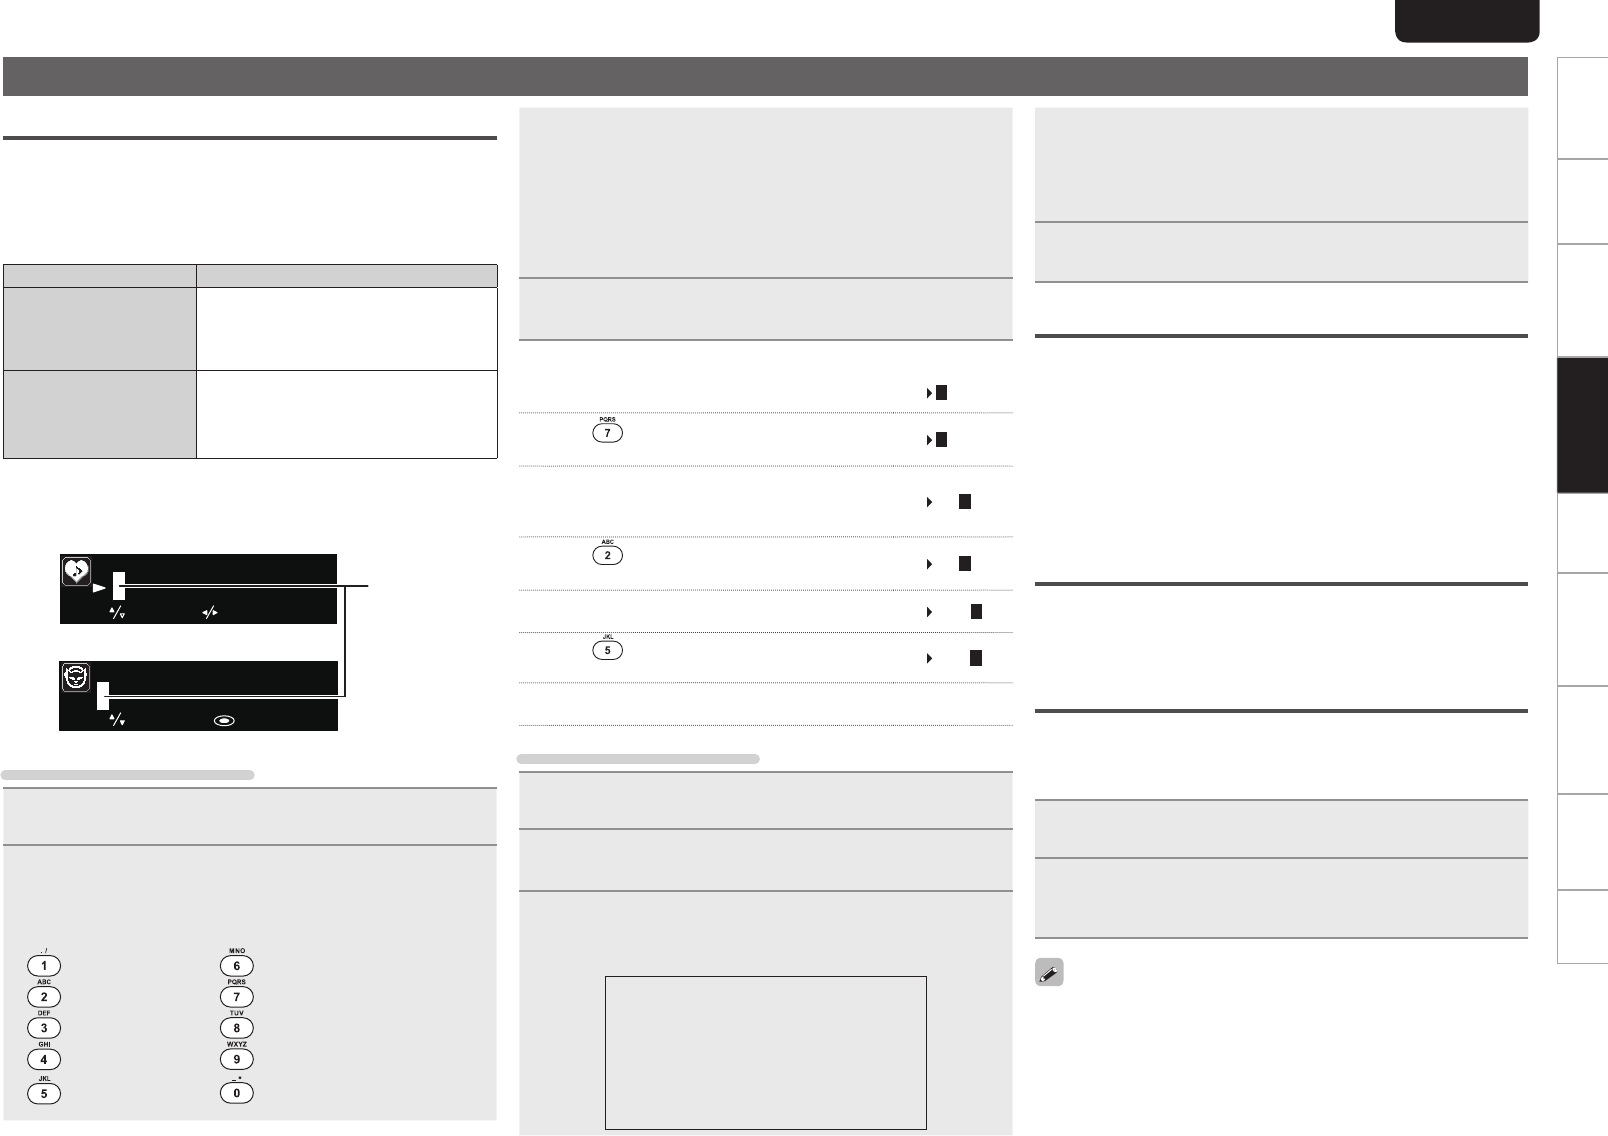
n Display of an input screen
select move
P03
[Username]
select
: enter
GPreset nameH
GAccount inputH
Cursor
Using the number buttons
1
Display the screen for inputting characters
.
2
Place the cursor at the character to be changed with
o p and press [NUMBER] (0 – 9) until the desired
character is displayed.
• The types of characters that can be input are as shown below.
1 . @ - _ / :
˜
m n o M N O 6
a b c A B C 2 p q r s P Q R S 7
d e f D E F 3 t u v T U V 8
g h i G H I 4 w x y z W X Y Z 9
j k l J K L 5
0 (Space) ! “ # $ % & ‘ ( )
z
+ ,
; < = > ? [ \ ] ^ ` { | }
• The input character type can be switched by pressing [MODE]
while the display name is being changed.
• For entering the characters assigned to one number button
continuously, press p to move the cursor to the right after entering
a character then enter the next character.
• For entering characters assigned to separate buttons, press the
number button continuously. The cursor automatically moves to
the next position, and the entered character is registered.
3
Repeat step 2 to change the name then press [ENTER/
MEMO]
or <
ENTER
> to register it.
Example: For changing characters from “POPS” to “ROCK”
q Place the cursor at “P”.
POPS
w Press
seven times.
ROPS
“P” changes to “R”.
e Press p twice.
ROPS
“R” is automatically registered, and the cursor
placed “P”.
r Press
six times.
ROCS
“P” changes to “C”.
t Press p.
ROCS
“C” is registered and the cursor placed “S”.
y Press
fi ve times.
ROCK
“S” changes to “K”.
u Press
[ENTER/MEMO] or <ENTER> to register the input name.
Using the cursor buttons
1
Display the screen for inputting characters
.
2
Use o p to set the cursor to the character you want
to change.
3
Use ui to change the character.
• The types of characters that can be input are as shown below.
G Upper case charactersH
ABCDEFGHIJKLMNOPQRSTUVWXYZ
GLower case charactersH
abcdefghijklmnopqrstuvwxyz
GSymbolsH ! “ # $ % & ‘ ( )
z
+ , - . / : ; <
= > ? @ [ \ ] ^ _ ` { | }
˜
GNumbersH
0123456789 (Space)
• The input character type can be switched by pressing [MODE]
while the display name is being changed.
n Other buttons
• Press 8 to delete the character.
• Press
9 to insert a space.
4
Repeat steps 2 and 3 to change the name then press
[ENTER/MEMO] or <
ENTER
> to register it.
Auto power on
When the power is in standby, the power turns on when any of
the buttons below other than ON/STANDBY is operated, and the
respective operation is performed.
• <5> ...............The disc tray opens.
• 13 ...............Playback of the “DISC” or “iPod/USB” starts.
• [TUNER] ........Playback of the tuner starts.
• [DISC] ............ The input source switches to “DISC” and the disc
starts playing.
• [iPod/USB] .... The input source switches to “iPod/USB” and the
USB starts playing.
Last function memory
This stores the settings as they were immediately before going into
the standby mode.
When the power is turned back on, the settings are restored to as
they were immediately before going into the standby mode.
Resetting the microprocessor
Perform this procedure if the display is abnormal or if operations
cannot be performed.
When the microprocessor is reset, all the settings are reset to their
default values.
1
Unplug the power cord.
2
Plug the power cord into a power outlet while pressing
<VOLUME d> and <VOLUME f> simultaneously.
“Initialized” is displayed.
If “Initialized” does not display in step 2, start over from step 1.


