


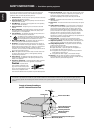

CONTROLS AND CONNECTIONS
6
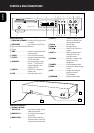
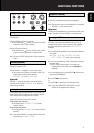
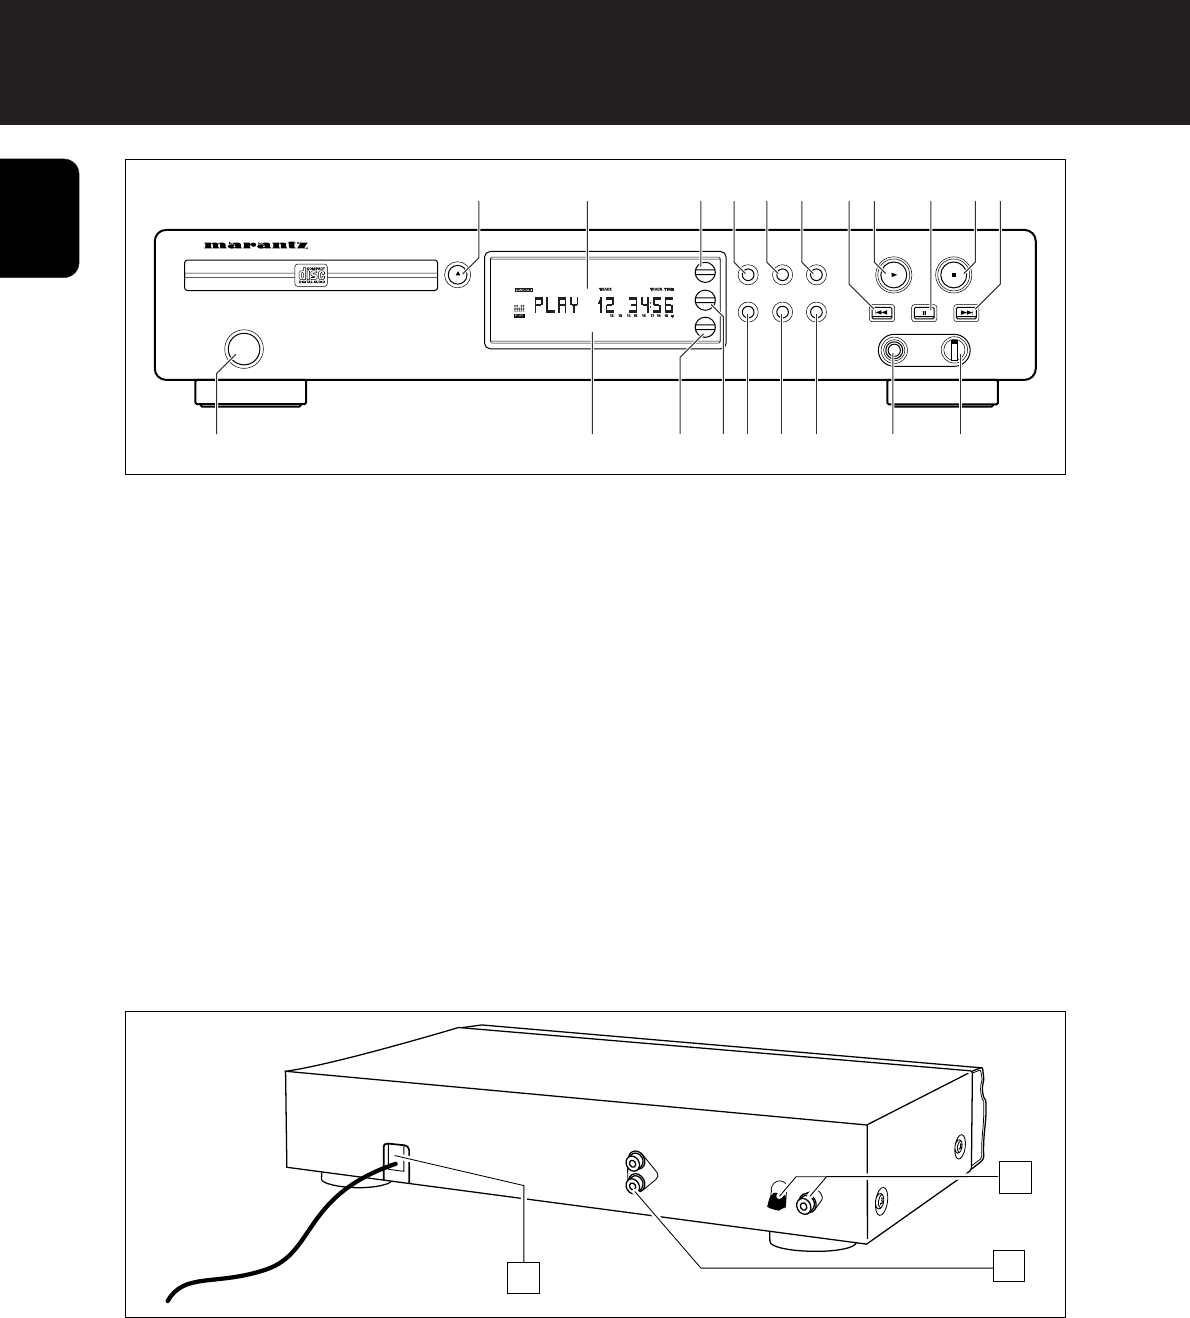
Controls on the front
1 POWER ON / STANDBY...switches the CD player on and
to standby
2 OPEN·CLOSE......................opens and closes the CD tray
3 Sensor for the infrared remote control
4 Display
5 TIME....................................switches through the different
time information
6 SCROLL...............................scrolls CD-Text information
7 CD TEXT..............................switches through the different
CD-Text information
8 HIGHLIGHT.........................plays the beginning of each
track or – if a CD-Text disc
contains highlights – the
highlights of a CD
9 SHUFFLE.............................plays a CD or a program in
random order
0 FADE....................................fades CD play out and in
! PREV. ∞ .............................selects the beginning of the
current or a previous track,
and searches backward
@ PLAY 2................................starts CD play
# PAUSE ;..............................interrupts CD play
$ STOP 9 ...............................stops CD play and clears a
program
% NEXT §..............................selects the beginning of a
subsequent track, and
searches forward
^ VOLUME .............................decreases or increases the
volume level of the
headphones
& PHONES..............................6.3mm headphone socket
* PEAK ...................................searches the loudest passage
of a CD
( EDIT.....................................changes the settings for
recording on tape or
CD-Recordable
) PROGRAM..........................programs track numbers
English
POWER ON/STANDBY
OPEN/CLOSE
TIME
HIGHLIGHT SHUFFLE FADE
PEAKEDITPROG
STOPPLAY
PREV PAUSE NEXT
PHONES
CD REWRITABLE PLAYBACK
CD PLAYER CD5000
SCROLL
CD TEXT
LEVEL
1
24
3
56
7890 !@ # %
^&
$
*()
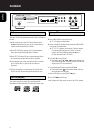
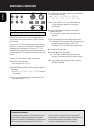
Connections at the back
¡ COAXIAL / OPTICAL
DIGITAL OUT......................to connect the digital input of
a digital audio device
™ LINE OUT L R .....................to connect the audio input of
an amplifier
£ MAINS LEAD .....................After all other connections
have been made, connect this
mains lead to the wall socket.
21
22
23