


75
VS-2
ENGLISH
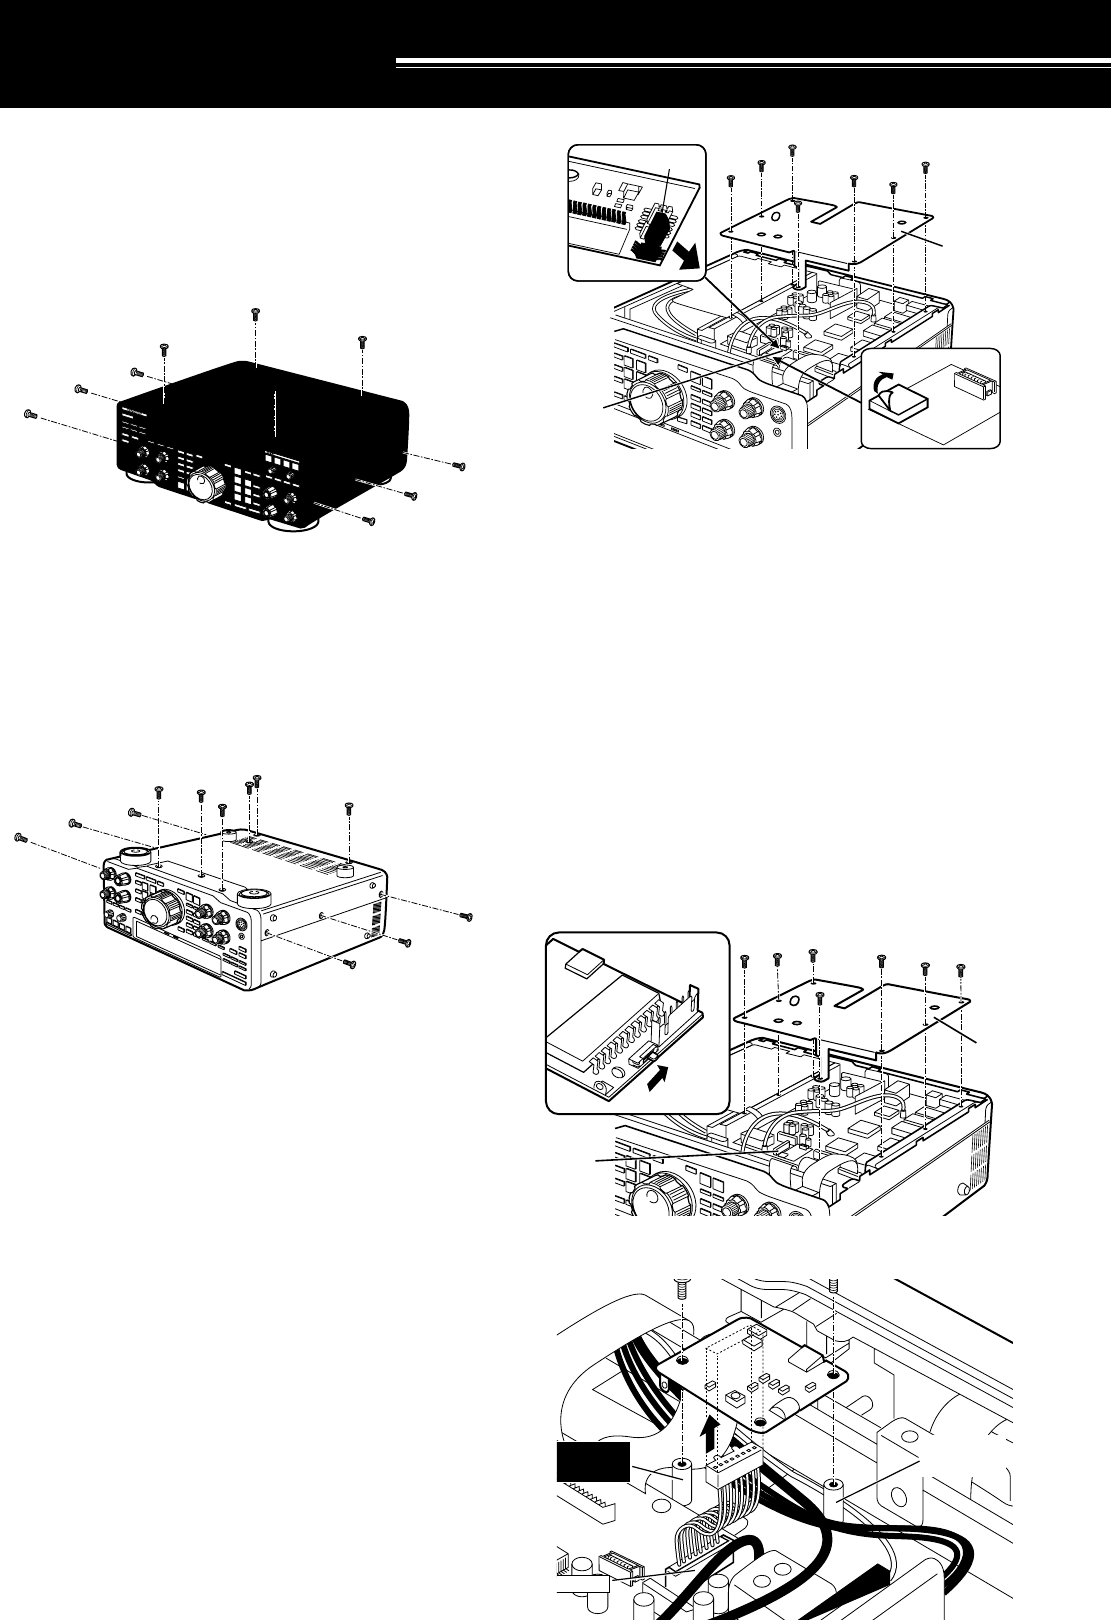
CN6
Cover A
INSTALLING OPTIONS
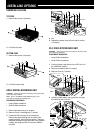
REMOVING THE CASE
TOP CASE
1 Remove the screws (10 screws).
2 Lift off the top case.
BOTTOM CASE
1 Remove the screws (12 screws).
2 Lift off the bottom case.
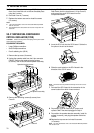
DRU-3 DIGITAL RECORDING UNIT
CAUTION:
Switch OFF the power and unplug the DC power cable
before beginning installation.
Note:
Refer to “INTERNAL ADJUSTMENTS” {page 70} for
information on adjusting the recording level.
EQUIPMENT REQUIRED:
• Large Phillips screwdriver
• Small Phillips screwdriver
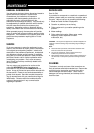
1 Remove the bottom case (12 screws).
2 Remove Cover A (see diagram) (7 screws).
3 Locate the CN5 connector in the transceiver.
Remove the paper backing from one side of the
supplied cushion, then install the cushion. Remove
the paper backing from the other side of the installed
cushion, then plug the DRU-3 connector (CN901)
into CN5.
4 Re-install Cover A (7 screws).
5 Replace the bottom case and re-install its screws
(12 screws).
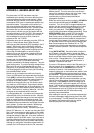
VS-2 VOICE SYNTHESIZER UNIT
CAUTION:
Switch OFF the power and unplug the DC power cable
before beginning installation.
EQUIPMENT REQUIRED:
• Large Phillips screwdriver
• Small Phillips screwdriver
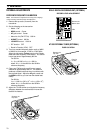
1 Confirm that the small switch on the VS-2 unit is in
the “ENGLISH” position.
2 Remove the bottom case (12 screws).
3 Remove Cover A (7 screws).
4 Locate the CN6 cable in the transceiver, and plug
this cable into the VS-2 unit.
CN5
CN5
q
CN901
DRU-3
w
Cover A
VS-2
CN6
T
hreaded
p
ost
Threaded
post