


English
|
11
3 Select the text
Turn the Control knob.
4 Exit Text display selection mode
Press the [FNC] button.
⁄
• If the selected display item does not have any
information, alternative information is displayed.
• When LX-AMP is connected, the item setup by the
Display mode of LX-AMP is displayed.
• Some items cannot be selected depending on the
display type and row.
• When selecting “Folder name” while playing with
iPod, names will be displayed depending on currently
selected browsing items.
• If the iPod Control by Hand Mode is set to on while
playing the iPod, “iPod by Hand Mode” is displayed.
• If all characters cannot be displayed while playing with
iPod, the file number in the list is displayed.
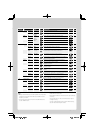
Information Display
Music title “TITLE***”
Folder name “FLD***”
File name “FILE***”
Auxiliary Input Display Setting
Selects the display when changing to Auxiliary
input source.
1 Select the AUX source
Press the [SRC] button.
2 Enter Auxiliary input display setting mode
Select “MENU” > “Name Set”.
For how to select Function Control item, refer to
<Function Control> (page 6).
3 Enter Auxiliary input display setting mode
Press the Control knob for at least 1 second.
The presently selected Auxiliary input display is
displayed.
4 Select the Auxiliary input display
Turn the Control knob.
“AUX”/ “DVD”/ “PORTABLE”/ “GAME”/ “VIDEO”/ “TV”
5 Exit Auxiliary input display setting mode
Press the [FNC] button.
⁄
• When operation stops for 10 seconds, the name at that
time is registered, and the Auxiliary input display setting
mode closes.
• The Auxiliary input display can be set only when the
built-in auxiliary input or the auxiliary input of optional
KCA-S220A is used. On the KCA-S220A, “AUX EXT” is
displayed by default.
• AUX source is initially set to “OFF”. Before display setting,
set “Built in AUX” described in <Function Control> (page
6) to “ON”.
: Select “MENU”
> “Built in AUX”
Illumination Color Selection
Selecting the Illumination Color of the panel.
1 Enter Illumination color selection mode
Select “SETUP” > “Color Select”.
For how to select Function Control item, refer to
<Function Control> (page 6).
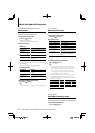
2 Select the place where you want to set the
Illumination Color
Place Display
All “All”
Display “Display”
Right “Right”
Left “Left”
Turn the Control knob and push the center
when the desired item is displayed.
3 Select the Illumination Color
Turn the Control knob and push the center
when the desired item is displayed.
Select the color from “Variable Scan”/ “Color1” —
“Color 10”/ “User”.
Creating “User” color
You can create your original color during the
selection from “Color1” — “Color10.”
The color you created can be called when you
select “User”.
1. Press the Control knob for at least 1 second.
Enter the detail color adjustment mode.
2. Set the color.
Operation type Operation
To select the color to adjust.
(red, green, or blue)
Push the Control knob towards right
or left.
To adjust color.
(Range: 0 – 9)
Turn the Control knob or push it
towards up or down.
3. Press the Control knob.
Exit the detail color adjustment mode.
4 Exit Illumination color selection mode
Press the [FNC] button.