


5 6
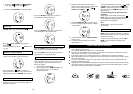
CONTROLS
1
2
3
4
5
6
7
8
9
10
11
12
13
14151617
18
19
20
21
22
23
24
25
26
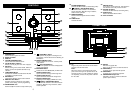
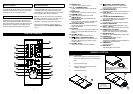
Front view
POWER Button
Used to turn the system on and off
RIGHT CD DOOR
DISPLAY
VOLUME UP/DOWN Button
Used to select the desired volume
CD SELECTION 1-4 Button
Selects a CD to play from one of the 4 players
EQ Button
Selects among “FLAT, POP, ROCK, JAZZ and
DISCO” as the tonal qualities desired for any
selection
TUNER/BAND Button
Activates the TUNER and selects the AM, FM,
or FM/Stereo reception bands
MUTE Button
Temporarily switches off the audio if desired
MEM./CLK ADJ. Button
Supplies memory functions for tuner station
presets, clock setting, and CD programming
HEADPHONES Jack
Stereo headphone socket: accepts 3.5mm plug
1.
2.
3.
4.
5.
6.
7.
8.
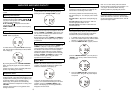
STOP/FM ST. Button
Interrupts the CD playback / clearing the CD
programme, provides stereo-mono switching for
FM stations
REPEAT/PRESET Button
Repeat function for CD mode / retrieve preset
radio stations
PLAY/PAUSE Button
Initiates CD operation and starts CD playback /
pauses CD playback
MP3 MODE Button
Selects TITLE or ALBUM(folder) in MP3 mode
OPEN/CLOSE R Button
Opens and closes the right CD changer door
OPEN/CLOSE L Button
Opens and closes the left CD changer door
DISPLAY MODE Button
Switching to time display (TIMER ON / OFF)
TUNING + SKIP/SEARCH Button
CD forward title selection / CD forward search
operation / Manual tuning of stations, station
search operation
11.
12.
13.
14.
15.
16.
17.
18.
9.
10.
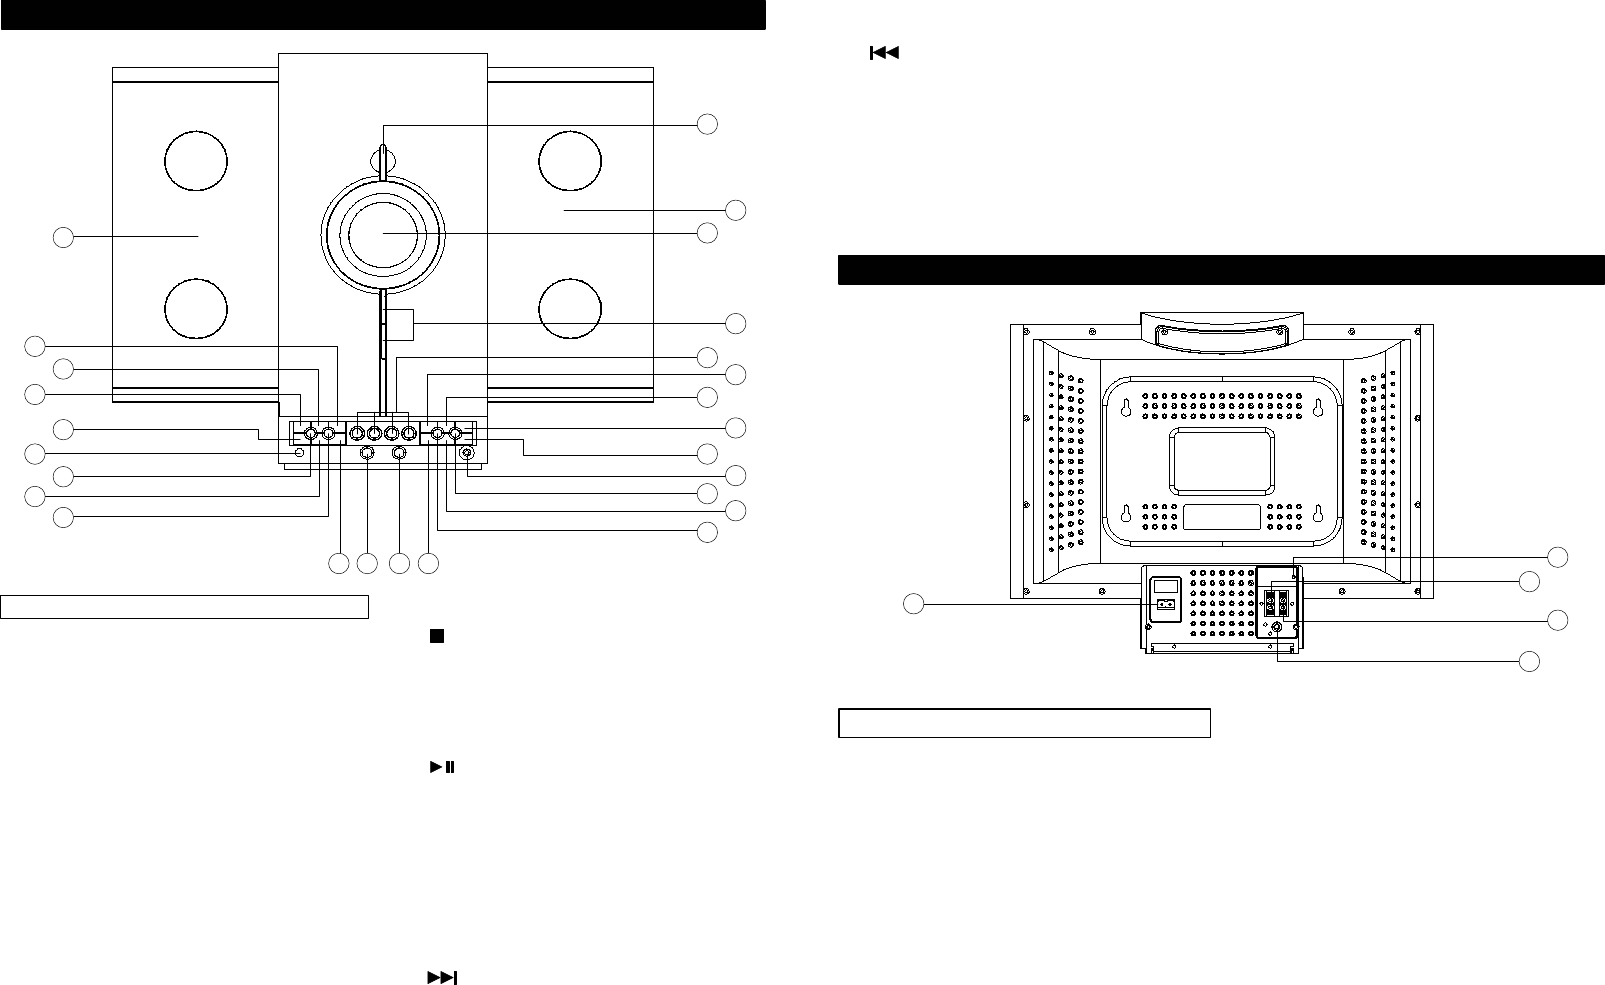
CONNECTIONS
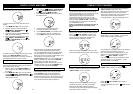
FOLDER DOWN Button
Activates the MP3 folders (in descending order)
TUNING - SKIP/SEARCH Button
CD backward title selection / CD backward
search operation / Manual tuning of stations,
station search operation
REMOTE SENSOR
Receives infrared signals from the remote
control
TIMER Button
Activates the timer
19.
SNOOZE Button
Turns off the unit for 9 minutes, after which the
unit will then resume its previous function
FOLDER UP Button
Activates the MP3 folder (in ascending order)
SLEEP Button
Set the automatic switch-off time
LEFT CD DOOR
23.
24.
25.
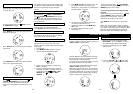
AC
Plug the AC power cord into this socket before
plugging it into the wall outlet
Note:
When the system is connected to AC power,
parts of the unit may be in operation due to its
stand-by function. In order to switch the system
off completely, remove the AC power cord from
the AC outlet.
27.
FM ANT.
FM antenna “pigtail” wire
Note: Do not connect to an external antenna
SPEAKERS R
Terminals for the right channel speaker
SPEAKERS L
Terminals for the left channel speaker
SUBWOOFER Output Jack
Optionally, connect an external subwoofer
speaker (not included)
28.
29.
30.
Rear view
27
28
29
30
31
31.
21.
22.
20.
26.