


– 57 –
English
There are three timers available — Recording Timer, Daily
Timer, and Sleep Timer.
Before using these timers, you need to set the built-in
clock.
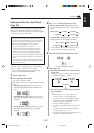
Setting the Clock
You can set the clock whether the unit is turned on or off
(on standby.)
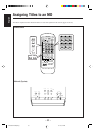
On the remote control ONLY:
1
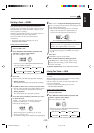
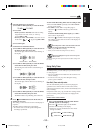
Press CLOCK/TIMER repeatedly until “TIME
ADJUST” appears on the display.
The hour digit flashing on the display.
2
Press ¢ or 4 repeatedly to adjust the hour.
• When press and hold the button, the hour digit
changes continuously.
3
Press SET to set the hour.
The minute digit starts flashing on the display.
• If you want to correct the hour again, press
CANCEL.
The hour digit starts flashing again.
4
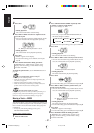
Press ¢ or 4 repeatedly to adjust the minute.
• When press and hold the button, the minute digit
changes continuously.
5
Press SET to finish setting the clock.
The built-in clock starts.
To adjust the clock again
Press CLOCK/TIMER repeatedly in step
1
until “TIME ADJUST”
appears on the display, then perform steps 2 to 5 above.
When you unplug the AC power cord or if a power
failure occurs
The clock setting will be reset to “0:00.” If this happen, you need
to set the clock again.
To check the clock time by sound while the unit is
turned off (on standby)
Press DIMMER while the key-touch tone is set to on. The clock
time will be indicated by sound.
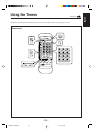
Using Recording Timer
With Recording Timer, you can make an unattended
recording.
• You can set Recording Timer whether the unit is turned
on or off (on standby.)
• To correct a mis-entry any time during the setting
process, press CANCEL.
How Recording Timer actually works
The unit automatically turns on, and starts recording on an
MD or a tape when the timer-on time comes. Then, when
the timer-off time comes, the recording stops and the unit
automatically turns off (on standby).
Recording Timer works only once, but the timer settings
remain stored in memory until you reset them or unplug the
AC power cord.
On the remote control ONLY:
1
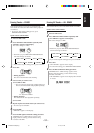
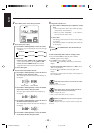
Press CLOCK/TIMER repeatedly until “REC
TIMER” appears on the display.
The timer ( ) indicator lights, and the REC indicator
starts flashing on the display.
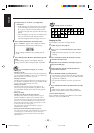
• Each time you press the button, the timer mode
changes as follows:
2
Press 4 to select “ON,” then press SET.
3
Select the source to record.
1) Press ¢ or 4 repeatedly to select the source.
• Each time you press the buttons, the source changes
as follows:
2) Press SET.
• When you select “FROM FM” or “FROM AM,”
select a preset number by pressing ¢ or 4.
• When you select “FROM AUX,” the external
equipment also need to have the timer function.
3) Press SET again.
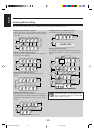
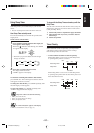
Ex. When pressing SET after
adjusting the hour to 10.
REC
Ex. When pressing SET after
adjusting the minute to 10.
FROM AUX
FROM AM
FROM FM
REC TIMER DAILY TIMER
TIME ADJUST
Clock Time
EN56-60UX-F70MD[UB]_f 01.7.10, 5:22 PM57