


6
Getting Started
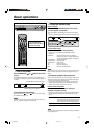
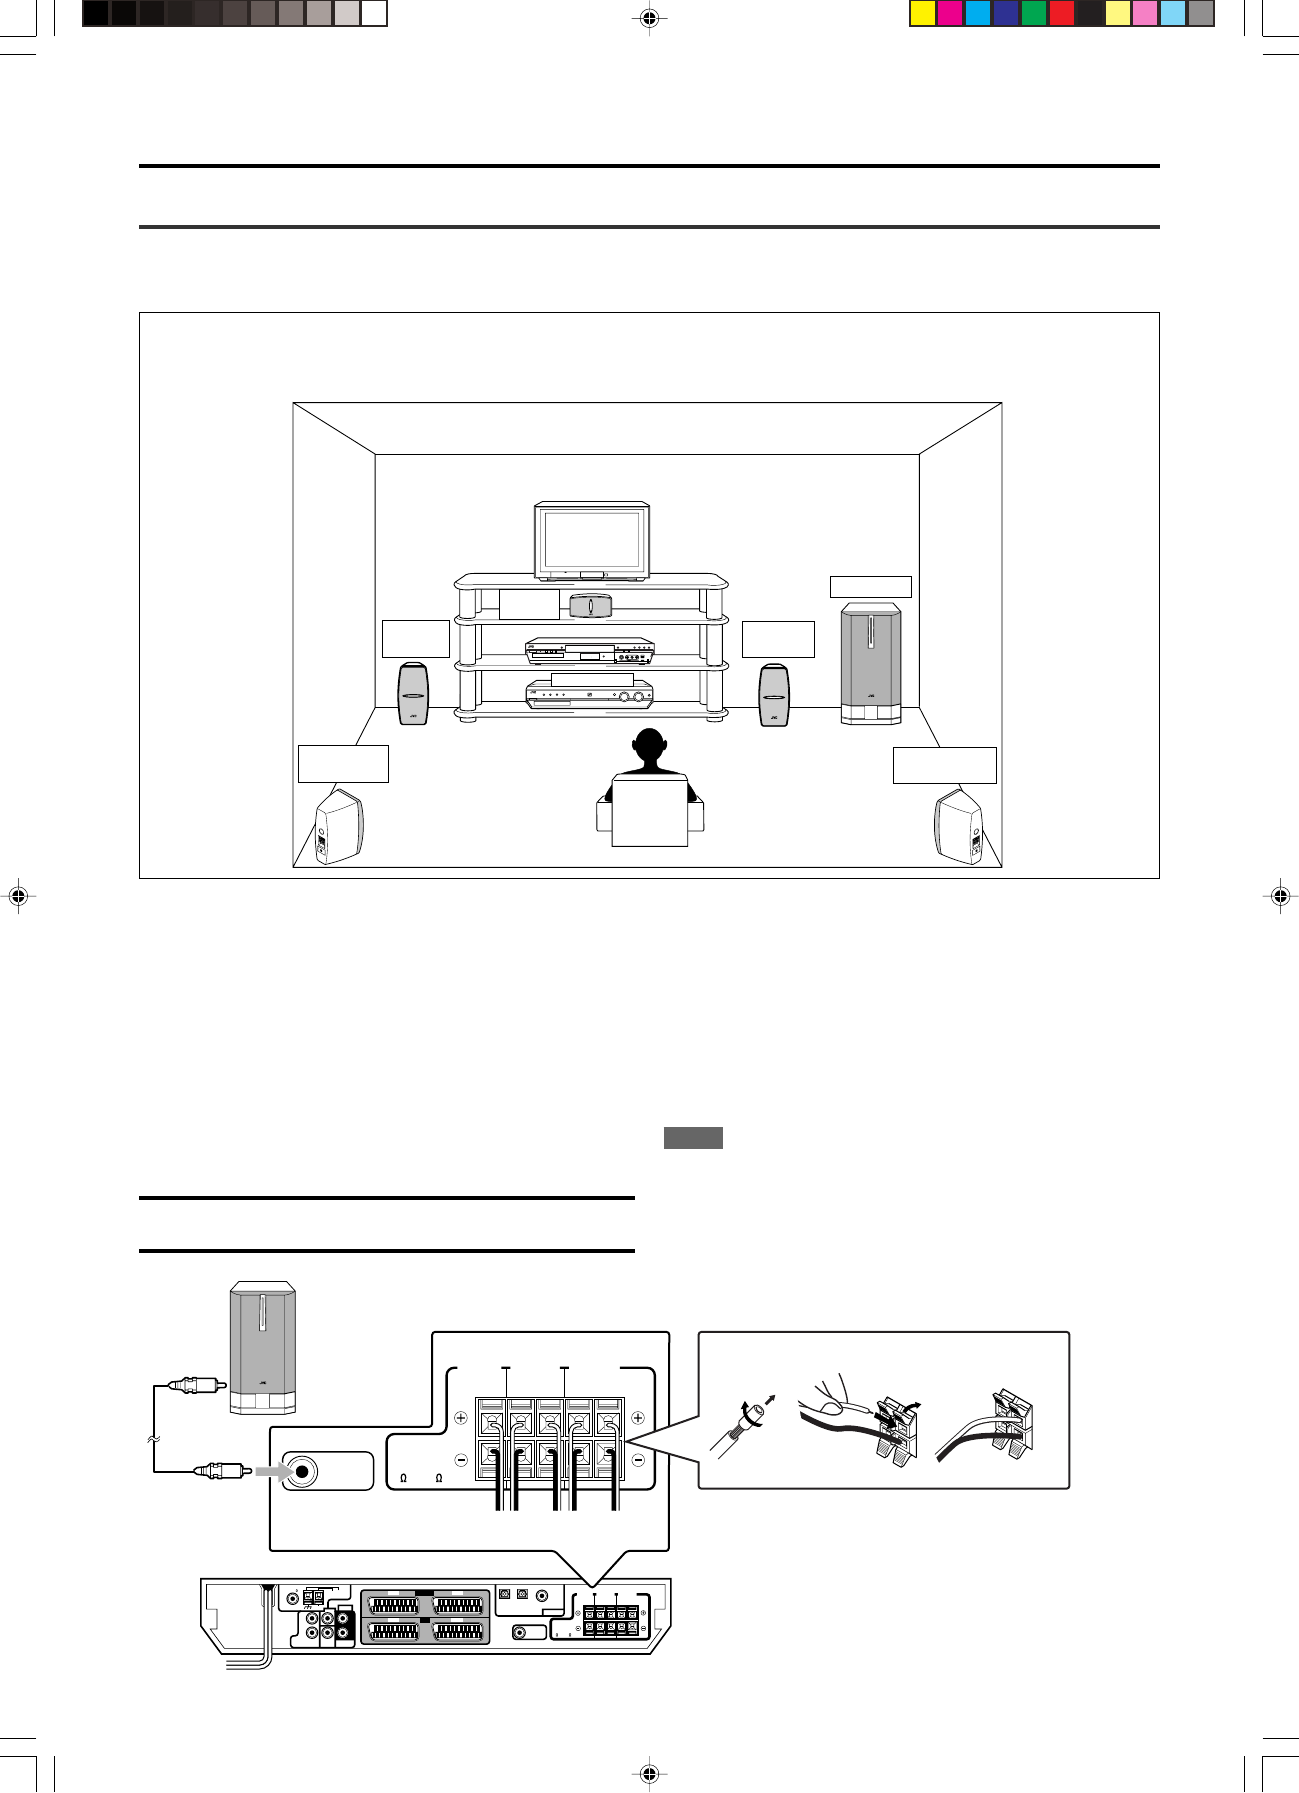
Connecting the speakers
Turn off all components before connections.
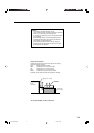
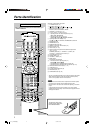
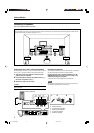
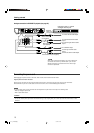
Speaker Layout Diagram
After connecting the front, center and surround speakers, and/or a subwoofer, set the speaker setting information properly to obtain the best
possible surround effect. For details, see pages 15 to 18.
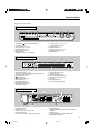
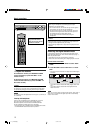
Connecting the front, center, and surround speakers
For each speaker, connect the (+) and (–) terminals on the rear panel
to the (+) and (–) terminals marked on the speakers respectively.
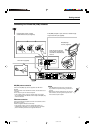
1
Twist and remove the insulation at the end of each
speaker cord (not supplied).
2
Press and hold the clamp of the speaker terminal (1),
then insert the speaker cord (2).
3
Release the finger from the clamp.
CAUTION:
Use speakers with the SPEAKER IMPEDANCE indicated by the
speaker terminals.
Powered subwoofer
COAXIAL
AM LOOP
ANTENNA
DVD
IN
AUDIO
L
R
L
R
FM 75
AM EXT
CENTER
FRONT
AV IN / OUT
AV IN
SUBWOOFER
OUT
DIGITAL IN
DIGITAL 3
(DVD)
DIGITAL 2
(STB)
DIGITAL 1
(VR)
CENTER
SPEAKER
SURROUND
SPEAKERS
RIGHT LEFT RIGHT LEFT
FRONT
SPEAKERS
SUB
WOOFER
SURR
(REAR)
CAUTION:
SPEAKER
IMPEDANCE
8
~
16
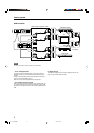
DVD
VR TV
STB
SUBWOOFER
OUT
CENTER
SPEAKER
SURROUND
SPEAKERS
RIGHT LEFT RIGHT LEFT
FRONT
SPEAKERS
CAUTION:
SPEAKER
IMPEDANCE
8
~
16
1
2
1
2
3
A
B
C
D
E
Connecting the subwoofer
By connecting a subwoofer, you can enhance the bass or reproduce
the original LFE signals recorded in the digital software.
Connect the input jack of a powered subwoofer to the
SUBWOOFER OUT jack on the rear panel, using a cord
with RCA pin plugs (not supplied).
• Refer also to the manual supplied with your subwoofer.
NOTE
You can place a subwoofer wherever you like since bass sound is
non-directional. Normally place it in front of you.
A To center speaker
B To right surround speaker
C To left surround speaker
D To right front speaker
E To left front speaker
Center
speaker
Subwoofer
Left front
speaker
Left surround
speaker
Right front
speaker
Right surround
speaker
RX-ES9SL
01-10_RX-ES9SL[B]f 03.6.27, 16:456