


29
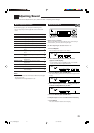
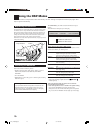
Operating JVC’s Audio/Video Components
You can operate JVC’s audio and video components with this receiver’s remote control, since control signals for JVC’s
components are preset in the remote control.
Tuner
You can always perform the following operations:
FM/AM: Alternate between FM and AM.
After pressing FM/AM, you can perform the following operations
on a tuner:
1 – 10, +10: Select a preset channel number directly.
For channel number 5, press 5.
For channel number 15, press +10, then 5.
For channel number 20, press +10, then 10.
FM MODE: Change the FM reception mode.
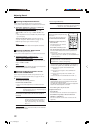
CD player
After pressing CD, you can perform the following operations on a
CD player:
3: Start playing.
4: Return to the beginning of the current (or previous)
track.
¢: Skip to the beginning of the next track.
7: Stop playing.
8: Pause playing. To resume, press 3.
1 – 10, +10: Select a track number directly.
For track number 5, press 5.
For track number 15, press +10, then 5.
For track number 20, press +10, then 10.
For track number 30, press +10, +10, then 10.
CD recorder
After pressing TAPE/CDR, you can perform the following
operations on a CD recorder:
3: Start playing.
4: Return to the beginning of the current (or previous)
track.
¢: Skip to the beginning of the next track.
7: Stop playing and recording.
8: Pause playing or recording. To resume, press 3.
REC PAUSE: Enter recording pause.
To start recording, press this button then 3.
Cassette deck
After pressing TAPE/CDR, you can perform the following
operations on a cassette deck:
3: Start playing.
REW: Fast-wind the tape from right to left.
FF: Fast-wind the tape from left to right.
7: Stop playing and recording or fast-wind the tape.
8: Pause playing or recording. To resume, press 3.
REC PAUSE: Enter recording pause.
To start recording, press this button then 3.
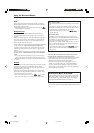
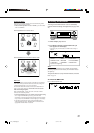
Operating Audio Components
IMPORTANT:
To operate JVC’s audio components using the supplied remote
control:
• You need to connect JVC’s audio components through the
COMPU LINK (SYNCHRO) jacks (see page 28) in addition to
the connections using cables with RCA pin plugs (see page 6).
• Aim the remote control directly at the remote sensor on the
receiver.
• To operate the target component using the COMPU LINK remote
control system, set the source name correctly if required. (See
page 12.)
• Refer also to the manuals supplied with your components.
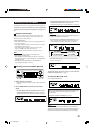
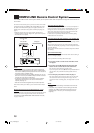
Sound control section (Amplifier)
You can always perform the following operations:
STANDBY/ON AUDIO:
Turn on or off the receiver.
VOLUME +/–: Adjust the volume level.
MUTING: Turn on or off sound muting.
ANALOG/DIGITAL: Switch the analog and digital input
alternately.
DIMMER: Dim or brighten the display.
SLEEP: Set the Sleep Timer.
SURROUND: Turn on and select Surround modes.
DSP: Turn on and select DSP modes.
SURROUND/DSP OFF:
Turn off the Surround and DSP mode.
After pressing SOUND, you can perform the following operations
by using the number buttons:
FRONT L then LEVEL +/–: Adjust the left front speaker output
level.
FRONT R then LEVEL +/–: Adjust the right front speaker output
level.
CENTER then LEVEL +/–: Adjust the center speaker output level.
SURR L then LEVEL +/–: Adjust the left surround speaker
output level.
SURR R then LEVEL +/–: Adjust the right surround speaker
output level.
SUBWFR then LEVEL +/–: Adjust the subwoofer output level.
EFFECT: Adjust the effect level.
TEST: Turn on or off test tone output.
Note:
After adjusting sounds, press the corresponding source selection
button to operate your target source by using the number buttons;
otherwise, the number buttons cannot be used for operating your
target source.
Continued on the next page
28-35_RX-5060B[J].p65 05.12.17, 14:3029