18
English
Changing the Playing Rhythm
Pattern ———————————————
■
1. During playing the rhythm pattern, press
MODE button on the Unit to select your
favorite Rhythm mode.
■
2. Within five seconds, turn the Jog dial to
select your favorite rhythm pattern.
The selected rhythm pattern will be played.
Adjusting the Tempo During
Playback ——————————————
■
1. During playing the rhythm pattern, press
the TEMPO button on the Unit.
The current tempo appears on the display for five seconds.
■
2. Within five seconds, turn the Jog dial to
increase or decrease the tempo.
You can adjust the tempo between 60 and 160.
• The tempo you have changed will be maintained even when
the System is turned off. However, it will be reset to the in-
itial value when you select other rhythm pattern.
You can generate two kinds of scratch sound (scratch-high and
scratch-low) by turning the Jog dial.
The scratch sound can be mixed with the following all sources to-
gether.
• BIRDS, WAVES, or rhythm pattern generated from the
Rhythm Machine
• Dram pad pattern generated from the Rhythm Machine
• Music source except Tuner
• MIC and Guitar inputs
■
1. Press the SCRATCH button on the Unit.
"SCRATCH" will appear on the display.
■
2. Turn the Jog dial to generate the scratch
sound.
When you turn the Jog dial clockwise or counterclockwise, the
scratch-high sound or scratch-low sound will be generated, re-
spectively. When you turn the Jog dial rapidly, the scratch
sound will be generated continuously.
To stop the scratch sound generation, press the
SCRATCH button once again to display "OFF".
Note: You cannot generate the scratch sound if Tuner is selected.
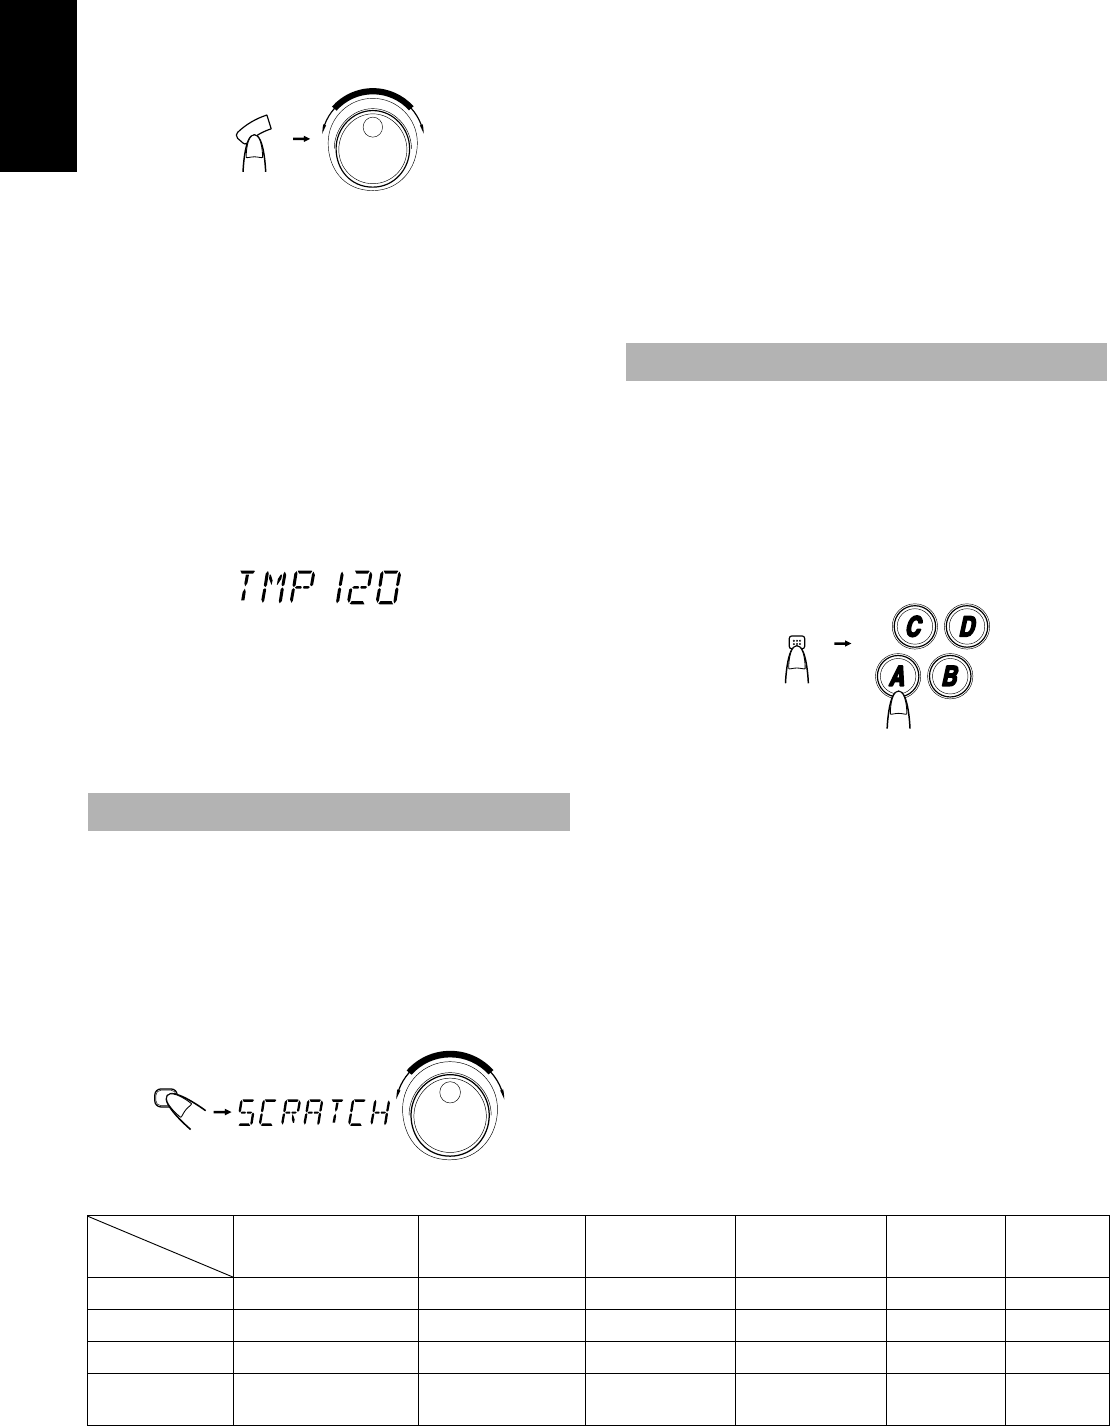
You can generate 20 pad patterns by pressing the Drum Pads A to
D on the Unit. Pad patterns are assigned to the Drum Pads A to D in
each Pad mode as shown in the "Pad Pattern Table".
The pad pattern can be mixed with the following all sources together.
• BIRDS, WAVES, or rhythm pattern generated from the
Rhythm Machine
• Scratch sound generated from the Rhythm Machine
• Music source except Tuner
• MIC and Guitar inputs
■
1. Press the PAD MODE button on the Unit to
select Pad mode.
Each time you press the button, mode changes as follows.
STD DR=PWR DR=TOM+HI=PERCUS=VOICE=
OFF=(back to the beginning)
■
2. Press the Drum Pads A to D on the Unit.
Each time you press the Pad, corresponding pad pattern which
is shown in the "Pad Pattern Table" will be generated.
Note: You cannot play the Pad pattern if Tuner is selected.
[Pad Pattern Table]
Abbreviations:
STD DR: Standard drum kit (bass, snare, high-hat, cymbal) PWR DR: Power drum kit TOM+HI: Tomtom and high-hat group
PERCUS: Percussion, ethnic percussion VOICE: Voice and onomatopoeic sounds
Generating Scratch Sound
M
O
D
E
S
C
R
A
T
C
H
J
O
G
/
R
H
Y
T
H
M
S
E
L
E
C
T
(During playing the
rhythm pattern)
(Within 5 seconds)
(Playing rhythm
pattern changes.)
SCRATCH
S
C
R
A
T
C
H
J
O
G
/
R
H
Y
T
H
M
S
E
L
E
C
T
Generating the Pad Pattern
PAD MODE
PAD MODE
Pad
STD DR
(Standard Drum)
PWR DR
(Tom + Hihat)
TOM+HI
(Tom & Hihat)
PERCUS
(Percussion)
VOICE
(Voice, etc.)
OFF
A
Standard-Bass Drum Power-Bass Drum High Floor Tom High Agogo Marian —
B
Standard Snare Power Snare
Low Floor Tom
Low Agogo Yeh! —
C
Standard-Closed Hihat Power-Closed Hihat Open Hihat Open Hi Conga Gun —
D
Power-Crash Cymbal
Power-Crash Cym-
bal
Pedal Hihat Hand Clap Engine —
RD-DP100(E)-Eng.fm Page 18 Monday, March 6, 2000 10:32 AM


