


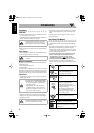


6
English
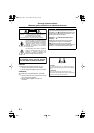
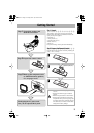
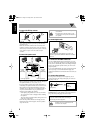
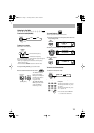
To connect the AM loop antenna
• If the AM loop antenna wire or speaker cords are covered with
vinyl, remove the vinyl to expose the tip of the antenna by
twisting the vinyl.
• Make sure the antenna conductors do not touch any other
terminals, connecting cords and power cord. Also, keep the
antennas away from metallic parts of the System, connecting
cords, and the AC power cord. This could cause poor
condition.
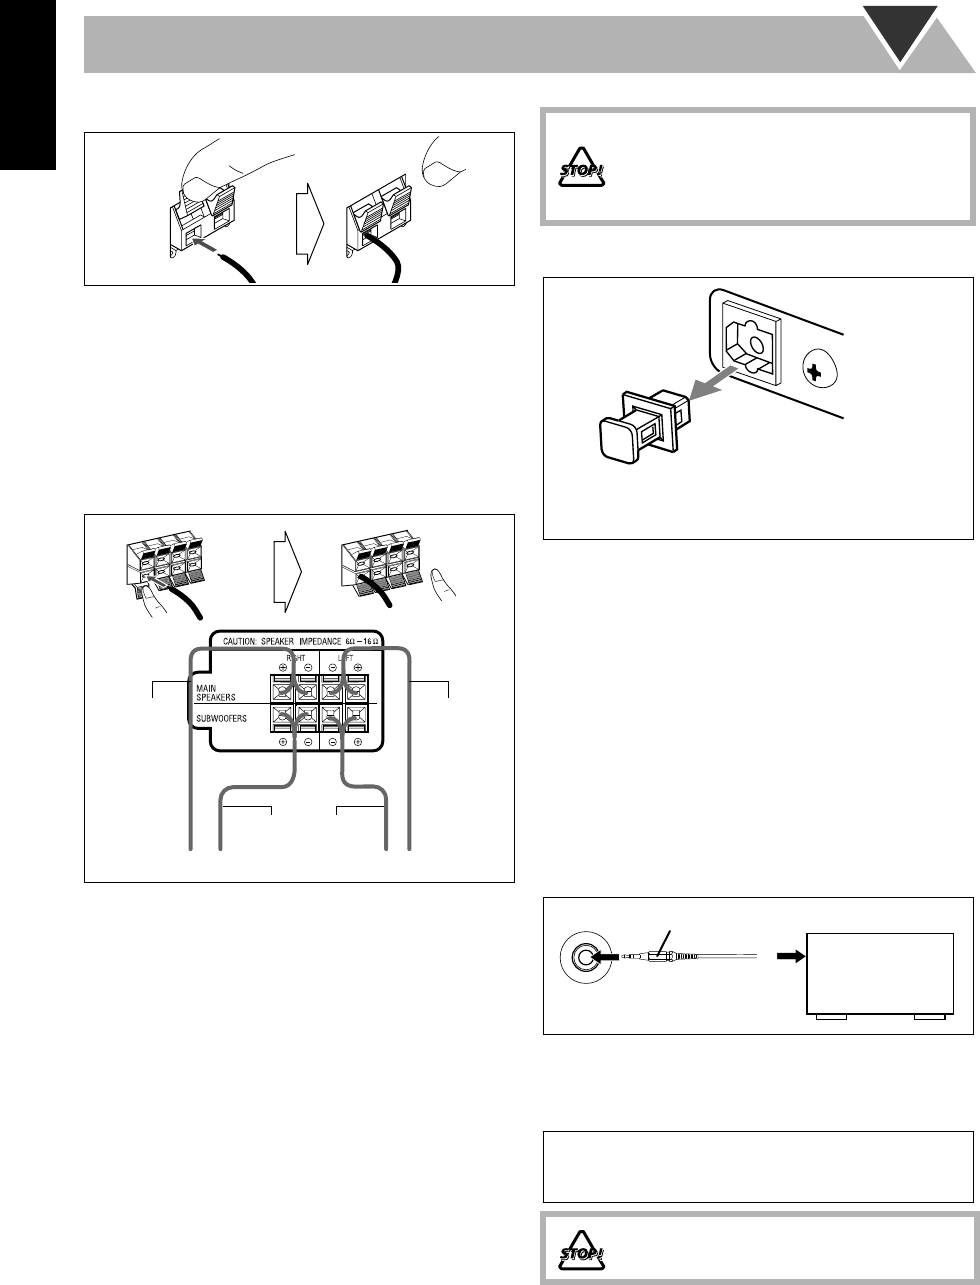
To connect the speaker cords
• When connecting the speaker cords, match the polarity of
the speaker terminals: (+) to (+) and (–) to (–).
• Use only speakers with the same speaker impedance as
indicated by the speaker terminals on the rear of the unit.
• The speakers are magnetically shielded to avoid color
distortions on TVs. However, if not installed properly, it
may cause color distortions. So, pay attention to the
following when installing the speakers.
– When placing the speakers near a TV set, turn off the
TV’s main power switch or unplug it before installing
the speakers.
Then wait at least 30 minutes before turning on the TV’s
main power switch again.
• Some TVs may still be affected even though you have
followed the above. If this happens, move the speakers
away from the TV.
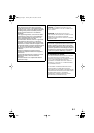
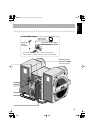
To connect digital audio
To connect the AV COMPU LINK cords
The AV COMPU LINK control system allows you to use
JVC’s TV with simple operations; by starting playing back
a disc, the TV automatically turns on and changes the input
mode to the appropriate position so that you can view the
playback picture.
To use AV COMPU LINK, you need to connect the unit and
the TV by using a cord with monaural mini-plugs (not
supplied) in addition to the connection with a video cord (see
page 4).
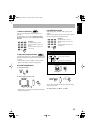
To connect other equipment
By using an stereo mini plug cord (not supplied), you can
connect equipment with analog audio output jacks such as an
MD player, a TV, etc.
If the audio output on the other equipment is not stereo
mini plug type,
use a plug adapter to convert the stereo mini
plug to the corresponding plug of the audio output.
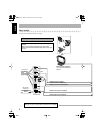
1 Hold
2 Insert
3 Release
Speaker
cords
(black/blue)
Speaker cords
(black/red)
From right speaker From left speaker
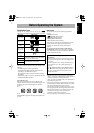
1 Hold
2 Insert
3 Release
Speaker
cords
(black/blue)
• DO NOT connect more than one speaker to
each terminal.
• DO NOT push or pull the speakers as this
will damage the foot spacers at the bottom of
the speakers.
IMPORTANT
Always set volume to MIN when connecting or
disconnecting the other equipment.
DO NOT plug in any equipment until all
connections are complete.
OPTICAL
DIGITAL
OUTPUT
Before connecting optical digital cord, remove the
protective cap from the OPTICAL DIGITAL OUTPUT
terminal.
AUX
(front panel)
Portable audio
device,
Game, etc.
Stereo mini plug cord (not supplied)
HX-GD8.book Page 6 Thursday, March 18, 2004 6:43 PM