


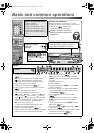

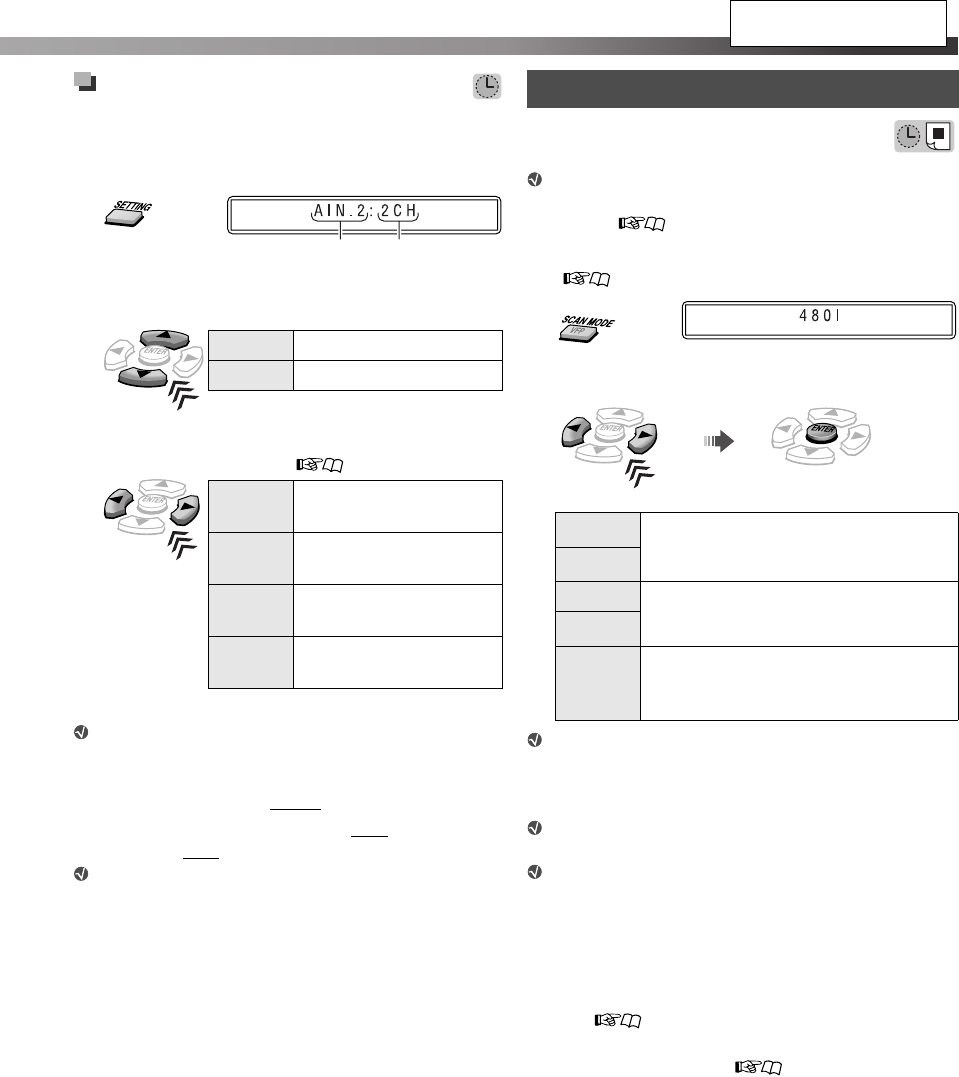
14
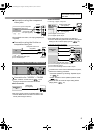
Setting the audio input for
external components
Set the audio input of the external component for “VIDEO1/
VIDEO2” (TH-D60) or “VIDEO” (TH-D50/TH-D5/TH-
D4).
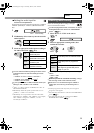
1
2 TH-D60 only: Select a source you want to set the
audio input for.
3 Select an appropriate audio input according to
the audio connection. ( 8, 9)
You can select the following settings for each source
(underlined items are the initial settings for each
source):
– “VIDEO1”: 5.1CH*
2
, COAX*
3
, and OPT*
3
– “VIDEO2”: 2CH, COAX*
3
, and OPT*
3
–“VIDEO”: 2CH and OPT
If your System is the TH-D60, make the audio input
setting for both “VIDEO1” and “VIDEO2.”
*
1
“AIN.1” or “AIN.2” appears on TH-D60, and “AIN.” on
TH-D50/TH-D5/TH-D4.
*
2
TH-D60 only: When the speaker position mode is set to
“S.SPK F,” “5.1CH” is not selectable.
*
3
TH-D60 only: It is not possible to select the same audio
input setting for “VIDEO 1” and “VIDEO 2.” For example,
when “COAX” is assigned to “VIDEO 1,” it is not
selectable for “VIDEO 2.”
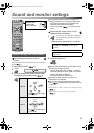
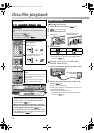
Select the scanning mode according to the type
of TV and connection method.
To use the progressive mode, connect the TV to the
HDMI MONITOR OUT terminal or COMPONENT
jacks*
1
. ( 7)
1 Select “DVD” or “USB” as the source.
(11)
2
3 Select an appropriate scanning mode, then
confirm the selection.
You can get better picture quality in the following
orders:
– 1080I > 720P
– 480P > 480I
When the picture is not shown correctly, change
the scanning mode to the interlaced mode.
When the TV is connected through S-VIDEO or
VIDEO jack, the scanning mode setting has no
effect.
*
1
Activate progressive mode only when your TV supports
progressive video signals.
*
2
Selectable only when the TV is connected via COMPONENT
jacks. ( 8)
*
3
Selectable only when the TV is connected via HDMI
MONITOR OUT terminal. ( 7)
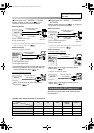
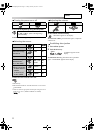
Item*
1
Current setting
AIN.1 For “VIDEO 1”
AIN.2 For “VIDEO 2”
2CH
For connection via the
AUDIO IN jacks
5.1CH
For connection via the
AUDIO MULTI IN jacks
COAX
For connection via the
COAXIAL jack
OPT
For connection via the
OPTICAL terminal
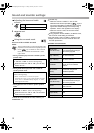
Scanning mode setting
480I*
2
To see the picture in interlaced mode.
1080I*
3
480P
To see the picture in progressive
mode.
720P*
3
AUTO*
3
The System automatically emits the
video signal to get the best picture
quality on your TV.
«Hold
Select Confirm
See page 12 for button
locations.
Body_TH-D456[JC].fm Page 14 Thursday, March 1, 2007 6:00 PM