


Page 25 | Fathom IWS
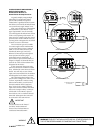
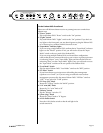
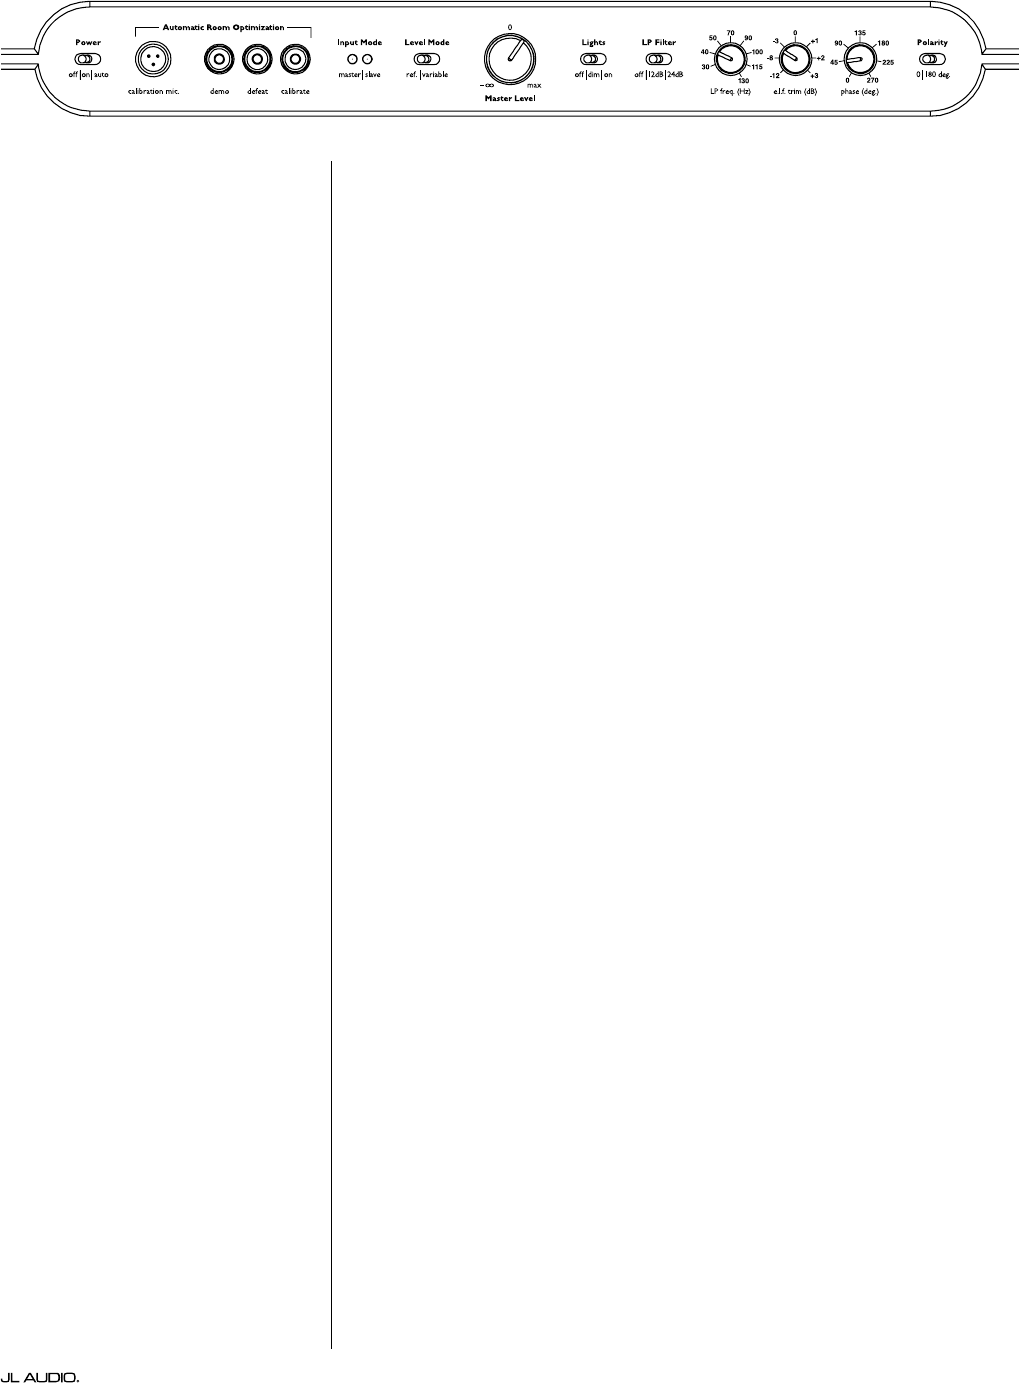
On the Fathom IWS’s Front Panel:
Please turn o the home theater receiver or preamp/processor to make these
adjustm ents.
1. “Power” Switch
Flip each Fathom IWS’s “Power” switch to the “On” position.
2. “Lights” Switch
Flip each Fathom IWS’s “Lights” switch to the “On” position. If you don’t see
any lights on the front panel, you may have forgotten to plug the Fathom IWS
in or there may be a problem with the electrical circuit.
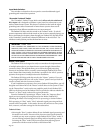
3. “Input Mode” Indicator Lights
If you are using a single Fathom IWS, conrm that its “Input Mode” indicator
light is on the “Master” position. If not, you will need to access the “Input
Mode” switch on the rear panel of the Fathom IWS.
If you are using multiple Fathom IWSs in a Master/Slave conguration,
conrm that the unit connected directly to your receiver or preamp/processor
is indicating “Master” on its “Input Mode” lights and that all other units are
indicating “Slave” on their “Input Mode” lights. If not, you will need to access
the “Input Mode” switches on the rear panels of the Fathom IWSs.
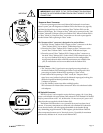
3. “Level Mode” Switch
Flip the master Fathom IWS’s “Level Mode” switch to the “REF” position.
4. “LP Filter” Switch
If your home theater receiver/processor is handling bass management
(speakers set on “small”) or if you are using an outboard crossover/bass-
management processor, ip the master Fathom IWS’s “LP Filter” switch to
“OFF.” If not, select the “12 dB” position.
5. “LP Freq. (Hz)” Knob
Rotate the “LP Freq.” knob to the “80 Hz” position.
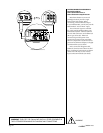
6. “e.l.f. trim (dB)” Knob
Rotate the “e.l.f. trim” knob to “0”
7. “Polarity” Switch
Flip the “Polarity” switch to “0”.
8. “phase (deg.)” Knob
Rotate the “phase” knob to “0” degrees
9. A.R.O. Defeat Switch
Press the A.R.O. defeat switch so that the red light in the
switch remains lit.