


E-8
• Places subject to constant vibration.
• Humid or moist places.
POWER SOURCES
This Music System operates on 120V~ 60Hz. Do not attempt to operate the radio on any other power source.
You could cause damage to the unit and void your warranty.
Please be sure the power outlet you plug this unit into is working and receives constant (unswitched) power.
The System is also equipped with a battery back-up system for the clock that is powered by 2 pieces of “AA”
(UM-3) size batteries (Not included).
Note: The batteries may be installed as a backup option to maintain the clock time if electrical power fails. In the
event of power outage, the clock time will not be displayed, however the clock will continue to operate so
current time will be maintained.
The remote control unit it is designed to operate on 2 x “AAA” (UM-4) size batteries (Not included).
GETTING STARTED
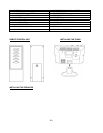
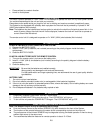
A. INSTALLING BACK UP BATTERIES INTO THE SYSTEM
1. Remove the BATTERY DOOR.
2. Install 2 x “AA” (UM-3) batteries (not included) according to the polarity diagram inside the battery
compartment.
3. Close the BATTERY DOOR.
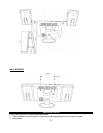
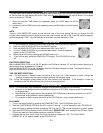
B. INSTALLING BATTERIES INTO THE REMOTE CONTROL
1. Turn over the remote control, and remove the battery door.
2. Install 2 x “AAA” (UM-4) size batteries (not included) according to the polarity diagram inside the battery
compartment.
3. Close the battery door.
IMPORTANT
: Be sure that the batteries are installed correctly.
Wrong polarity may damage the unit and void the warranty.
For best performance and longer operating time, we recommend the use of good quality alkaline-
type batteries.
BATTERY CARE
I. Do not mix old and new batteries.
II. Do not mix alkaline, standard (carbon-zinc) or rechargeable (nickel-cadmium) batteries.
III. If the unit is not to be used for an extended period of time, remove the battery. Old or leaking battery can cause
damage to the unit and may void the warranty.
IV. Do not dispose of batteries in fire, batteries may explode or leak.
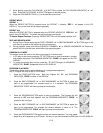
AC OPERATION
1. Plug the AC POWER CORD into a 120V AC ~ 60Hz outlet.
2. Press the POWER BUTTON to turn the unit on. The LCD DISPLAY will light up.
3. To turn off the unit press the POWER BUTTON again. The LCD DISPLAY will go “Off”.
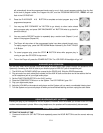
USING THE REMOTE CONTROL CORRECTLY
Note: The Remote Control is only for operating the CD Player.
Point the Remote Control at the Infrared SENSOR (IR) (#22) located on the front of the System.
The functions of the remote buttons are the same as the corresponding controls on the main unit.
The performance of the Infrared SENSOR may be degraded causing unreliable operation if there is strong
ambient light source in the same room.
The recommended effective distance for remote operation is about 10-15 feet.