


75
Advanced Setup
—Continued
■
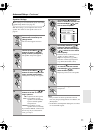
Power On Vol / Z2 Power On Vol
With these preferences, you can specify the volume set-
tings to be used in the main room and Zone 2 when the
AV receiver is turned on.
When the Volume Display preference is set to Absolute,
the range of “Power On Vol” is 0 to 100 (“Z2 Power On
Vol” is 0 to 82). When it’s set to Relative, the range of
“Power On Vol” is –
∞
dB, –81 dB to +18 dB (“Z2 Power
On Vol” is –
∞
dB, –81 dB to 0 dB).
To use the same volume level as when the AV receiver
was turned off, select “Last.”
The “Power On Vol” cannot be set higher than the “Max-
imum Vol” setting.
■
Headphones Level
With this preference, you can specify the headphone vol-
ume relative to the main volume. This is useful if there’s
a volume difference between your speakers and your
headphones. The headphones level can be set from
–12 dB to +12 dB.
OSD Setup
■
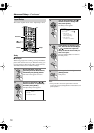
Scan Mode
If the text in the onscreen setup menus flickers due to
compatibility issues with your TV or projector, select
Non-Interlaced.
Interlaced:
Default.
Non-Interlaced:
Select if the menu text flickers.
With some TVs or projectors, the onscreen setup menus
may not appear when “Non-Interlaced” is selected. In
this case, select this setting again by using the AV
receiver’s display, and select “Interlaced.”
Immediate
These settings determine how the operation details are
displayed.
■
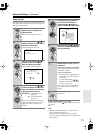
Immediate Display
This preference determines whether operation details are
displayed onscreen when an AV receiver function is
adjusted.
On:
Displayed (default).
Off:
Not displayed.
Even when On is selected, operation details are not out-
put if the input source is connected to a COMPONENT
VIDEO IN or HDMI IN.
■
Monitor Type
With this preference, you can specify the aspect ratio of
your TV so that the operation details are displayed prop-
erly.
4:3:
Select if your TV is 4:3 (default).
16:9:
Select if your TV is 16:9.
■
Display Position
This preference determines where on the screen opera-
tion details are displayed.
Bottom:
Bottom of the screen (default).
Top:
Top of the screen.
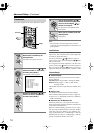
OSD Position
With this preference, you can specify the position of the
onscreen setup menus. This is useful with TVs or projec-
tors where the menus don’t appear in the center of the
screen, or part of the menu is cut off.
To set the menu position, use the arrow [ ]/[ ]/
[ ]/[ ] buttons. To set it back to its default position,
press [ENTER].
12V Trigger A/B/C Setup
See page 82.
HDMI Setup (DTR-7.6 Only)
■
HDMI Audio Out
This preference determines whether audio received at
the HDMI IN is output by the HDMI OUT. You may
want to turn this preference on if your TV is connected
to the HDMI OUT and you want to listen to the audio
from a component that’s connected to an HDMI IN,
through your TV’s speakers. Normally, this should be set
to Off.
Off:
HDMI audio is not output (default).
On:
HDMI audio is output.
With some TVs and input signals, no sound may be out-
put even when this setting is set to On.
Lock Setup
■
Lock
With this preference, you can protect your settings by
locking the setup menus.
When the setup menus are locked, only settings on the
Audio Adjust menu can be changed.
Locked:
Setup menus locked.
Unlocked:
Setup menus not locked.