


74
Advanced Setup
—Continued
This section explains items on the “Preference” menu.
Note:
• This procedure can also be performed on the AV
receiver by using its [Setup] button, arrow buttons, and
[Enter] button.
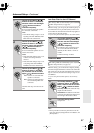
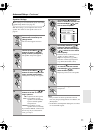
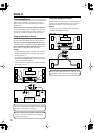
IntelliVolume
With this preference, you can set the input level for each
input source. This is useful if some of your components
are louder or quieter than others.
Use the Up and Down [ ]/[ ] buttons to select an
input selector, and use the Left and Right [ ]/[ ] but-
tons to set the level.
If a component is too loud compared to your other com-
ponents, use the Left [ ] button to reduce its input level.
If it’s too quiet, use the Right [ ] button to increase its
input level. The level can be set from –12 dB to +12 dB.
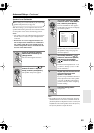
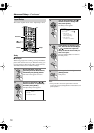
Volume Setup
■
Volume Display
With this preference, you can choose how the volume
level is displayed.
Absolute:
Display range is MIN, 1 through 99, MAX.
Relative:
Display range is –
∞
dB, –81 dB, –80 dB
through +18 dB.
The absolute value 82 is equivalent to the relative value
0 dB.
■
Muting Level
This preference determines how much the output is
muted when the Muting function is used (see page 54).
It can be set to –
∞
dB (default) or between –50 dB and
–10 dB in 10 dB steps.
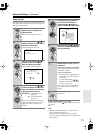
■
Maximum Vol / Z2 Maximum Vol
With these preferences, you can prevent the volume
being set too high by specifying maximum volume levels
for the main room and Zone 2.
When the “Volume Display” preference is set to “Abso-
lute,” the range of “Maximum Vol” is 50 to 99 (“Z2 Max-
imum Vol” is 50 to 81). When it’s set to “Relative,” the
range of “Maximum Vol” is –32 dB through +17 dB (“Z2
Maximum Vol,” the range is –32 dB through –1 dB). To
specify no maximum volume, select “Off.”
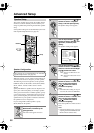
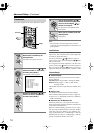
Preferences
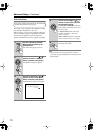
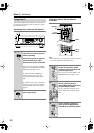
1
Press the [Receiver] Remote
Mode button, followed by the
[Setup] button.
The main menu appears onscreen.
2
Use the Up and Down [ ]/[ ]
buttons to select “7. Preference,”
and then press [Enter].
The Preference menu appears.
3
Use the Up and Down [ ]/[ ]
buttons to select a preference,
and then press [Enter].
Setup
Receiver
Enter
7.Preference
------------------------
1.IntelliVolume
2.Volume Setup
3.OSD Setup
4.OSD Position
5.12V Trigger A Setup
6.12V Trigger B Setup
7.12V Trigger C Setup
8.HDMI Setup
9.Lock Setup
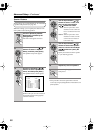
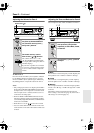
4
Use the Up and Down [ ]/[ ]
buttons to select an option, and
use the Left and Right [ ]/[ ]
buttons to change it.
The preferences are explained in the
next column.
5
When you’ve finished, press the
[Setup] button.
Setup closes.