


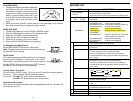

32
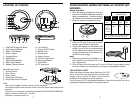
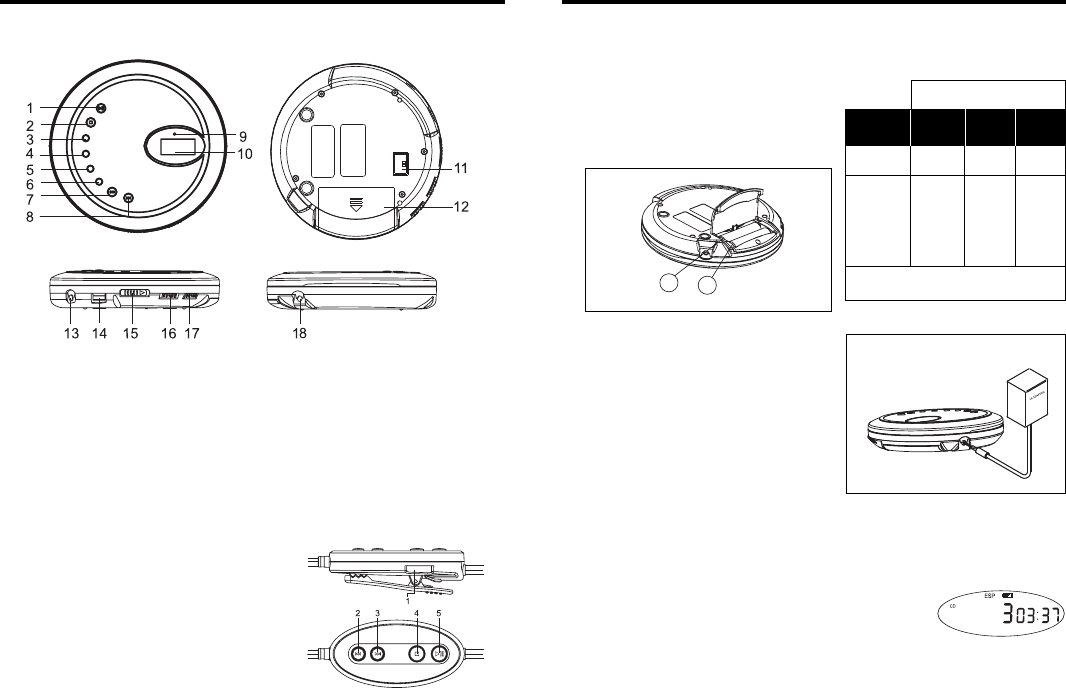
LOCATION OF CONTROL
-
+
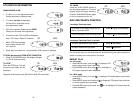
10.LCD Display
11. Charge On/Off Switch
12.Battery Door
13.Phones Jack
14.Volume Control
15.CD Door Open Switch
16.Bass Boost Switch
17.Hold Switch
18.DC Input Jack
1. Play/Pause/Power On Button
2. Stop/Power Off Button
3. Album +/ESP Button
4. Album - Button
5. Program Button
6. Mode Button
7. Skip Backward Button
8. Skip Forward Button
9. Battery Charge Indicator
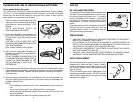
POWER SOURCES: NORMAL BATTERIES / AC ADAPTER (NOT
INCLUDED)
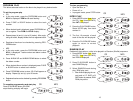
Battery Operation
1. Open the battery compartment cover and
insert two “AA”alkaline batteries inside the
battery compartment. Follow the polarity
as indicated in the battery compartment.
2. Close the battery compartment cover.
AC Operation (AC adapter not included)
1. Insert the DC plug, at the end of the AC
adapter cord into the DC input jack.
2. Plug the AC adapter into AC power outlet
socket. Use only with the recommended
6V AC adapter and make sure the local
voltage corresponds to the adapters re-
quired AC input voltage.
Note:
1. While using power from AC adapter, nor-
mal batteries must be taken out of bat-
tery compartment.
2. If the AC plug of this unit does not fit in your AC outlet, a plug adapter should
be used. Consult your local dealer on the type of plug adapter required.
LOW BATTERY ALERT
When the battery indicator starts flashing in the LCD
panel, this means that the batteries are losing their
charge. In this case the CD player will not function
properly and the batteries must be replaced.
If you are using Ni-CD rechargeable batteries, follow the intructions on how to
recharge the batteries detailed in the owners manual.
Average Playing Time
(Continuous Play)
Alkaline
“AA”
Approx.
9 hrs.
Approx.
8 hrs.
Approx.
8 hrs.
Ni-CAD
Rechargeable
(min
specification
recommended
1.2V - 650mA)
Approx.
4 hrs.
Approx.
3 hrs.
Approx.
2.5 hrs.
Note: Zinc/Carbon, or Zinc/Chloride type bat-
teries are not recommended for this unit.
Battery
Type
Normal
CD
Anti-
Shock
MP3
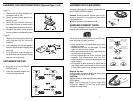
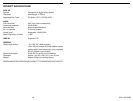
Wire Remote Control
1. Volume Control
2. Skip - Button
3. Skip + Button
4. Stop/Power Off Button
5. Play/Pause/Power On Button
Note:
- Use only the supplied remote control unit with the player.
- You can also set the volume control of main unit to the proper sound level to the
earphone.
- You can turn on the player by pressing and hold the PLAY/PAUSE/POWER ON
button of remote control over 1 second.
- Operation is same as main unit.