


16 INSTALLATION AND CONNECTIONS
Installation and Connections
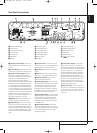
Connecting the AC Power
Notes
• The Power Requirement is:AC 230V, 50 Hz.
• Connecting to power other than the one listed
above may damage the system or cause
abnormal operation.
• Before connecting the AC power cord of this
system to a wall outlet, connect the speakers
and other component cables to the system.
• Connect the AC power cord of the active
subwoofer.
• Connect the AC power cords of your TV and
any optional components to a wall outlet.
Once the speakers have been placed in the room
and connected, the remaining steps are to
program the system configuration memories.
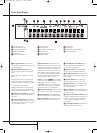
First Turn On
You are now ready to power up the HS 250
Controller to begin final adjustments.
1. Plug the Power Cable
4
into an un-
switched AC outlet.
Note that the Power Indicator
1
will turn
orange, indicating that the unit is in the
Standby mode.
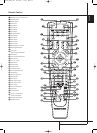
2. Remove the protective plastic film from the
main front-panel lens. If left in place, the film
may affect the performance of your remote
control.
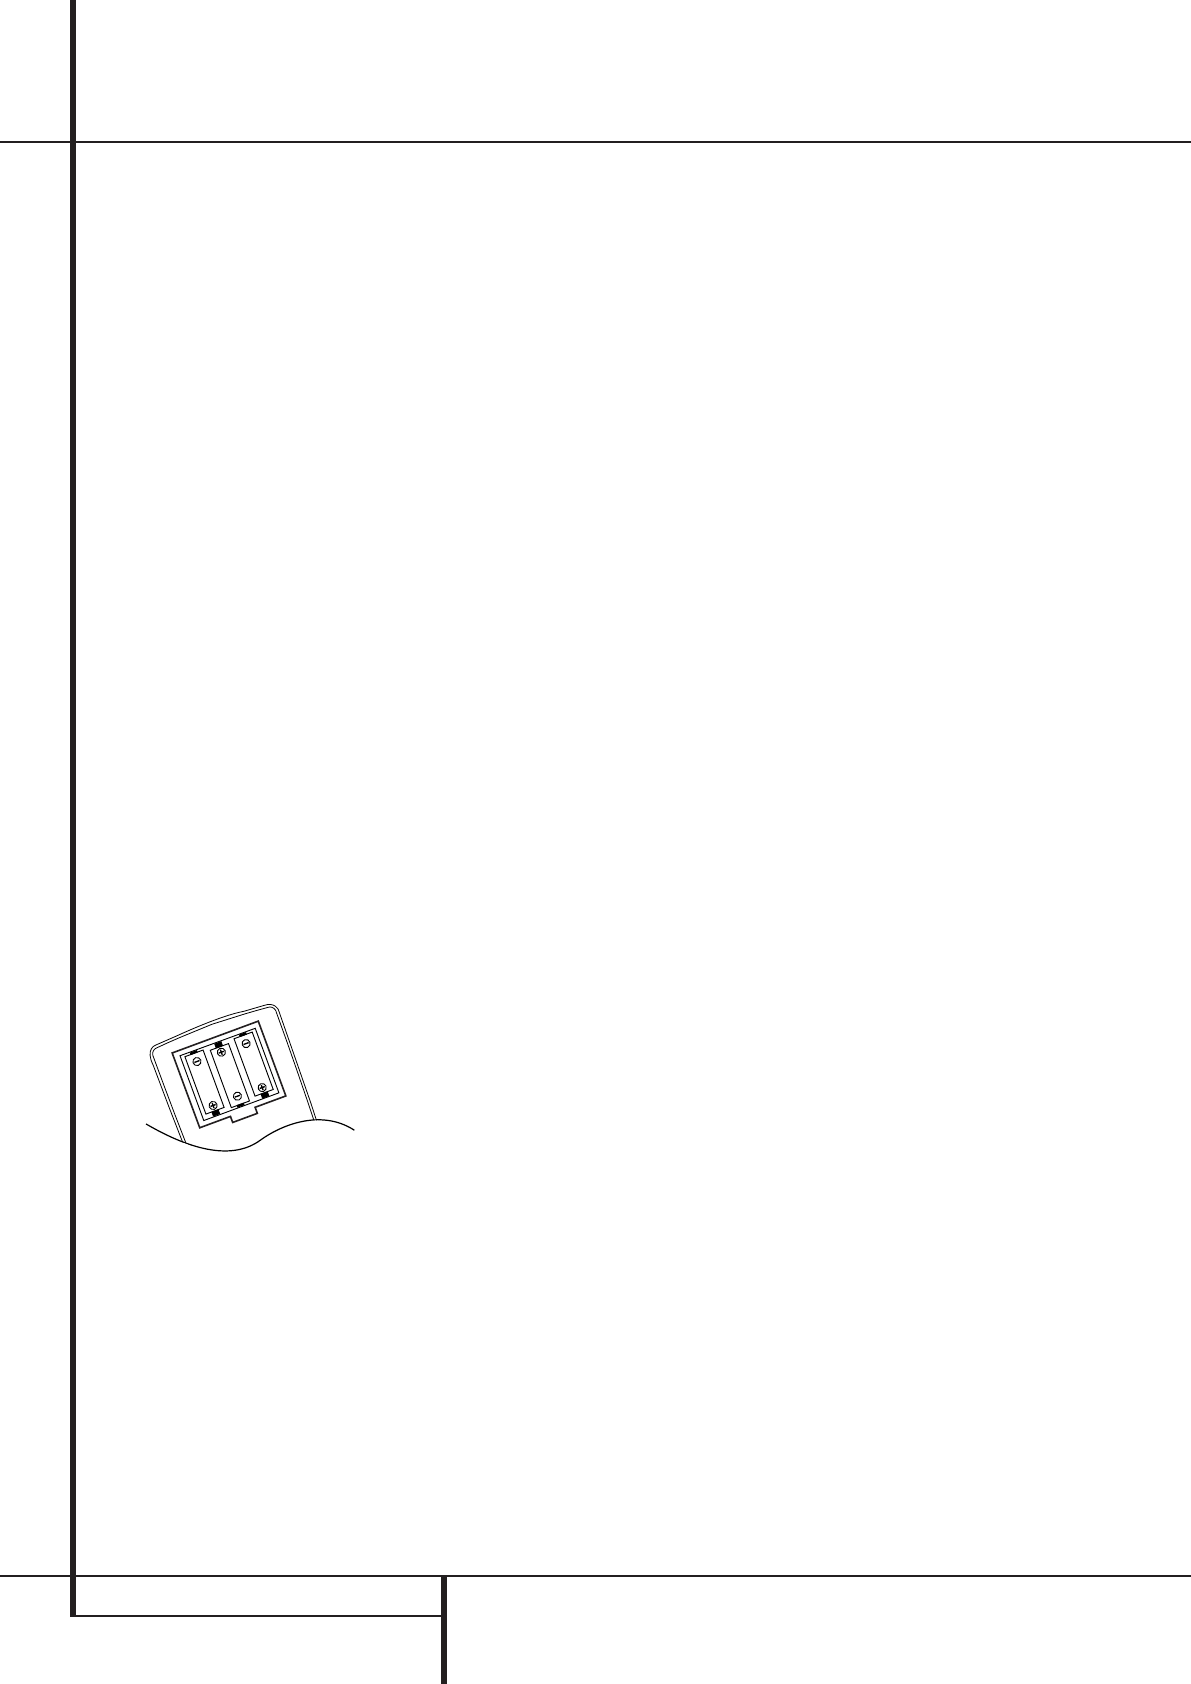
3. Install the three supplied AAA batteries in the
remote as shown. Be certain to follow the (+)
and (–) polarity indicators that are on the top
of the battery compartment.
4.Turn the HS 250 on either by pressing the
Power On/Off
1
or the Input Source
Selectors
0
on the remote control.
The Power Indicator
1
will turn white to
confirm that the unit is on, and the Main
Information Display
0
will also light up.
Basic Play
Preparation
1. Switch the TV ON and select its video input
connected to the HS Controller.
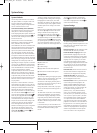
2.When you switch on the HS system controller,
a Harman Kardon HS welcome image should
appear on the screen. If that screen appears
distorted or without color, change the
appropriate settings at the Video Setting
Submenu according to your TV set and to the
connection used between the HS Controller
and your TV.
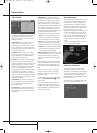
3. If there is no picture at all, not even the
Harman Kardon screen, check the setting of
the video input used on your TV (most SCART
inputs on TVs can be configured in the TV´s
menu). If this doesn't work, connect your TV
with different cables to the HS Controller, e.g.
via Composite (yellow jacks) or S-Video
cables, rather than SCART to view the setup
menus until all appropriate ”Video menu”
settings are made properly.
4. Insert a disc into the Slot Loader
6
.
Hold the disc without touching either of its
surfaces, position it with the side you wish to
play facing down, align it with the guides, and
place it in its proper position.
• 3" (8 cm) discs or 5" (12 cm) discs can be
used.
5.After the discs slides into the loader, it will
start playing automatically.
• With most DVD’s, a Disc Menu appears on the
screen. Select specific menu item by using
ARROW
9
buttons on the remote, then
press ENTER
6
.
Disc Playback Features
Skipping tracks or titles/chapters
To move forward or backward through the tracks
on a CD or the titles or chapters on a DVD, press
Previous/Next
EF
.
Fast Motion Playback/Fast Search
1.To move forward or backward through the
DVD or CD disc being played at fast speed,
press Search
HJ
on the remote. Once
one of these buttons is pressed, the fast
search will continue until Play is pressed.
There are four fast-play speeds. Each press of
the Search Buttons will cycle to the next speed
in the following order: 2x, 4x, 16x, 100x, indicat-
ed by a number of arrow indicators on the right
top of the screen.
2. Press PLAY
G
at any time to resume normal
playback.
Note that there will be no audio playback during
fast-forward or -reverse play of DVD discs. This is
normal for DVD, as surround processors cannot
process the digital audio streams during fast-
play modes; audio will be heard during fast-play
of conventional CD’s.
Freeze Frame and Frame Advance
(with DVD only)
1. Press PAUSE
C
when a DVD is playing to
freeze the picture.
2. Each time you press one of the STEP (FWD or
REV
EF
) buttons, the picture advances
one frame in the selected direction.
3. Press PLAY
G
to resume normal playback.
34138_HS250_UK 18/09/07 13:58 Side 16