


USB MENU 25
ENGLISH
USB Menu
USB MENU
The HS systems are among the first to allow direct
playback of compatible files from portable USB
devices.Two USB On-The-Go inputs are available,
one on the right side of the product and one on the
rear panel.
Connect your USB thumb drive or portable hard
disk, to either of the side or rear panel USB Inputs
3G
. If you have more than two devices that you
would like to connect at the same time, you can
use a standard USB-hub with an external power
supply, to which you can connect up to 16 portable
USB devices.
1. Press the USB
0
button on the remote control
to turn the DVD Receiver on.Also make sure that
your video monitor connected to the HS 250 is
switched on.
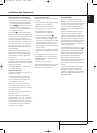
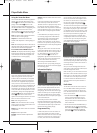
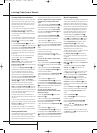
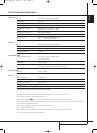
2.The TV monitor will show the below screen,
allowing you to select which of the file types
available on the device you would like to display
and play. Showing different file types at the
same time like MP3 and JPEG is possible.
3. Move the cursor to the buttons on the lower left
side of the screen, and press ENTER to select or
deselect the requested file types.
In case several USB devices are connected, all will
be shown in the same USB Menu.
To differentiate the drives, they will be shown as 1
and 2. USB drives can have more than one parti-
tion. If that is the case, the different partitions will
be shown as 1a, 1b, 1c etc.
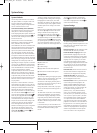
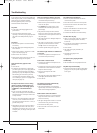
The USB Menu contains the following settings or
indications. Follow the explanations in the Upper
Menu Line on the bottom of your screen to change
the settings.
Disc: Shows the type of the disc.
Picture: Selects the interval between the current
picture on the screen and the next one.
In the USB Menu, the chapter, track or picture cur-
rently playing will be marked with an arrow symbol
in front of the Track (MP3,WMA) or Picture (JPEG).
Tracks and pictures can be selected from this list at
any time by moving the cursor to the desired track
or file and pressing ENTER
6
to confirm.
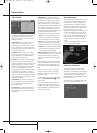
The top part of this screen can be de-activated to
show the complete Track list on the screen.To de-
activate, move the cursor to the upper INFO (or i
INFO) Submenu on the left side of the screen. Press
ENTER
6
until the icon is highlighted in light blue
and the full Track list is visible on the screen. In the
same way the Disc list can be removed from the
screen by deactivating the PROGRAM Submenu.
When the HS 250 is in play mode, pressing the
PLAY button on the remote control will highlight the
track being played.
If you have a USB device that contains both music
files (MP3,WMA) and JPEG images, you can choose
to run these simultaneously, mixing the MP3 or
WMA audio with your own images.The time inter-
val can be chosen in the Picture Setting.
With such devices, you can also either listen to the
MP3 or WMA audio or watch the JPEG video files
only. In order to do so, click in stop mode on the
MUSIC, PICTURE or MOVIE icons on the left part of
the screen to select or deselect the desired format.
NOTE: The HS 250 will not play back any of the for-
mats SVCD/VCD, MPEG1 (Video), MPEG2 (Video)
and audio CD tracks (CDDA) stored on an external
USB hard drive.
• You will need a FAT32 pre-formatted external
hard disk drive with USB connector. If your disk is
formatted with another file system (like NTFS) you
will need to re-format it. Please contact your hard
disk supplier for more information.
• We recommend creating folders and sort the files
by file type (movies, pictures or music). This will
allow you to quickly find the file you’re looking for.
Using
When Harman Kardon’s is connected and
a compatible Apple
®
iPod
®
is docked in The Bridge,
press the DMP Selector Button
0
to choose
the iPod as the input source allowing playback of
audio materials on your iPod through your high-
quality audio/video system.
When The Bridge is properly connected and a com-
patible iPod is properly docked, the Upper Display
Line
0
will read DMPIN.Once that message
appears, use the remote to control the iPod.
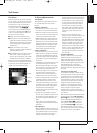
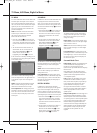
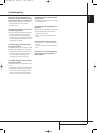
Whether or not an iPod is docked in The Bridge, the
screen shown in the figure above will appear on a
video display connected to the HS 250, but you will
not be able to affect the screen without an iPod
docked in The Bridge. Once an iPod is docked in The
Bridge and selected as a source, the On Screen Display
will change to show a reflection of your iPod menu.
Navigate The Bridge’s screens by using the
KLAB
Buttons
9
to highlight a line and
pressing the Set Button
6
to select the line.
Press the Menu Button
B
to return to the pre-
vious level of The Bridge’s menu system.
Audio: Shows the audio track that is currently
playing. Options are shown on both menu lines on
the bottom of the screen.
Repeat: Sets the repeat mode.
(Repeat 1, Repeat Folder).
Random: Activates Random Playback when possi-
ble.
Time: Shows the elapsed time and remaining time
of a song currently playing.
NOTE: iTunes allows you to set certain selections
to always or never remember playback position, or
to be skipped in Shuffle mode.The HS 250’s set-
tings cannot override these iTunes settings.
While a selection is playing, the song title, artist
and album name, if available on the iPod, will scroll
across the lower line in the front panel Message
Display
0
.The upper line will display the elapsed
time of the track on the left, the play mode icon,
and the time remaining on the right.
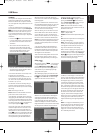
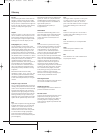
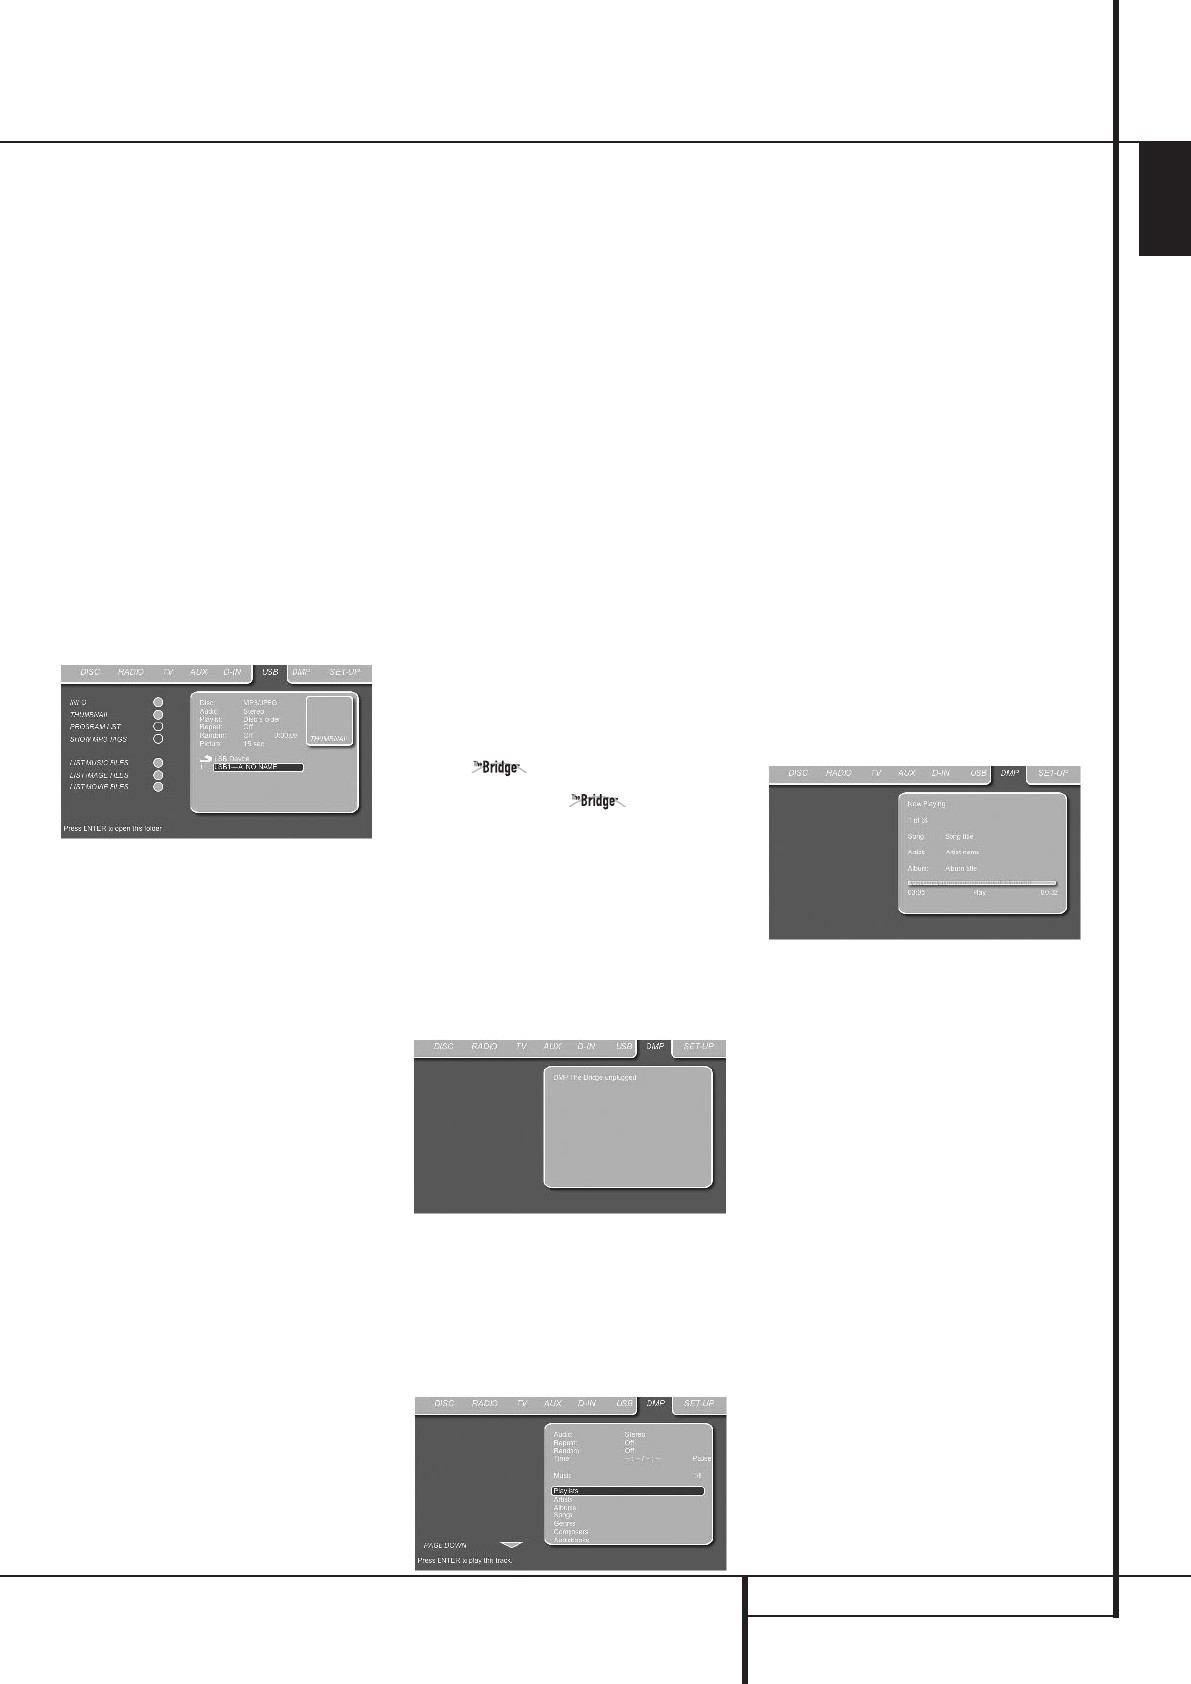
In addition, if a video display is connected to the
HS 250, a screen will appear to display information
about the iPod’s status and the track.The top line
will display the play mode icon, with the phrase
“Now Playing” appearing to the right to remind
you that you are viewing the status of the current
track, as opposed to another menu screen.Below
that the HS 250 displays the total number of tracks
in the current play list on the right (all materials on
the iPod are considered one of the play lists) with
the number of the current track on the left.The
song title, artist and album are displayed.At the
bottom of the screen is a graphic bar indicating the
current play position within the track, with the
elapsed and remaining times appearing below the
bar.
NOTE: It is strongly recommended that you use a
screen saver built into your video display to avoid
possible damage from “burn-in” that may occur
with plasma and many CRT displays when a still
image, such as a menu screen, remains on display
for an extended period of time.
34138_HS250_UK 18/09/07 13:58 Side 25