


AVR 700/AVR 70/AVR 70C
11
Making Connections
Making Connections
CAUTION: Before making any connections to the AVR, ensure that the AVR’s AC
power cord is unplugged from the AVR and the AC outlet. Making connections
with the AVR plugged in and turned on could damage the speakers.
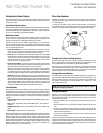
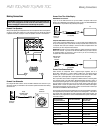
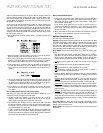
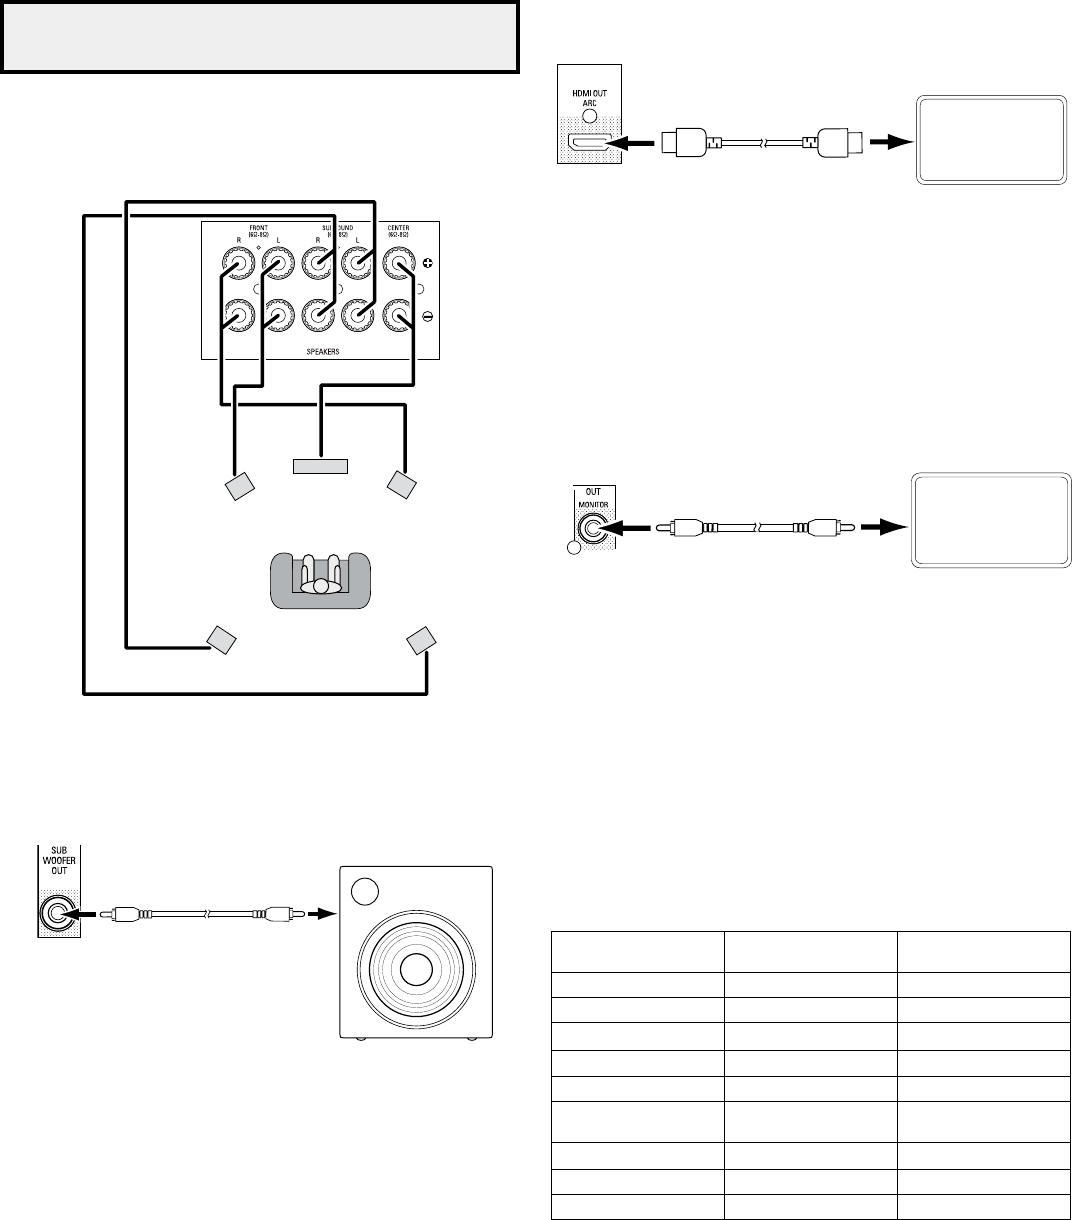
Connect Your Speakers
After you have placed your loudspeakers in the room as explained in Place Your Speakers,
on page 8, connect each speaker to its color-coded terminal on the AVR as explained
in Speaker Connections, on page 9. Connect the speakers as shown in the illustration.
FL
C
FR
SRSL
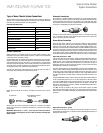
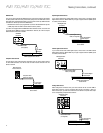
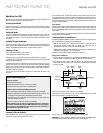
Connect Your Subwoofer
Use a single RCA audio cable to connect the AVR’s Subwoofer Out connector to your
subwoofer. Consult your subwoofer’s user manual for specific information about making
connections to it.
AVR
Subwoofer
Connector
Powered
Subwoofer
Single
RCA Audio Cable
(not supplied)
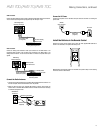
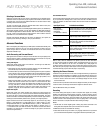
Connect Your TV or Video Display
HDMI Monitor Out connector
If your TV has an HDMI connector and you have HDMI or component video source
devices, use an HDMI cable (not included) to connect your TV to the AVR’s HDMI Monitor
Out connector. It will provide the best possible picture quality.
HDMI Cable
(not supplied)
TV
AVR HDMI
Monitor Out
Connector
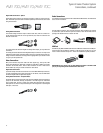
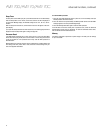
Composite Video Monitor Out connector
If your TV does not have an HDMI connector, or if your TV does have an HDMI connector
but you are connecting some source devices with only composite video connectors, use
a composite video cable (not included) to connect the AVR’s Composite Monitor Out
connector to your TV’s composite video connector.
IMPORTANT: The AVR’s on-screen display (OSD) only appears through the Composite
Monitor Out connector. If you want to use the AVR’s OSD menus you need to connect
its Composite Monitor Out connector to your TV even if you are not connecting any
composite video source devices to the AVR.
Composite Video Cable
(not supplied)
TV
AVR Composite
Monitor Out
Connector
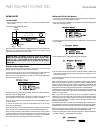
Connect Your Source Devices
Source devices are components where a playback signal originates, such as a
Blu-ray Disc or DVD player, or a cable, satellite or HDTV tuner. Your AVR has several
different types of input connectors for your audio and video source devices: HDMI,
composite video, optical digital audio, coaxial digital audio and analog audio.
Each of your AVR’s source buttons is assigned to an HDMI connector or an analog audio
input connector (listed in the “AVR Source Button/Analog Audio Connector” column of
the table below).The digital inputs are not assigned to any specific sets of analog inputs.
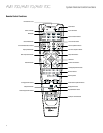
Once you select a source device you can use the remote control’s Audio Input Select
(DIGITAL) button to select the specific audio input connection (HDMI, coaxial digital,
optical digital, analog) that you want to listen to. (Note: You cannot select an audio input
connection for the FM/AM or USB source buttons.)
As you connect your various source components, fill out the “Source Device Connected”
and “Digital Audio Input Connector Used” columns in the following table – it will make it
easy to keep track of which devices you have connected to which connectors. Note: The
AVR remote is pre-programmed to control a Harman/Kardon Blu-ray Disc or DVD player
connected to HDMI 1.
AVR Source Button/
Analog Audio Connector
Source Device Connected
Digital Audio Input
Connector Used
Video 1
Video 2
Video 2
Tape
Aux
AVR Source Button/
HDMI Connector
Source Device Connected
Digital Audio Input
Connector Used
*HDMI 1
HDMI 2
HDMI 3
* The AVR remote is pre-programmed to control a Harman/Kardon Blu-ray Disc or DVD player
connected to HDMI 1.