


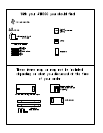

Get Started!
Pick three locations 1) a
place for the transmitter
2) place for your studio
or inside connection (can
just be under a desk) and
3) a ground. Once you
have planned these loca-
tions so they will all
work together you are
ready!
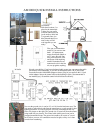
First, put your transmitter
mount in, you can use stan-
dard 1 1/4 antenna mast
mount from Radio Shack or
an TV store. Be safe! Stay
away from electrical wires
and do not climb anything
unsafe! Remember the an-
tenna needs to be in the free
air, not up against anything.
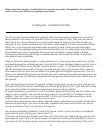
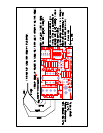
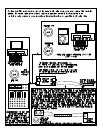
Next do your cabling; if you have a balanced audio source you can connect the audio
pair directly to the transmitter, if you have an unbalanced (like a RCA jack) audio
source then use the AM1000PR adapter as shown. Plug in your audio to the 1/8 jack
on the adapter. Secure the control cable to the building or pole. (Note transmitter is
not installed yet,). Ground the control wire shield at one end only.
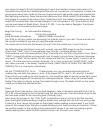
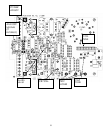
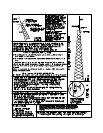
Now run the ground wire, it can be #12 or #10, from the hardware store. The
wire needs to take a direct path from the transmitter to a good ground for best
lighting protection. It is best to keep the wire away from metal on the way
down, see picture on the right. The ground wire is (stood off) from the mount
using stand offs (see picture). The control cable (audio power) can just be
wrapped around the mount. The ground wire needs to be secure so it won’t
move before you tune. All connections need to be tight, so they won’t later
corrode from weathering.
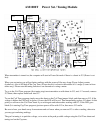
AM1000 QUICK INSTALL INSTRUCTIONS
In Studio
Ground Rod
Shielded
Ground
Wire