


Recording to a PC
To record audio to your computer:
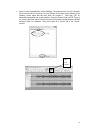
1. Place your album on the turntable platter and align the cartridge slightly ahead of the track
you want to begin recording. Lower the cartridge (needle) to the album.
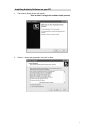
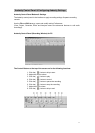
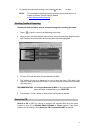
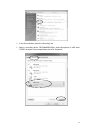
2. Click the Record button to start recording.
The waves (top and bottom) will show on the interface.
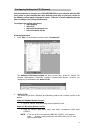
3. Record the entire album or random tracks by clicking the “Pause” button on the
computer (Audacity Interface Control Panel) to allow time to prepare for the next song or
album. Once you are ready to continue recording, press the “Pause” button on the
computer and downloading will continue.
4. Repeat steps 2 and 3 until you have finished downloading.
NOTE: Do not click “Stop” button on computer while continuously downloading songs.
Remember to click “Pause” in between your desired songs. Press “Stop” on
the computer only when all your desired songs have been downloaded.
After you have finished downloading, you may play back the songs through your computer.
In Stop Mode, simply click the button.
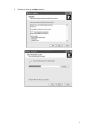
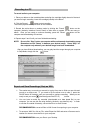
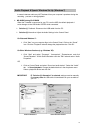
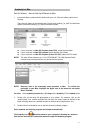
Export and Save Recordings (files) as WAV
¾ The easiest way to record your records is to play from start to finish on one side and
record as a single track. IF you need to flip the album over to side 2, press the
PAUSE button on Audacity, until you are ready to continue recording. When you are
ready to end your recording (download) press the STO P ( ) button.
¾ You now have an audio file recorded (downloaded as a data based file) to your
computer. You can use this file using Audacity (Audacity .aup data file) only. In order
to use the file outside of Audacity, convert the file to an audio format.
RECOMMENDATION: convert all files to WAV format for exporting to your computer.
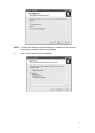
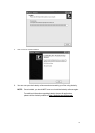
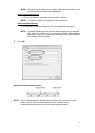
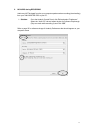
¾ To save as a WAV file, click on File, select Export As WAV and enter a file name and a
location for where to save the file on your computer.
RECOMMENDATION: save your files to your Desktop
14