


HDMI 201 Tx/Rx • Installation and Operation
Installation and Operation, cont’d
2-10
HDMI 201 Tx/Rx • Installation and Operation
2-11
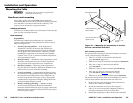
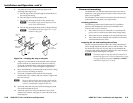
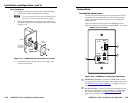
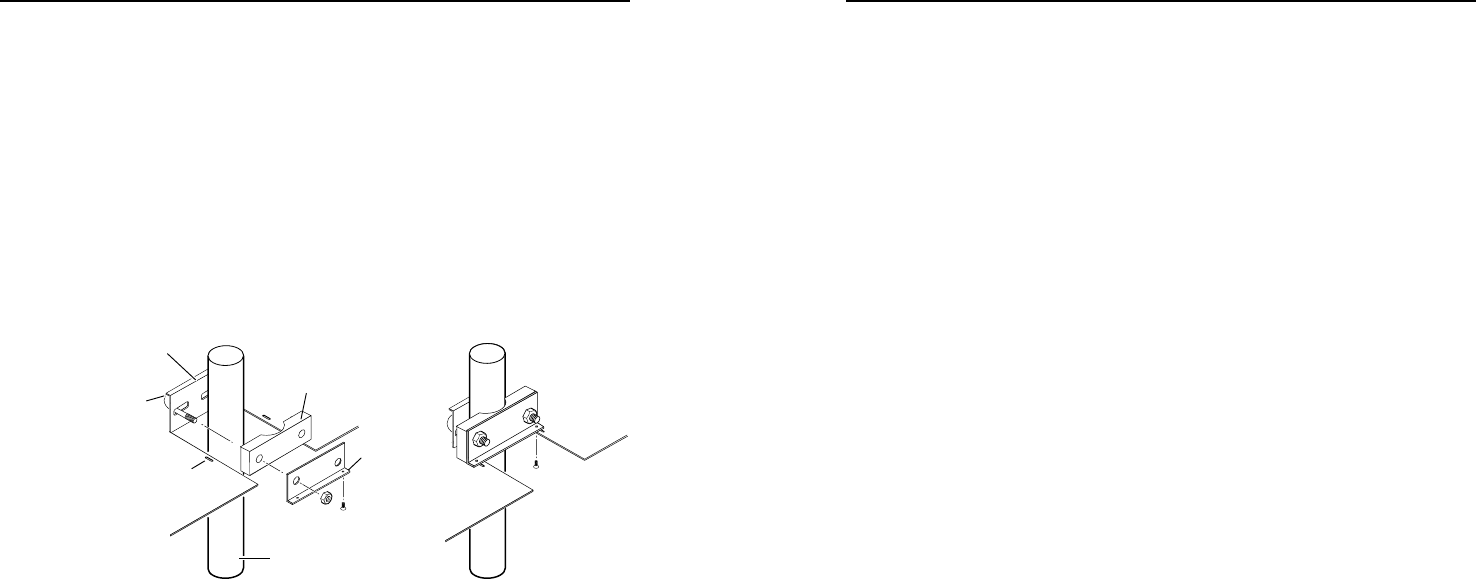
6. Assemble the U-bolt and the following parts in the
following order (gure 2-8):
a. Pass the legs of the U-bolt through the slotted holes on
the mount plate ange.
b. Place the legs around the projector pole.
c. Pass the legs through the holes in the contour base.
N
Thepoletssnuglyintothedepressioninthe
center of the contoured base.
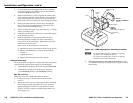
d. Pass the legs through the holes in the L-shaped bracket.
N
ThesuppliedU-bolttsatypical(1.5"to2.0"
diameter) ceiling pole.
U-bolt
Slotted Hole
in PMK Tr ay
L-shaped
Bracket
L-shaped
Bracket Screws
Contoured
Base
Ceiling
Pole
Mount Plate
Flange
Figure 2-8 — Hanging the tray on the pole
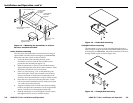
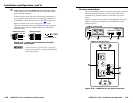
7. Align the two slotted holes in the bottom of the L-shaped
bracket with the two slotted holes in the base of the tray.
Secure the L-shaped bracket to the base by inserting two
provided 6-32 x 5/16" screws through the aligned slots.
8. Move the PMK 350 up to the desired location on the ceiling
pole, as close to the ceiling as desired.
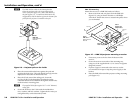
9. Secure the L-shaped bracket to the U-bolt using the
included hex nuts, washers, and lock washers. Tighten the
hex nuts securely.
N
Besuretotightenthehexnutssecurelyenoughthatthe
PMK 350 does not slide down the ceiling pole. A socket
wrench is recommended to tighten the hex nuts.
10
. Secure the front and rear plates to the mounting tray with
four of the included #6 screws.
11. If desired, choose one of the provided four sizes of self-
adhesive cover sheets, and apply it to the underside of the
mounting tray.
Decora unit mounting
The HDMI 201 A D (Decora) transmitter and receiver can be
installed in a one-gang electrical wall box with a Decora wall
plate cover (supplied).
The installation must conform to national and local electrical
codes and to the wall plate’s size requirements.
UL/safety guidelines
The following Underwriters Laboratories (UL) guidelines
pertain to the installation of the Decora transmitters and
receivers into a wall or furniture.
1
. These units are not to be connected to a centralized DC
power source or used beyond their rated voltage range.
2. These units must be installed in UL listed junction boxes.
3. These units must be installed with conduit in accordance
with National Electrical Code.
Preparing the site and installing the wall box
Choose a location that allows cable runs without interference.
Allow enough depth for both the wall box and the cables. The
box should be at least 2.5" (6.4 cm) deep to accommodate the
connectors and cables. Install the cables into the wall, furniture,
or conduits before installing the wall plate.
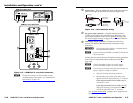
N
TheDecoraunitsareverydeepandhaveconnectorson
the back side (figure 2-9). Extron recommends its 1-gang
or 2-gang junction boxes (part #s 980130 and 980084),
which have a depth of 2.5" (6.4 cm).