


22
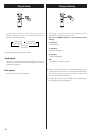
This setup has no effect at the moment. Leave this setup
as it is (factory settings)
When the SA-10 is updated in the future, it will have an effect
on the sound output from the i.LINK (AUDIO) terminals.
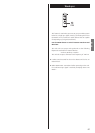
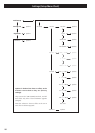
Use these speaker setup menus when the i.LINK (AUDIO)
terminal is connected to a surround sound amplifier, and
when you don’t use the speaker menus of the amplifier.
There is no need for this setup when not using the i.LINK
(AUDIO) terminal, or when you use the speaker menus of the
amplifier. In this case, leave this setup as it is (factory settings).
The speaker setup has effects on the sound output from the
i.LINK (AUDIO) terminals when “Analog Out” is set to “Multi
ch”.
<
When “Analog Out” is set to “2ch”, the settings made here
are ignored.
<
When “CD Direct” is set to “Direct”, the settings made here
are ignored during playback of a CD.
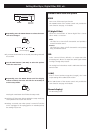
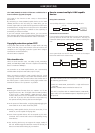
Speaker Size (SP Size)
Select the size (Large or Small) independently for the L/R
(front pair of speakers), the C (center speaker) and the SR/SL
(surround pair of speakers). Turn the subwoofer (SW) ON or
OFF (if you have no subwoofer).
Large
Select this when the connected speakers can fully reproduce
bass frequencies.
Small
Select this when the connected speakers are rather small and
cannot reproduce bass frequencies.
When this setting is selected, bass frequencies are output
from the subwoofer (if no subwoofer is connected, from the
front speakers).
OFF
Select this when no speaker is connected. The sound is
output from the front (or surround) speakers.
<
When the front speaker is set to “Small”, the subwoofer is
set to “ON” automatically. You cannot set the subwoofer
“OFF”.
ON (subwoofer only)
Select this when a powered subwoofer is connected.
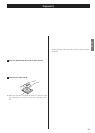
< For the center and surround pair options, if these speakers are
not physically present, you can select OFF to prevent any
output from those channels (you cannot turn off the front L/R
pair). Any speakers turned off will down mix to the other
enabled channels.
<
Turning downmix on and off may affect the overall volume.
<
If necessary, adjust the level of subwoofer using the volume
control of its own or the Speaker level setup.
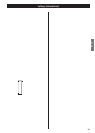
Settings (Speaker Setup)
Speaker levels (SP Level)
Use this to set the relative levels of the speakers. You can set
the L/R pair together, and the center, and surround rear pair
independently, as well as the subwoofer. The maximum value
you can set here is 0dB and the minimum is –12dB, with
settings made in 0.5dB increments. The default setting is each
speaker channel set to 0dB.
1. When you are ready to start, display “Test Start” and
press the ENTER button.
The unit outputs test tone from each channel in turn at the
specified level for each channel.
< Test tone at very high levels may not be good for your
speakers. Make sure the level of your system is turned down
to a reasonable level before carrying out this operation.
<
Test tone from subwoofer may be nearly inaudible. Check the
level of subwoofer using source material containing low
frequency sound.
<
The unit won’t output test tone when a Super Audio CD is (or
had been) loaded. In this case, remove the disc, turn the unit
off and on, and try again.
<
The unit won’t output test tone when “i.LINK” is set to
“60958”. Select “PCM” to output test tone (see page 23).
2. Adjust the levels and continue using the test tone as
necessary until you are happy with the balance.
Test tone length (Test tone)
This represents the length of time that the test tone is output
from each speaker when Test Start is selected.
Select “Test Tone”, press the right cursor button, choose
between 2, 5 and 10 seconds using the up or down cursor
buttons, and press the ENTER button to confirm the entry.