ENGLISH
Getting Started Connections Setup Playback Remote Control Multi-Zone Information Troubleshooting
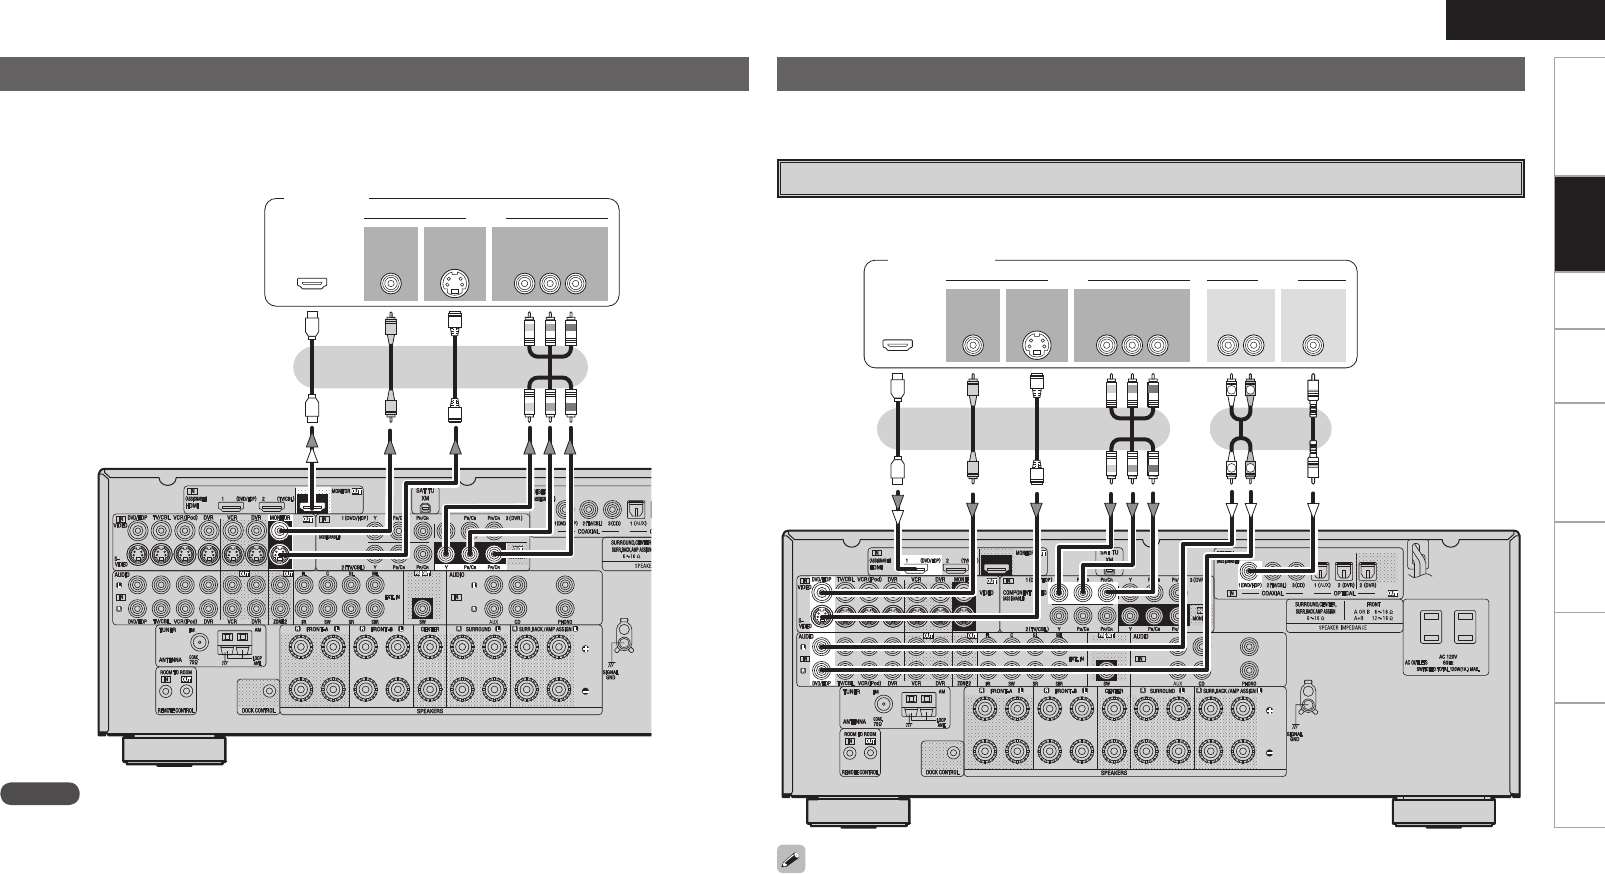
• Connect the cables to be used (vpage 8 “Video Conversion Function”).
• With HDMI connections, the video and audio signals can be transferred with a single cable.
• To output the audio signals to the monitor with HDMI connections, set menu “Manual Setup” – “HDMI
Setup” – “HDMI Audio Setup” to “TV” (vpage 27).
Connecting the Monitor
47*%&0
*/
7*%&0
$0.10/&/57*%&0
: 1# 13
7*%&0
*/
)%.*
*/ */
R
L
R
L
47*%&0
065
"6%*07*%&0
$0.10/&/57*%&0
: 1# 13
7*%&0
065 065
"6%*0
$0"9*"-
065
3-
065065
)%.*
Monitor
Carefully check the left (L) and right (R) channels and the inputs and outputs, and be sure to interconnect
correctly.
Connecting the Playback Components
DVD Player
• Connect the cables to be used.
• With HDMI connections, the video and audio signals can be transferred with a single cable.
DVD player
NOTE
• The component video connectors may be indicated differently on your monitor. For details, see the
monitor’s operating instructions.
• No audio signals are output from the HDMI monitor output connector. To play the sound by monitor, make
analog or digital audio output connections to monitor’s audio input connectors.
• The audio signals output from the HDMI connectors are only the HDMI input signals.
Video-converted HDMI signals are not included in the audio signals.
• Connect an HDP (High-Definition Player) in the same way.
• When using an optical cable for the digital audio connection, make the settings at menu “Input Setup”
– “Assign” – “Digital In” (vpage 35).
1.AVR888E3_ENG_1st.indd 15 2007/07/18 21:52:20


