


24
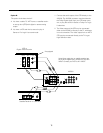
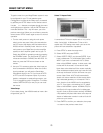
Using Dolby Pro Logic 2:
The AVS550 features Dolby Pro Logic 2 surround cir-
cuitry to process Dolby Surround encoded program-
ming from TV broadcasts and Videotapes. In addition,
Dolby Pro Logic 2 will create surround sound fields
from non-encoded Stereo sources such as CD’s, MP3’s
and Radio stations. Pressing the PROLOGIC button on
the remote will select from each of the available sound
field options. The selected sound field is displayed on
the front panel display for AV sources, and on the TV
screen for CD, MP3 and Tuner sources.
Internal or external digital sources with Dolby Digital or
DTS soundtracks will override the Dolby Pro Logic cir-
cuitry so that these sources will play with their proper
decoders. See pg. 31 for a description of the various
Dolby Pro Logic 2 soundfields available.
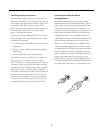
Listening with Headphones:
1. Plug the headphones into the headphone jack
located behind the lower flap. The AVS550 will
automatically switch the front L & R audio channels
to STEREO DOWNMIX when headphones are
attached.
2. Use the rotary volume control located to the right of
the headphone jack to adjust headphone volume
independent of the main volume. Press and release
the volume knob to extend the control shaft for eas-
ier adjustment.
3. Do not leave the headphones plugged in when you
are not using them.
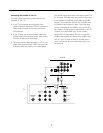
Recording from the AVS550:
You can only record from sources that are not Copy
Protected.
1. Connect your recording device to the REC OUT
jacks on the rear of the AVS500. The video format
(S-Video or CVBS) of the input you are recording
must be the same as your recording device will
accept.
2. When recording a 5.1 source select a 2.0 sound-
track if available in the disc menu. If no stereo
soundtrack is available, select Stereo or Pro Logic
Downmix mode in the SPEAKER Setup menu. See
Advanced Setup pg. 29.
3. Set Pro-Logic mode “Off.”
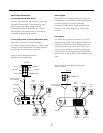
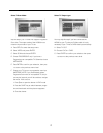
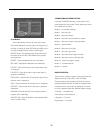
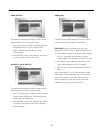
Viewing Or Playing Files:
SMART NAVI - WITH MENU
You may play back MP3-encoded music files and view
JPEG encoded picture files that have been recorded to
a CD. You may include both file types on the same CD.
JPEG files may be viewed individually or may be com-
bined into a slide show with automatic transitions.
You may use an MP3 file to provide a musical back-
ground for your slide show.
The specifics of file navigation depend on the SMART
NAVI setting in the GENERAL page of the Setup
menus.
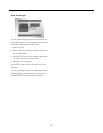
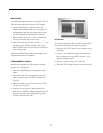
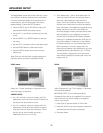
Playing MP3 or WAV Files:
Select DVD source and load your MP3 or WAV
encoded CD.
If SMART NAVI = NO MENU: All the tracks on the disc
will be played in order as if they were all at the same
level. The hierarchy of files and folders is not dis-
played on the screen.
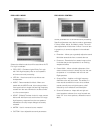
• Use the number buttons or the |<< and >>| buttons
to select tracks.