


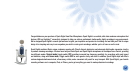

Setting Up
Spark Digital includes a uniquely-designed shockmount stand that is designed to help isolate your microphone (and, thus, your recordings)
from vibrations, bumps, and any low frequency noises you may have resonating through the recording area (air conditioning unit, nearby
computers, passing semi-trucks, or whales in your bathtub).
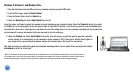
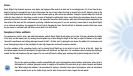
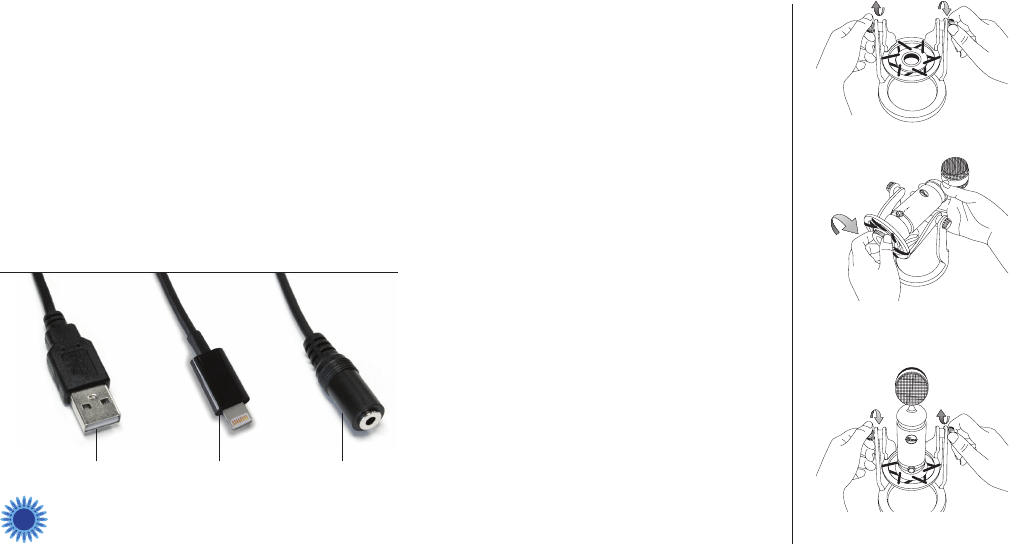
First, unpack the microphone and stand from the packaging. Loosen both knobs at the side of the stand, allowing the yoke to rotate
freely. Next, turn the yolk horizontally and thread the bottom of the microphone into the shockmount yoke by firmly holding the
microphone while grasping the knurled rotating ring at the base of the yoke and rotating clockwise. After the microphone is tightened
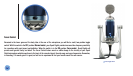
down against the shockmount yoke, you can adjust the angle of the mic so that the Blue logo and control knob (and address side of
the microphone) is facing your sound source, giving you easy access to the control knob. The yoke of the shockmount can be rotated
fully – once it is rotated to your desired angle, tighten both knobs at the sides of the stand to lock the yoke in place.
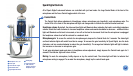
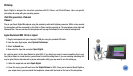
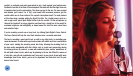
With the microphone set up in the stand, select the
appropriate y-cable for your use: USB cable to connect to
your computer’s USB port, or Lightning cable for use with
the iPad or iPhone. Plug the proprietary connector end into
the receptacle at the bottom of the Spark Digital micro-
phone, and plug the appropriate cable into your computer’s
USB port or iPad/iPhone. If you are using headphones to
monitor your recording, plug your 3.5mm headphone jack
into the female headphone receptacle on the y-cable.
Upon connection, the status lights on Spark Digital will light
up to indicate the microphone is ready for use.
USB
4
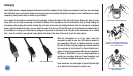
Loosen knobs on yolk of shockmount.
Grasp mic in one hand & set into threads
at bottom of yolk. Tighten by turning ring at
base of yolk clockwise.
Rotate mic to desired angle and
tighten yolk knobs.
Lightning
3.5mm Headphone Jack