


XCH10RF
7
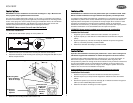
Installation (continued)
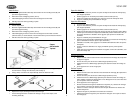
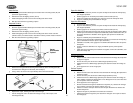
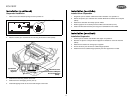
Vertical Installation
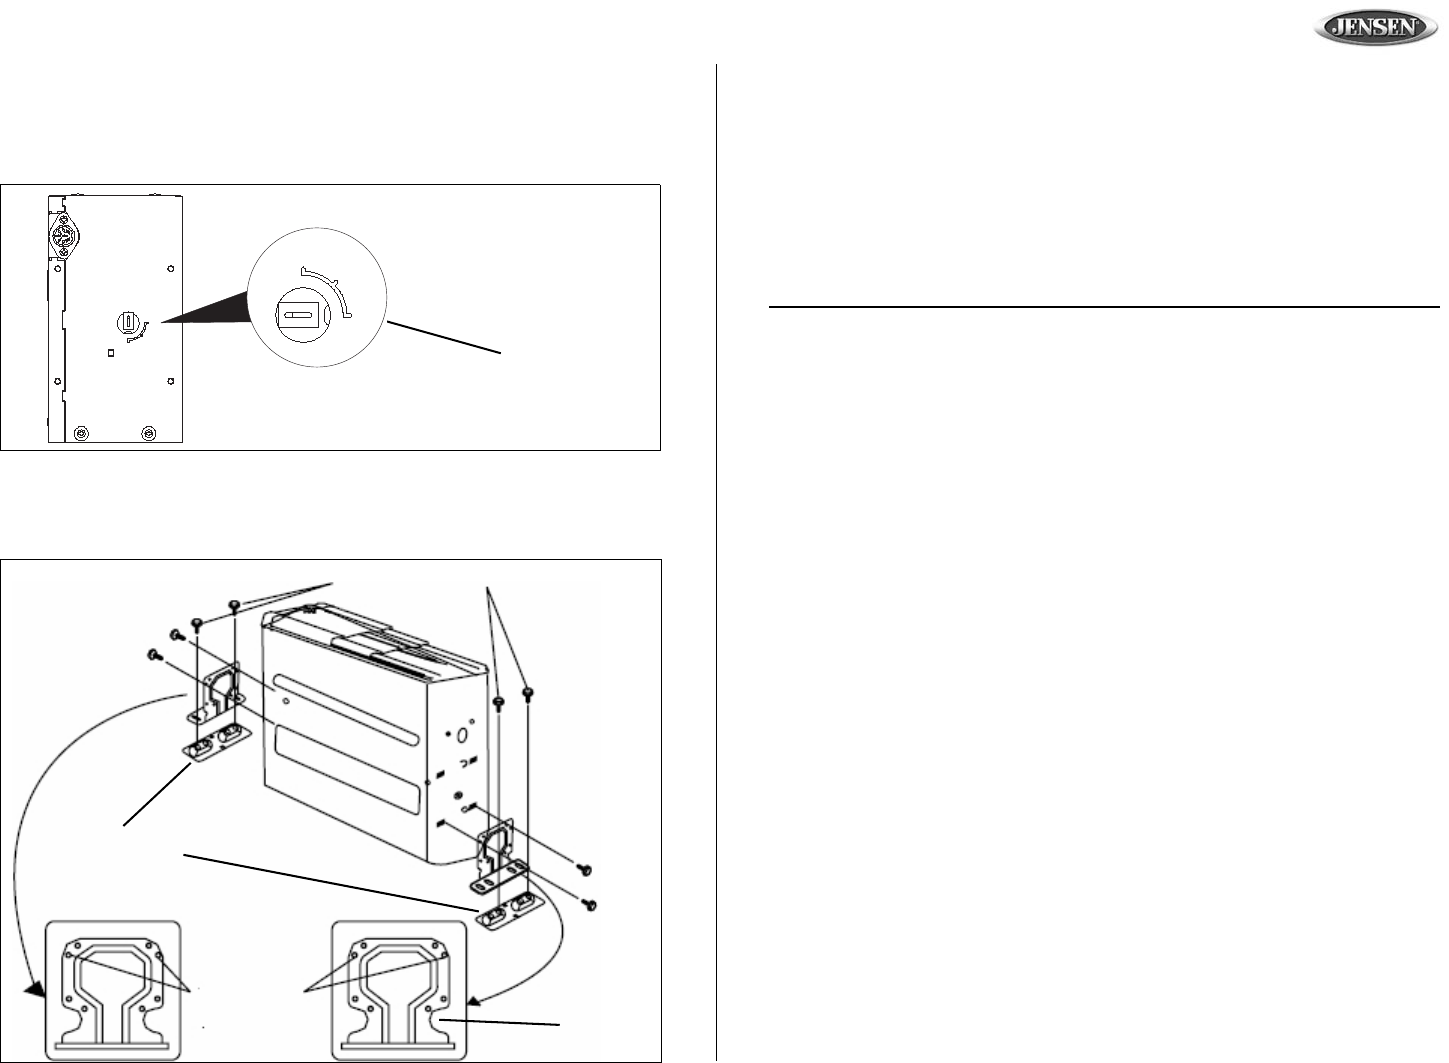
1. Make sure the anti-vibration springs are set to position "90".
2. Attach a bracket (A) bracket to each side of the unit using the machine screws (M4x5).
3. Attach the brackets (A) to the mounting base (B) using the hexagonal bolts (M6 x 12) and
M6 flat and split washers.
4. Determine the mounting location and mount the unit.
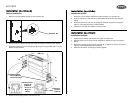
Position “90”
90
45
0
90
45
0
(M6 x 12)
Hexagonal Bolts / Pernos Hexagonales / Boulons Hexagonaux
Base de Montaje
Machine Screws
Ecrous de
Machine
(M4x5)
Tornillos de
la Máquina
(B) Mounting Base
Base de montage
(A) Brackets
Equerres
Soportes
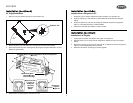
Installation (continúa)
Instalación Vertical
1. Asegúrese que los resortes antivibración estén colocados en la posición "90".
2. Sujete el soporte (A) a cada lado de la unidad utilizando los tornillos de la máquina
(M4x5).
3. Sujete los soportes (A) a la base de montaje (B) utilizando los pernos hexagonales
(M6x12), la arandela plana M6 y arandela dividida.
4. Determine la ubicación del montaje y monte la unidad.
Installation (continué)
Installation Verticale
1. Vérifiez que les ressorts anti-vibration sont réglés à la position 90.
2. Attachez l'équerre (A) à chaque côté de l'appareil en utilisant les écrous de machine
(M4x5).
3. Attacher les équerres (A) à la base de montage (B) en utilisant les boulons hexagonaux
(M6x12) et des rondelles M6 plates et fendues.
4. Déterminer la location du montage et montez l'appareil.