


12
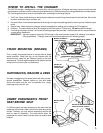
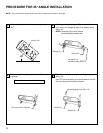
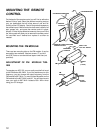
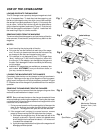
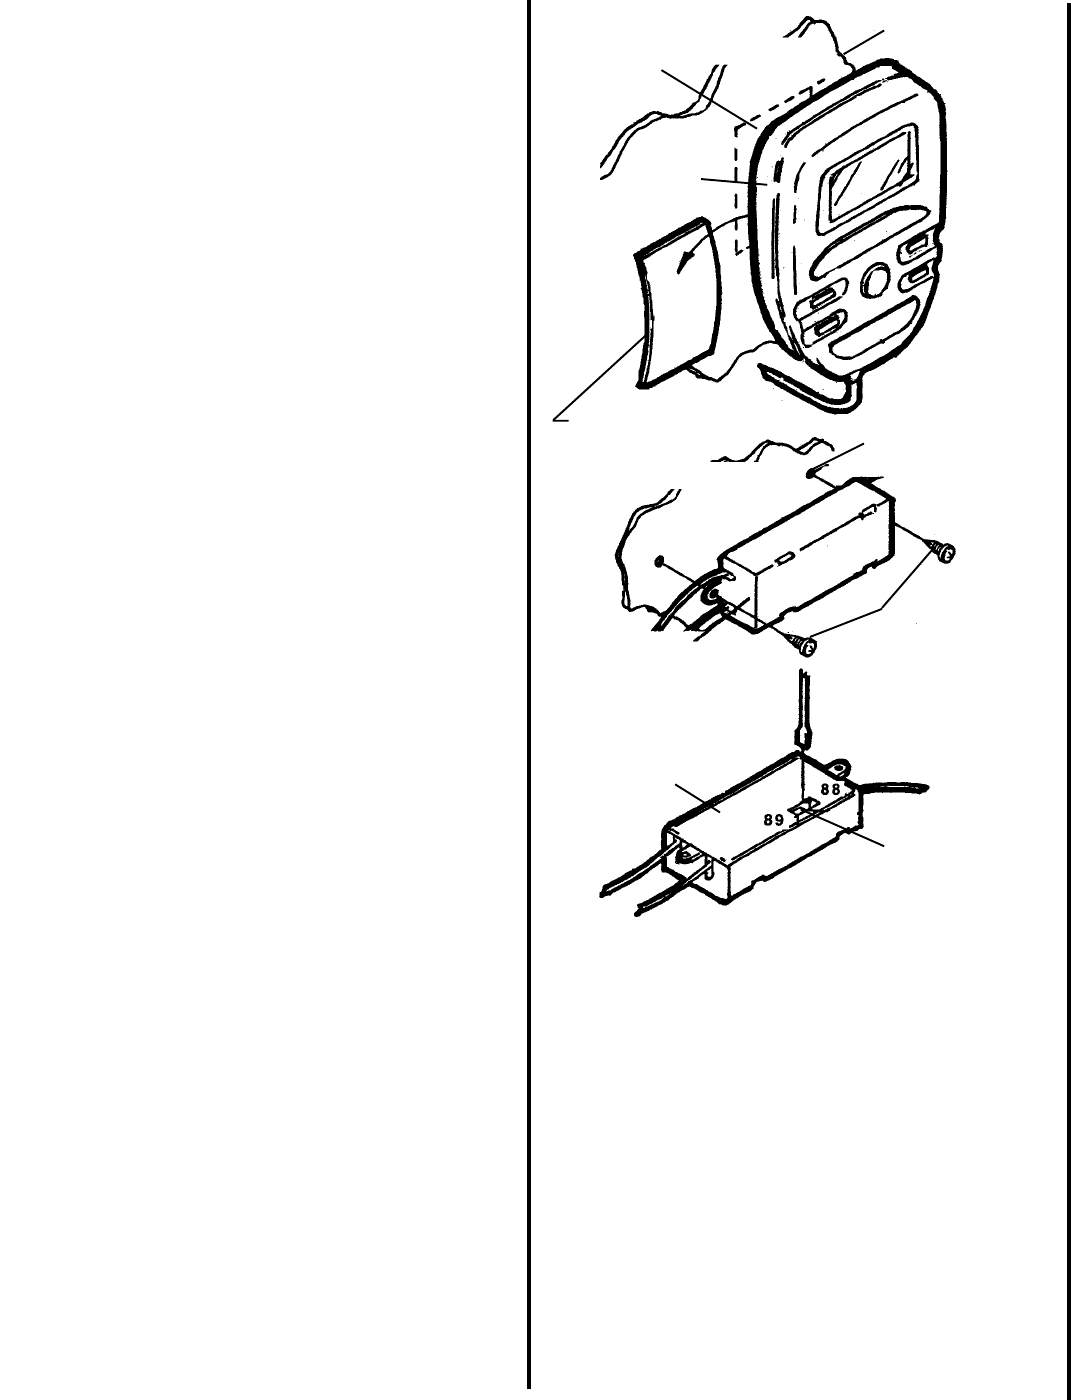
MOUNTING THE REMOTE
CONTROL
On the back of the remote control you will find an adhesive
backed “Velcro” pad. Select the desired mounting area on
your car dashboard that will allow ease of use and full
visibility of the LCD display. Peel off the protective paper on
the adhesive pad. Make certain the dash area is clean of all
wax, grease, etc., and press the remote control in place.
Allow a 1/2 hour for the adhesive to secure, then you will find
the Velcro pads will allow you to remove the remote control
for hand-held use if desired and replace it as often as
needed.
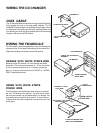
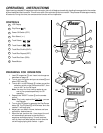
MOUNTING THE FM MODULE
There are two mounting tabs on the FM module. It can be
secured by two methods. Use two screws “C” and drill
two 3/32" holes or use electricians tape or twist ties (not
provided).
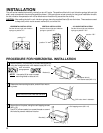
ADJUSTMENT OF FM MODULE TUN-
ING
To operate your ACC-52, your car radio must be first tuned
to the FM band at 89.1MHz. If you find interference on this
frequency, you can change the output frequency from the
FM module to 88.7 MHz., by moving the slide switch on the
FM module to the 88.7 MHz. position. You will then have to
tune your radio to 88.7 MHz. instead of 89.1 MHz. when
using your CD changer.
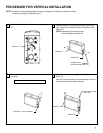
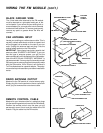
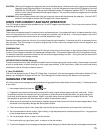
CHANGER RESET BUTTON
IMPORTANT: After all wiring of the ACC-52 is
completed, press the “RESET” button on the
changer BEFORE inserting the CD magazine. If
wired correctly, the changer will mechanically
cycle within 5 seconds of pressing the button.
If you do not hear the unit cycle, re-check all
wiring until the reset function operates as
described. DO NOT attempt to insert the CD
magazine until correct reset function is
obtained. (See page 13 for further information).
CLEAN MOUNTING AREA
REMOTE
CONTROL
REMOVE PAPER LINER AND
PRESS IN PLACE
DRILL TWO
3/32" DIA. HOLES
FM CONVERTER
DOOR OPENED
CAUTION LABEL
CD CHANGER
SCREW
"C"
(2 PCS.)
SLIDE
SWITCH
FM
MODULE
RESET BUTTON
RESET BUTTON
TOOL
MOUNTING
SURFACE
CAR DASHBOARD