


Owner’s Enjoyment Manual
AudioControl
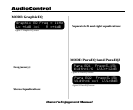
flashing next to Save. Push the “+” or “-” buttons
to select the memory destinsation to where you
are saving. Then use the left/right navigation
buttons to move N(-) Y(+) display area. Tap the
“(+)” button to complete the saving process or (-)
to quit the memory saving process.
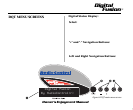
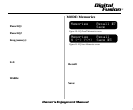
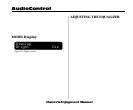
MODE: Display
In this mode, you have the ability to select
between two levels of brightness for the display on
your DQT. Using the left and right navigation
buttons, toggle back and forth between “Bright”
and “Dim” and stop on the level of lighting you
are most comfortable with you. Tap the “Select”
button and your last display brightness setting
will be retained as you move on to the next mode.
ADJUSTING THE EQUALIZER
When it comes to music, everyone has his or her
own particular taste. Some people want pounding
bass and crisp, blood curdling highs. Others may
prefer a “flat” response, or at least think it is flat.
At the end of the day, most people just want their
system to sound balanced, “just like it did in the
store” or their buddy’s car. The following equal-
ization guidelines should help you achieve your
own personal audio nirvana.
1) For optimum performance, get your hands on a
test compact disc that contains pink noise and
a good quality RTA (real time analyzer); we
happen to know someone who makes a really
good one. If you cannot locate an RTA, you
probably want to have your authorized
AudioControl dealer perform the equalization
adjustments as they will have one. You can
certainly “try” adjusting your DQT using your
ears, however an RTA will give you the best
results.
2) Begin playing pink noise through your system
and place the microphone for your analyzer on
a microphone stand in the drivers seat. The
microphone should be sitting where your head
12
Display
Bright Dim
Figure 12: Display screen