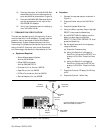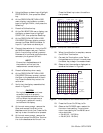
13. MAIN PCB AND RF MODULE ASSEMBLY
REPLACEMENT
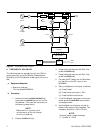
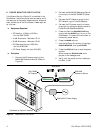
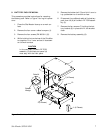
This procedure provides instructions for replacing
the main PCB and RF module assembly. Refer to
Figure 7 (page 7) during this procedure.
NOTE
The test port panel is replaced as
part of the main PCB assembly.
1. Place the Site Master face up on a work sur
-
face.
2. Remove the four corner rubber bumpers (1).
3. Remove the four screws (PN 900-811) (2).
4. While holding the two halves of the Site
Master together, turn it over and set it face
down on the work surface.
CAUTION
In the next step, the PCB Assy (3)
and test port panel (4) must stay
with the front panel.
5. Remove the bottom half (5) and fold it over to
lay upside down on the work surface.
6. Disconnect the red/black cable of the battery
pack from the main PCB assembly connector
J6 (6).
7. Remove the screw (10) located on the bottom
side of the main PCB assembly next to the
RF Bridge assembly.
8. Pull the PCB assemblies clear from the top
half of the case.
9. Disconnect the grey/brown cable of the LCD
assembly from the main PCB assembly con
-
nector J8.
10. Remove the four screws holding the LCD as
-
sembly, but do not disconnect the 20-way
connector from the keypad PCB assembly.
11. Use pliers to gently squeeze the nine plastic
spacer heads to release them from the Key
-
pad PCB assembly and carefully pull the
Keypad PCB with the LCD assembly from
the main PCB assembly.
12. Remove the four standoffs and the EMI
shield cloth.
NOTE
If the Power Monitor (Option 5) is in
-
stalled, remove the two screws hold
-
ing the Option 5 PCB assembly to
the test port panel and unsolder the
wires from pins 1 through 4 of the RF
Detector connector on the test port
panel.
13. Carefully remove the serial number from the
test port panel.
14. Install the serial number on the replacement
test port panel.
15. Reverse the above procedure to re-assemble
the Site Master.
10 Site Master S820A MM


