


2
Thank you for purchasing this Altec Lansing product. For generations, Altec
Lansing has been first in audio innovation. Today, our line of powered speakers
has received more performance awards than any other brand. In all kinds of
environments, in every price range, Altec Lansing offers sound of distinction —
giving even the most demanding customers the audio enjoyment they seek. Just
listen to this!
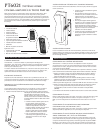
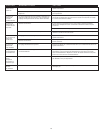
Box Contents
• 2 Satellite Speakers
• 2 Satellite Bases
• Subwoofer
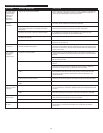
• Wired Controller
• Wireless Speaker System Remote
• 3.5 mm Stereo Audio Cable
• 2 sets of Satellite Mounting Brackets
• Two Satellite Extension Cables
• RCA cable
• Speaker System Manual
Also included:
• Universal Remote
• 2 AAA (LR 03) batteries
• Universal Remote manual
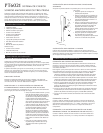
Placing Speakers
Subwoofer
Warning: The subwoofer is NOT magnetically shielded, so it must be kept at least
2 feet (0.6m) from PC monitors, TV sets, computer hard drives or any other
magnetic media (floppy disks, computer or audio tapes, etc.).
The subwoofer is non-directional, so it doesn’t need to be placed in any
particular location. Putting it on the floor close to a wall or in a corner will
maximize bass efficiency and be sure to provide it with proper ventilation.
Satellite Speakers
Arrange the satellite speakers to suite your listening tastes. The speakers are
magnetically shielded and can be placed close to a TV set or PC monitor without
distorting the image.
TV Stand or Home Entertainment Center
Installation (base included)
When placing the speakers on a TV stand or in a home entertainment center, use
the included mounting-base as follows:
• Locate the right satellite speaker and one (1) satellite base. Insert the metal pins
of the satellite base into the corresponding holes on the rear of the satellite
speaker. Be sure the groove on the base is facing down before inserting the base
into the satellite speaker. Run the cable through the groove on the base.
• Locate the left satellite speaker and one (1)
satellite base. Insert the metal pins of the
satellite base into the corresponding holes
on the rear of the satellite speaker. Be sure
the groove on the base is facing down
before inserting the base into the satellite
speaker. Run the cable through the groove
on the base.
• For optimal positioning the speakers can
also pivot 15 degrees back or 5 degrees
forward.
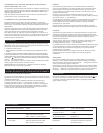
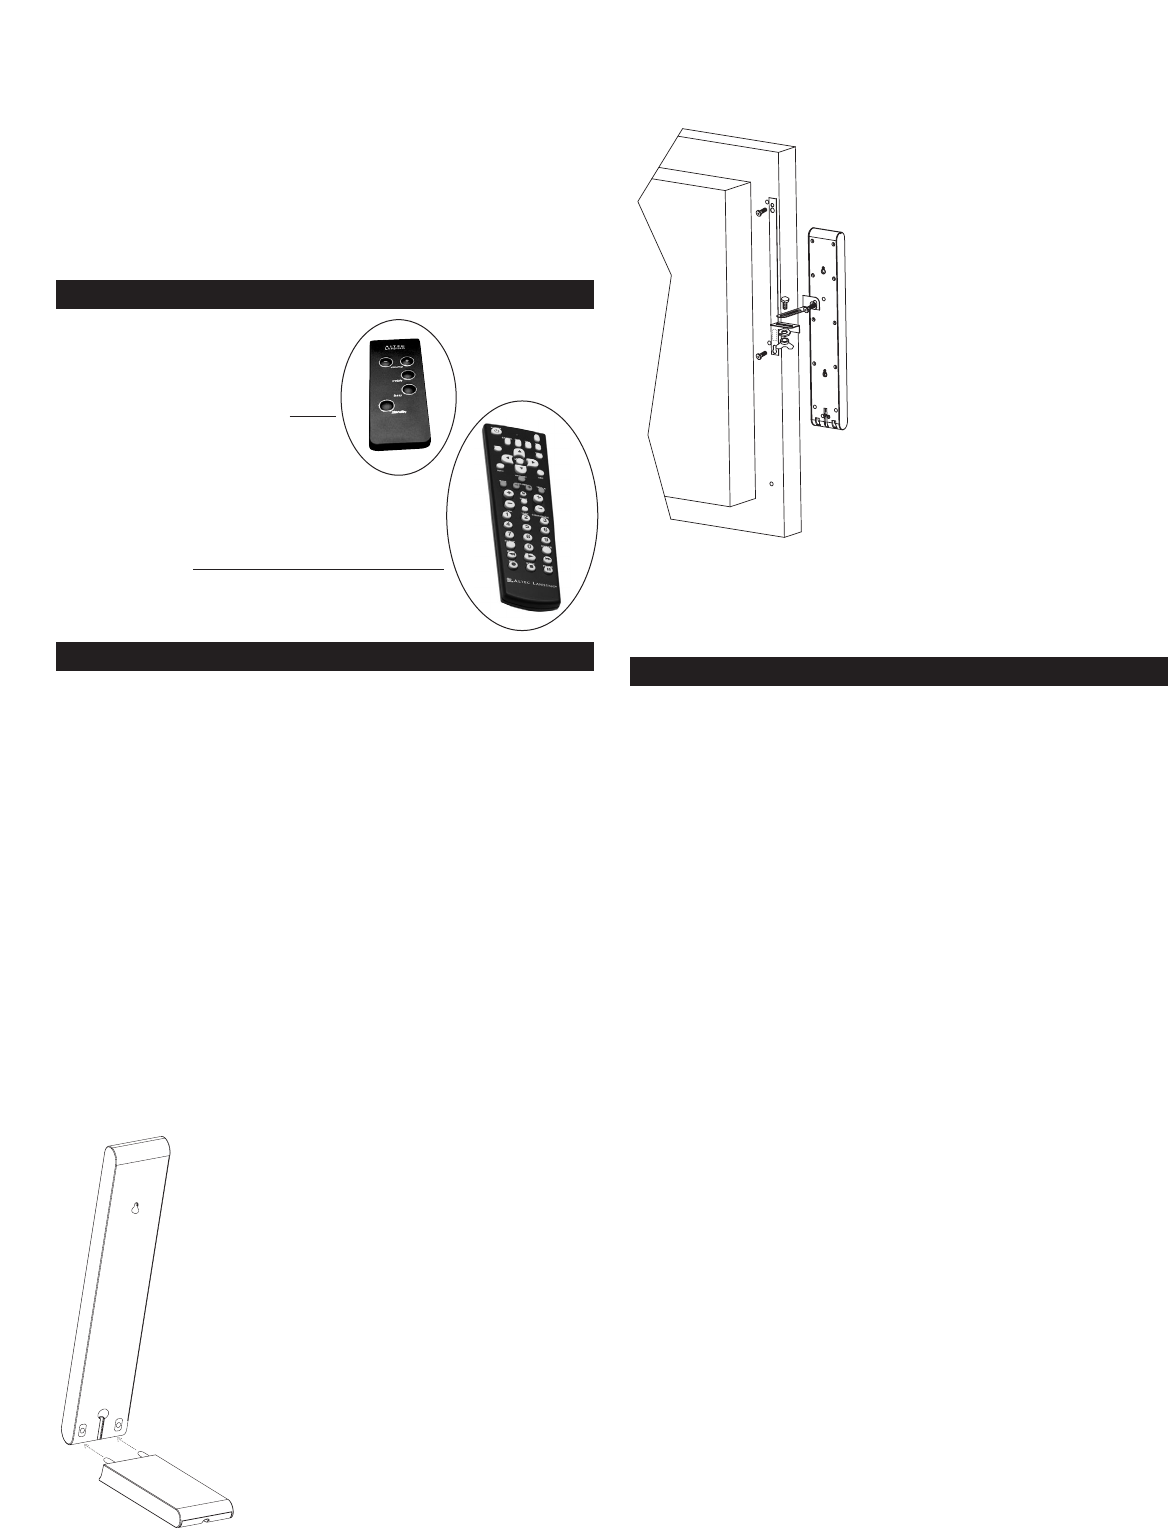
Flat-panel Display Installation (brackets included)
When attaching the satellite speakers to your flat-panel display, use the included
brackets as follows:
• Locate the left flat-panel display mounting
bracket.
• Secure the long bracket to the display with
the supplied screw, washer and wing nut.
When installed, this bracket will project
outward to the left of the display.
• Secure the small left satellite bracket with
the supplied screw, washer and wing nut.
This bracket attaches to the satellite
speaker’s threaded insert. Before
tightening the wing nut, adjust brackets
to the desired orientation of the satellite
speaker.
• Locate the right flat-panel display
mounting bracket and repeat these
instructions, projecting the bracket
outward to the right of the display.
Wall-mounting Installation
When mounting the satellite speakers to the wall, use the key holes (top and
bottom) or the threaded inserts on the rear of the satellite speaker (installation
using threaded inserts requires the purchase of a universal mounting kit.)
Making Connections
Connecting the Speaker System
Warning: Do not insert the speaker system’s power adapter plug into an AC
outlet until all connections are made. Also, turn off your audio source before
connecting its outputs to the PT6021’s inputs.
To ensure first-time operation as expected, please carefully follow the connection
sequence described below.
1. Connect the right satellite speaker’s orange connector into the “RIGHT” input on
the rear of the subwoofer. If using the mounting base, run the cable through the
channel on the base.
2. Connect the left satellite speaker’s brown connector into the “LEFT” input on the
rear of the subwoofer. If using the mounting base, run the cable through the
channel on the base.
3. Connect the grey-colored DIN connector from the wired controller into the grey
“CONTROLLER” jack on the rear of the subwoofer. Note that the arrow on the
DIN connector must face up.
4. Connect one end of the audio input cable (with lime green connectors at each
end) to the matching lime green input plug on the back of the subwoofer,
labeled INPUT.
5. Connect the other end of the audio input cable to your desired audio source.
Connecting to a PC
Connect the lime green audio input cable to your PC’s sound card output jack
(typically colored lime green and usually labeled “1” or “Main”) as described in
your PC/sound card documentation.
Connecting to a Portable Audio Device (CD Player,
MP3 Player, etc.)
Connect the lime green audio input cable to the line out of your portable device
(if it has one) or to the device’s headphone jack.
Connecting to a Gaming System (Playstation 2,
Xbox, GameCube, etc.) and TV
The primary input jacks are located on the subwoofer, connect any audio source
that has red (right) and white (left) RCA output jacks to the PT6021’s red (right)
and white (left) RCA input jacks.
Note: For the clearest sound, try muting your TV’s speakers when using the TV as
an audio source.
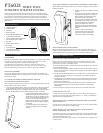
PT6021
Three-Piece
Powered Theater System