


Important:
Important:
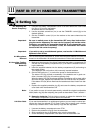
2.2 Inserting and
Testing Batteries
Important:
2.3 Connecting and
Using Microphones
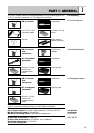
2.4 Color Code
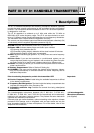
1.1 Adjustments
Be sure to switch power to the transmitter OFF every time before
changing the carrier frequency. The new carrier frequency will not be
activated before you switch the transmitter back ON. (If you change the
carrier frequency while the transmitter is ON, the transmitter will remain
tuned to the old carrier frequency.)
If you wish to set up a multichannel system, read section 1.2 Multichannel
Systems in Part V first.
1. Open the battery compartment (3h).
2. Insert the supplied batteries into the battery compartment (3h) conforming to
the polarity marks.
The transmitter will not function with incorrectly inserted batteries.
3. Close the battery compartment (3h). The GAIN control (3j) remains accessible
through an opening in the battery compartment cover.
4. Rotate the security cover (3m) CW to uncover the switches.
5. Set the POWER switch (3a) to "I" to switch the power to the transmitter on.
The status LED (3c) will flash momentarily. If the batteries are in good con-
dition, the status LED (3c) will continue glowing dimly.
When the status LED (3c) illuminates brightly the batteries will be dead within
about 90 minutes. Replace the batteries with new ones as soon as possible.
If the status LED (3c) fails to illuminate the batteries are dead. Insert new
batteries.
6. Snap the security cover (3m) back over the switches CCW.
You can wear the transmitter inside a shirt or jacket pocket, fix it to your belt
with the belt clip (3g).
Make sure the antenna will hang down freely, without being covered by
the body.
1. Connect your microphone to the audio input (3d).
2. For details on how to use your microphone for best results, refer to the micro-
phone instruction manual.
To replace the black color code platelet (3e) on the transmitter with a different-
color platelet from the optional CC 60 Color Coding Kit,
1. Lift the end of the black color code platelet (3e) on the top panel of the trans-
mitter and remove the color code platelet (3e).
2. Select a color code platelet of the desired color from the CC 60 Color Coding
Kit and snap the selected platelet onto the transmitter.
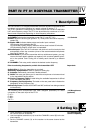
1. Handheld transmitter: Using the supplied screwdriver (1m), set the GAIN
control (2e) so that on the receiver the AF LEDs (1h) will light green and the AF
LED (1d) on the receiver as well as the status LED (2b) on the transmitter will
only flash on the loudest signal peaks.
Bodypack transmitter: Using the supplied screwdriver (1m), set the GAIN
control (3j) so that on the receiver the AF LEDs (1h) will light green and the AF
LED (1d) on the receiver as well as the status LED (3c) on the transmitter will
only flash on the loudest signal peaks.
28
PART IV: PT 81 BODYPACK TRANSMITTER
IV
1 Adjusting the Transmitter and Receiver
PART V: OPERATING NOTES
V