


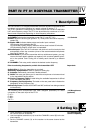


2.1 Selecting the
Carrier Frequency
Important:
Important:
2.2 Microphone
Element
2.3 Inserting, Testing,
and Removing
Batteries
Note:
2.4 Color Code
1. Unscrew the battery compartment cover CCW and remove the color code
ring (2d or 2j) from the transmitter.
All controls are now accessible.
2. Use the supplied screwdriver (1m) to set the CHANNEL control (2g) to the
desired channel.
3. Set the CHANNEL control (1k) on the receiver to the same channel as the
transmitter.
Be sure to switch power to the transmitter OFF every time before chan-
ging the carrier frequency. The new carrier frequency will not be activa-
ted before you switch the transmitter back ON. (If you change the carri-
er frequency while the transmitter is ON, the transmitter will remain
tuned to the old carrier frequency.)
If you wish to set up a multichannel system, read section 1.2 Multichannel
Systems in Part V first.
Prior to switching the transmitter on, screw the microphone element CW onto the
thread on the transmitter. All electrical connections will be made automatically.
1. Make sure that the end of the ribbon fixed inside the battery compartment (2f)
will stick out of the battery compartment (2f). (The ribbon is needed for remov-
ing the batteries.)
2. Insert the supplied batteries into the battery compartment (2f) conforming to
the polarity marks.
The transmitter will not function with incorrectly inserted batteries.
3. Set the PWR switch to "I" to switch the power to the transmitter on.
The status LED (2b) will flash momentarily. If the batteries are in good con-
dition, the status LED (2b) will continue glowing dimly.
When the status LED (2b) illuminates brightly the batteries will be dead within
about 90 minutes. Replace the batteries with new ones as soon as possible.
If the status LED (2b) fails to illuminate the batteries are dead. Insert new bat-
teries.
4. Replace the supplied protective ring (2j) and screw the battery compartment
cover back onto the transmitter CW.
If you prefer to cover all controls permanently, reinstall the original unadjustable
black plastic ring (2d) after adjusting the system as described in Part V, section 1.
5. Removing batteries: Pull the ribbon outward to release the batteries from
the battery compartment (2f) and remove the batteries.
If you use the transmitter in a multichannel system you can install a colored pro-
tective ring from the optional CC 60 Color Coding Kit to identify each wireless
channel by a different color. These security rings are also adjustable.
1. Unscrew the battery compartment cover CCW.
2. Remove the protective ring (2j) from the transmitter.
3. Slide a protective ring of the desired color onto the transmitter.
4. Screw the battery compartment cover back onto the transmitter CW.
26
PART III: HT 81 HANDHELD TRANSMITTER
III
2 Setting Up