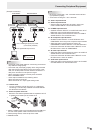
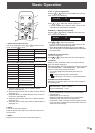
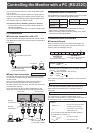
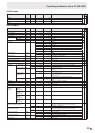
■ Connection with the control kit (optional)
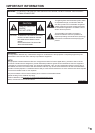
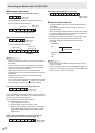
Caution
• Whenattachingtheremotecontrolsensorbox,turnthe
mainpowerswitchOFF.
• Exceptfortheremotecontrolsensorboxconnectioncable,
do not insert any other cable into the control kit terminal.
Also, do not connect any connection cables that have been
extended with commercially available cables.
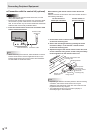
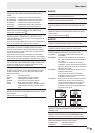
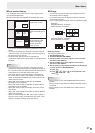
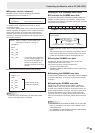
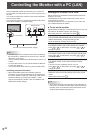
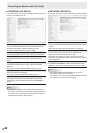
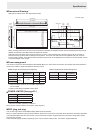
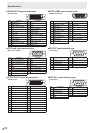
1. Insert the remote control sensor box connection cable
into the control kit terminal.
Connection cableControl kit terminal
Remote control
sensor box
TIPS
• Whenconnectingthecontrolkit,selectwhethertousethe
remote control sensor and the brightness sensor on the
remotecontrolsensorboxorthemonitorwithCONTROL
KITSETTINGontheSETUPmenu.
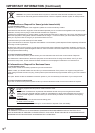
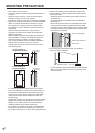
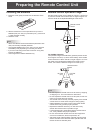
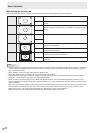
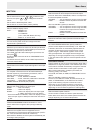
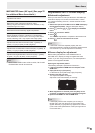
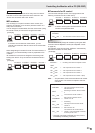
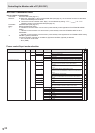
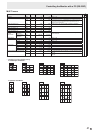
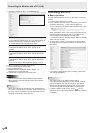
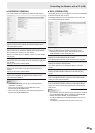
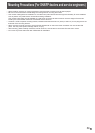
When attaching the remote control sensor box to this
monitor
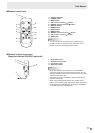
Attach the remote control sensor box to the location shown in
the following illustration;
For the monitor in
landscape orientation
For the monitor in
portrait orientation
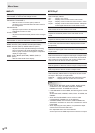
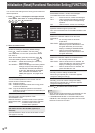
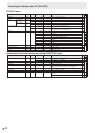
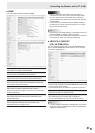
1. Unscrew the screw in the monitor’s remote control
sensor box mounting hole.
2. Secure the mounting bracket by screwing the screw
removed in Step 1. in the monitor’s remote control
sensor box mounting hole.
3. Adjust the angle of the remote control sensor box, and
secure it with the xing screw, so that it may accurately
receive signals from the remote control unit.
Angle
adjustment
Mounting bracket
Screw (Screw
removed from
the remote control
sensor box
mounting hole)
Fixing screw
Remote control
sensor box
Remote control sensor box
mounting hole
TIPS
• Dependingonwhereithasbeenplacedorthesurrounding
conditions, the remote control sensor box may be
affected by the brightness of the main unit screen and the
brightness sensor may respond.
• Thebrightnesssensormaynotfunctionproperlyin
extremely bright or dark locations.
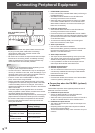
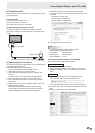
Connecting Peripheral Equipment